How to Reset the Snipping Tool on Windows 11 and Windows 10
Resetting the Snipping Tool restores the app to its default settings and can fix common issues such as crashes, freezing, screenshots not saving, or the Windows + Shift + S shortcut not working. Before resetting, Microsoft recommends trying the Repair option because it attempts to fix the app without removing its data.
Introduction
The Snipping Tool is Microsoft’s built-in screenshot and screen recording application for Windows 11 and Windows 10. It allows you to capture screenshots, annotate images, and, in newer Windows 11 versions, record your screen without installing third-party software.
Although the app is generally reliable, it can occasionally stop working due to corrupted app data, failed updates, system glitches, or conflicts with Windows services. You may notice that the app crashes on launch, refuses to open, shows a blank window, or fails to respond when you press Windows + Shift + S.
In many cases, resetting the Snipping Tool resolves these problems because it restores the app to its original configuration. If resetting doesn’t solve the issue, additional troubleshooting steps such as repairing, reinstalling, or updating the app may be necessary.
This guide explains exactly how to reset the Snipping Tool on Windows 11 and Windows 10, what happens during the reset process, when you should use it, and what to do if the problem persists.
What Happens When You Reset the Snipping Tool?
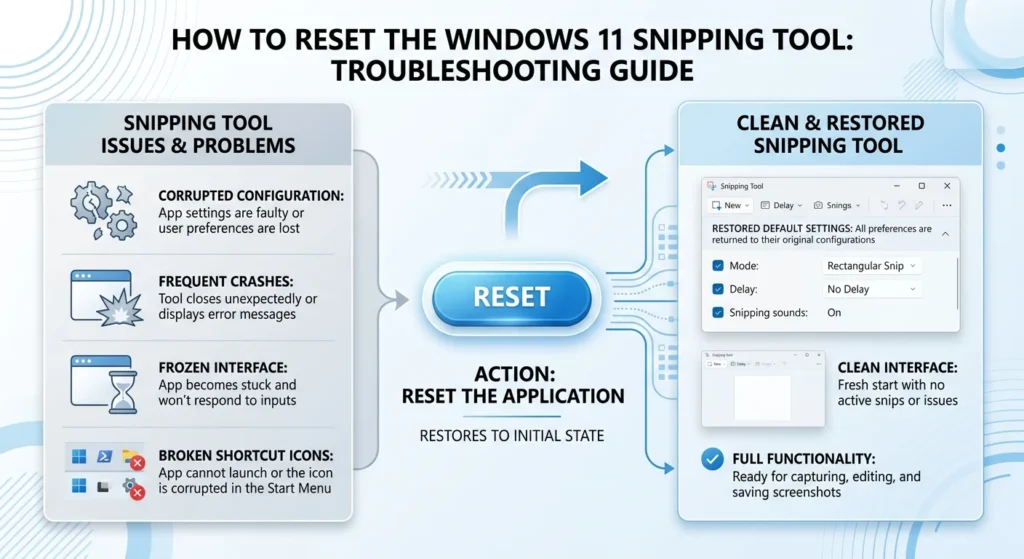
Resetting the Snipping Tool returns the application to its default state. Windows removes the app’s stored settings and temporary data so it can start fresh.
When you reset the app:
- App settings return to their default values.
- Temporary and cached data is cleared.
- Any customized preferences are removed.
- The app behaves as if it were newly installed.
However, resetting the Snipping Tool does not:
- Delete screenshots already saved on your computer.
- Remove files stored in your Pictures folder, Desktop, or other locations.
- Affect other Windows applications.
- Delete your personal documents.
Because resetting clears app-specific data, you may need to configure certain preferences again after opening the app.
Does Resetting Remove Saved Screenshots?
No. Screenshots you’ve already saved remain untouched because they’re stored separately from the application’s settings.
For example, if you’ve saved screenshots to:
- Desktop
- Pictures
- Documents
- OneDrive
those files will remain exactly where they are after resetting the app.
Only unsaved captures or temporary clipboard data may no longer be available.
When Should You Reset the Snipping Tool?
Resetting the Snipping Tool is recommended when the app repeatedly experiences problems that basic troubleshooting, such as restarting your PC, cannot fix.
Common symptoms include:
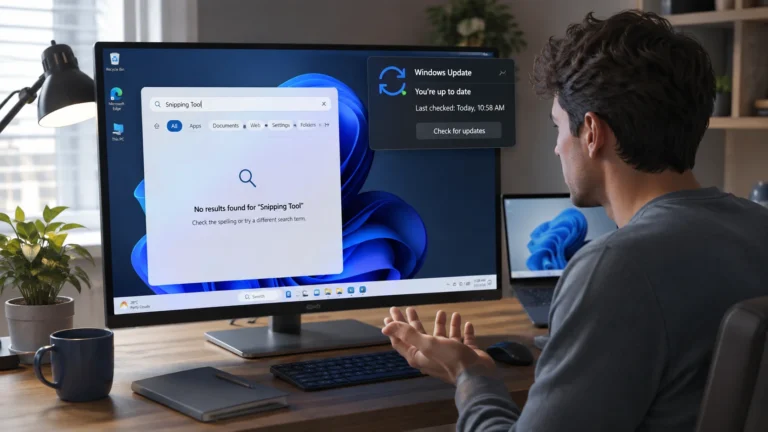
The Snipping Tool Won’t Open
Clicking the app does nothing, or it closes immediately after launching.
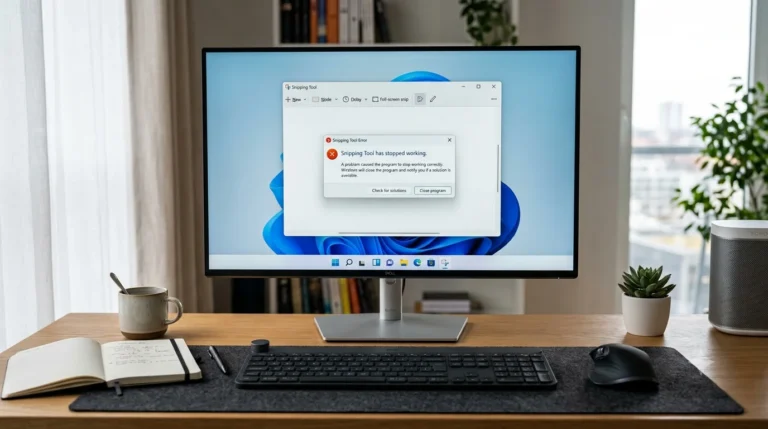
The App Keeps Crashing
The Snipping Tool opens briefly before crashing without displaying an error message.
Windows + Shift + S Isn’t Working
The keyboard shortcut stops opening the screenshot toolbar, even after restarting Windows.
Screenshots Aren’t Saving
The app captures the screen but refuses to save images or displays save errors.
The Screenshot Toolbar Doesn’t Appear
The floating capture toolbar fails to appear when you use the shortcut or launch the app.
Screen Recording Doesn’t Work
On Windows 11, the recording feature may stop working after a failed update or corrupted app data.
Notifications Don’t Appear
After taking a screenshot, Windows doesn’t display the preview notification required to edit or save the image.
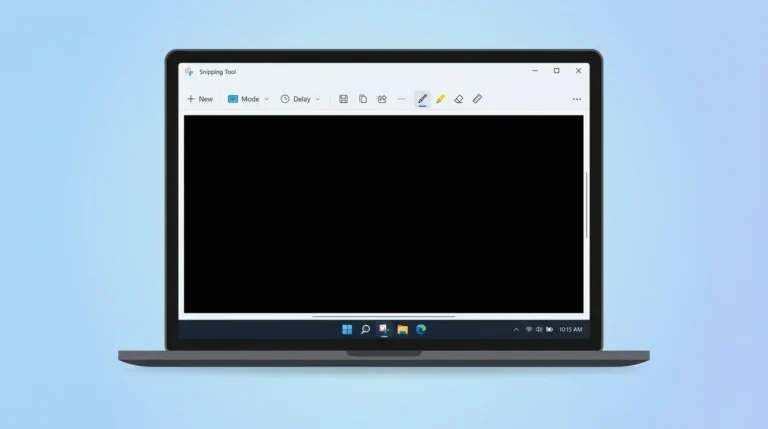
The App Shows a Blank or Black Window
Instead of displaying the capture interface, the Snipping Tool opens with a blank, empty, or black screen.
If you experience one or more of these problems, resetting the app is often an effective solution.
Repair vs. Reset the Snipping Tool
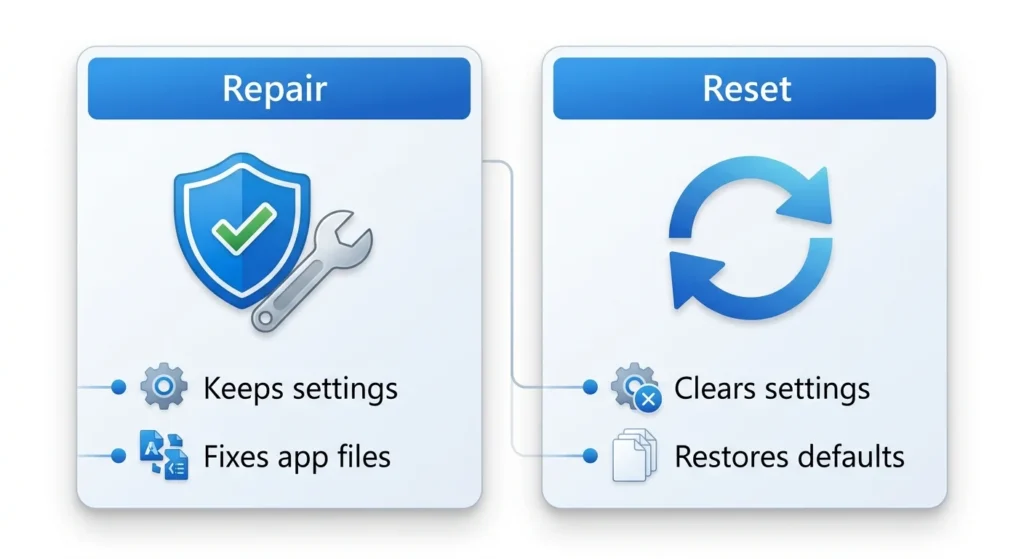
Windows provides two built-in recovery options: Repair and Reset. Although they appear similar, they serve different purposes.
Repair attempts to fix the application without deleting its data. Reset restores the app to its default state and removes its stored settings.
| Feature | Repair | Reset |
|---|---|---|
| Keeps app settings | Yes | No |
| Clears app data | No | Yes |
| Restores default settings | No | Yes |
| Recommended first | Yes | No |
| Time required | Less than a minute | Less than a minute |
| Best for | Minor app issues | Persistent problems |
When Should You Use Repair?
Choose Repair if:
- The app recently started acting strangely.
- Screenshots occasionally fail.
- The app opens but behaves unexpectedly.
- You want to preserve your settings.
Repair is the safest option because it doesn’t erase the app’s data.
When Should You Use Reset?
Use Reset if:
- Repair doesn’t fix the issue.
- The app crashes every time it opens.
- The keyboard shortcut no longer works.
- The application appears corrupted.
- You want to restore the app to its default state.
Resetting is more comprehensive than repairing, making it a better option for persistent software issues.
Why Microsoft Recommends Repair Before Reset
Microsoft includes both options because repairing is less disruptive. It attempts to repair damaged application files while preserving your settings and preferences.
If repairing doesn’t resolve the issue, resetting provides a clean starting point by removing corrupted app data and restoring the Snipping Tool to its factory-default configuration.
For this reason, it’s best practice to try Repair first and use Reset only if the problem continues.
How to Reset the Snipping Tool on Windows 11
If the Snipping Tool continues to crash, freeze, or stop responding after a restart, Windows 11 lets you reset the app through the Settings app. Before you reset it, try the Repair option first because it attempts to fix the app without removing its stored data.
Follow these steps to reset the Snipping Tool in Windows 11.
Step 1: Open the Settings App
Press Windows + I on your keyboard to open Settings.
Alternatively:
- Click the Start menu.
- Select Settings.
Step 2: Go to Apps
In the left sidebar, click Apps.
This section contains all installed applications and app management options.
Step 3: Open Installed Apps
Select Installed apps to view every application installed on your computer.
Step 4: Locate the Snipping Tool
Scroll through the list or use the search box.
Type:
Snipping Tool
When it appears, continue to the next step.
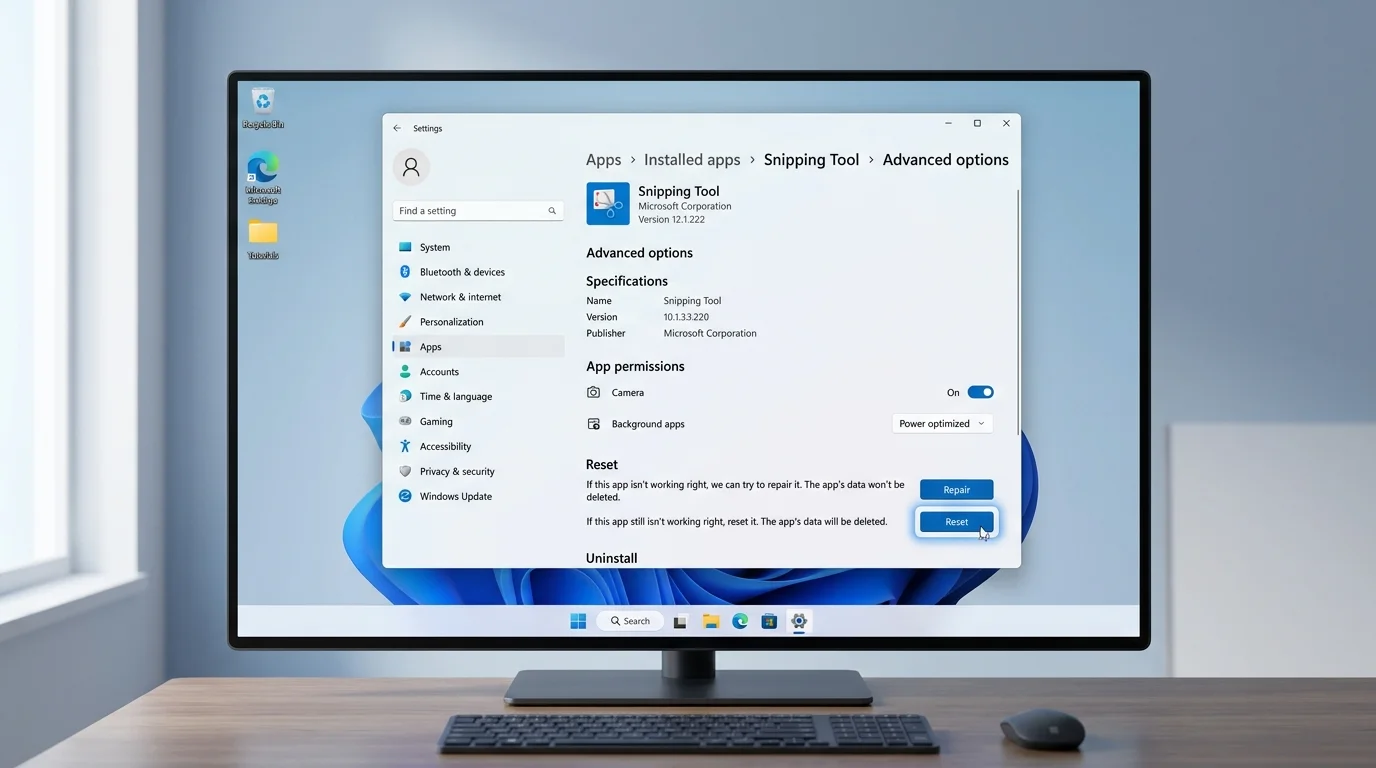
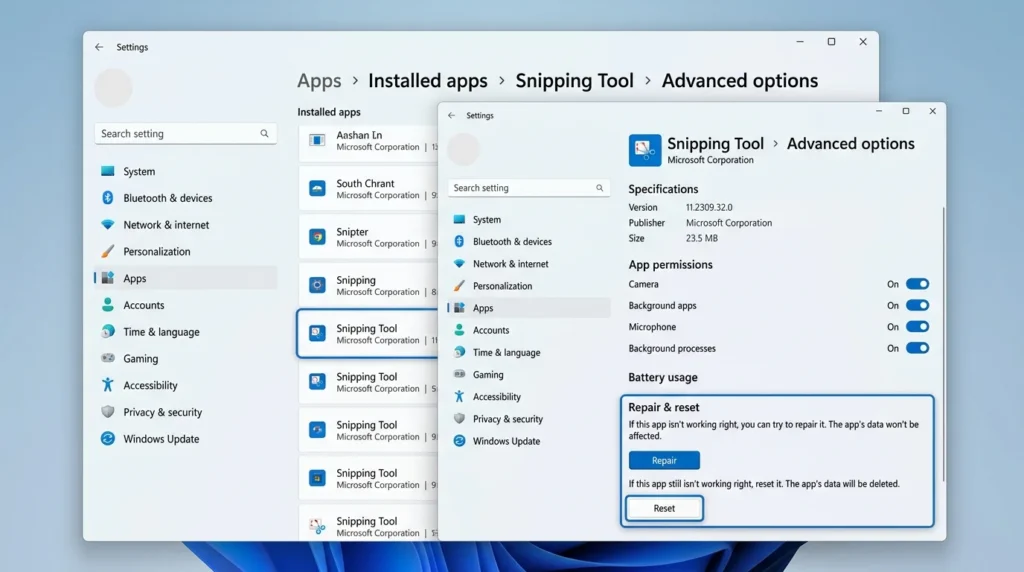
Step 5: Open Advanced Options
Click the three-dot menu next to Snipping Tool.
Choose:
Advanced options
This page contains several recovery options, including Repair, Reset, and Terminate.
Step 6: Click Repair First
Under the Reset section, click Repair.
Windows will attempt to repair the application without deleting its settings or app data.
Wait until the repair process finishes.
Open the Snipping Tool and test whether the issue has been resolved.
If the app still isn’t working correctly, proceed with the reset.
Step 7: Click Reset
Return to the same Advanced options page.
Click Reset.
Windows displays a warning indicating that the app’s data will be deleted and its settings restored to their defaults.
Click Reset again to confirm.
The process usually takes only a few seconds.
Step 8: Launch the Snipping Tool
Open the Snipping Tool from the Start menu.
Test the following features:
- Open the application normally.
- Press Windows + Shift + S.
- Capture a screenshot.
- Save the screenshot.
- Copy it to the clipboard.
- Try screen recording (Windows 11).
If everything works as expected, the reset was successful.
How to Reset the Snipping Tool on Windows 10
Windows 10 follows a similar process, although some menu names differ slightly depending on your Windows version.
Step 1: Open Settings
Press Windows + I.
Or click:
Start → Settings
Step 2: Open Apps
Select:
Apps
Step 3: Find Snipping Tool
Locate the Snipping Tool in the installed applications list.
Depending on your Windows version, you may also see Snip & Sketch, which Microsoft used before merging it into the modern Snipping Tool.
Step 4: Open Advanced Options
Click the application.
Select:
Advanced options
Step 5: Repair the App
Choose Repair first.
Allow Windows to complete the repair.
Test the application before continuing.
Step 6: Reset the App
If Repair doesn’t resolve the issue:
- Click Reset
- Confirm the warning
- Wait for Windows to finish
Afterward, launch the Snipping Tool again and verify that it functions correctly.
How to Verify the Reset Worked
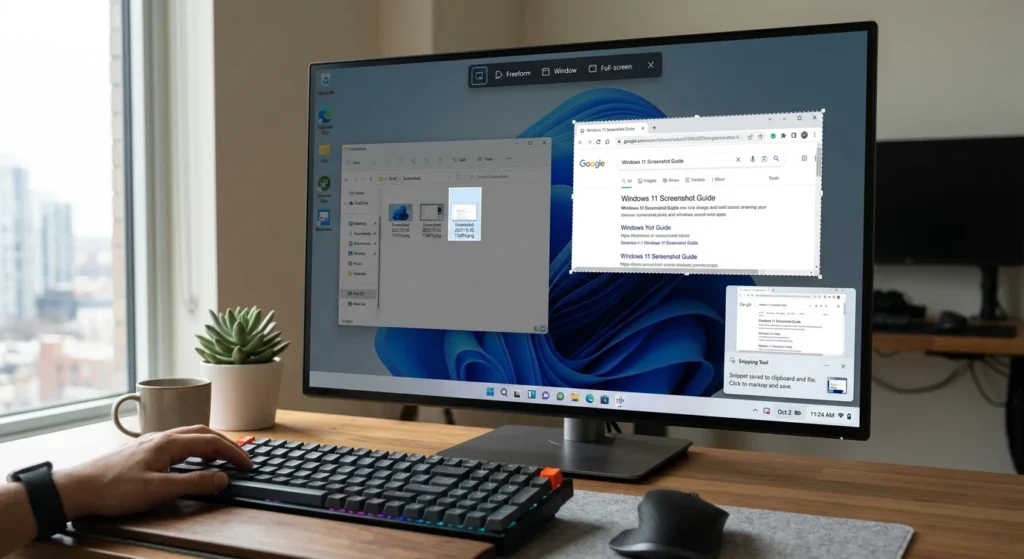
Resetting the app only takes a few seconds, but it’s important to confirm that everything is working as expected before assuming the issue is fixed.
Use this quick checklist.
The App Opens Normally
The Snipping Tool should launch without crashing or displaying error messages.
Windows + Shift + S Works
Press the keyboard shortcut.
The screenshot toolbar should appear at the top of your screen.
Screenshots Save Successfully
Capture a screenshot and save it to your preferred location.
Open the image to ensure it saved correctly.
Clipboard Copy Works
Take another screenshot.
Open an application such as Paint or Word and press Ctrl + V.
The screenshot should paste correctly.
Delay Capture Works
If you use delayed screenshots, test the timer feature.
It should function normally after the reset.
Screen Recording Works
Windows 11 users should also test the screen recording feature.
Create a short recording and verify that it saves successfully.
If every item above works correctly, the reset was successful.
Reset Didn’t Fix the Problem? Try These Solutions
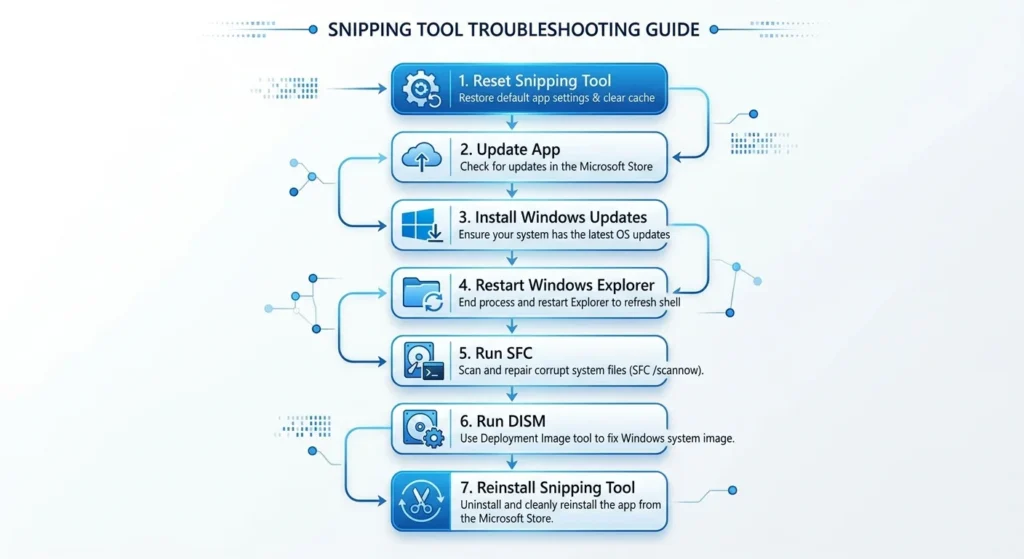
Sometimes the issue isn’t caused by corrupted app data. If resetting the Snipping Tool doesn’t solve the problem, try the following troubleshooting methods.
Reinstall the Snipping Tool
A damaged installation may require a fresh copy of the app.
You can reinstall it through the Microsoft Store.
After reinstalling, restart your computer before testing the application again.
Update the Snipping Tool
Outdated versions may contain bugs that Microsoft has already fixed.
Open the Microsoft Store.
Go to your Library.
Check for available updates.
Install any updates for the Snipping Tool.
Install the Latest Windows Updates
Windows updates often include fixes for built-in applications.
To check for updates:
- Open Settings.
- Select Windows Update.
- Click Check for updates.
- Install any available updates.
- Restart your computer.
Restart Windows Explorer
A temporary Windows Explorer issue can prevent screenshot tools from working.
To restart it:
- Press Ctrl + Shift + Esc.
- Open Task Manager.
- Find Windows Explorer.
- Right-click it.
- Select Restart.
Once Explorer restarts, test the Snipping Tool again.
Run the System File Checker (SFC)
Corrupted Windows system files can affect built-in applications.
Open Command Prompt as an administrator.
Run:
sfc /scannowWait for the scan to complete.
Restart your computer if repairs are made.
Run DISM
If SFC doesn’t fix the issue, use the Deployment Image Servicing and Management (DISM) tool.
Run these commands one at a time:
DISM /Online /Cleanup-Image /CheckHealthDISM /Online /Cleanup-Image /ScanHealthDISM /Online /Cleanup-Image /RestoreHealthRestart Windows after the process finishes.
Check the Windows + Shift + S Shortcut
If only the shortcut isn’t working:
- Test the Snipping Tool from the Start menu.
- Ensure your keyboard is functioning properly.
- Restart Windows Explorer.
- Check whether another application has overridden the shortcut.
Reset the Microsoft Store Cache
A corrupted Microsoft Store cache can affect built-in Windows apps.
Press Windows + R.
Type:
wsreset.exePress Enter.
A blank Command Prompt window opens briefly before the Microsoft Store launches automatically.
Restart your PC afterward.
Restart Your Computer
Although simple, restarting Windows often resolves temporary system glitches affecting the Snipping Tool.
If you’ve tried several fixes without restarting, do so before moving on to more advanced troubleshooting.
Why You Should Try Repair Before Reset
Windows provides both Repair and Reset because they solve different types of problems. Although it may be tempting to reset the Snipping Tool immediately, using Repair first is the better approach in most situations.
The Repair option checks the application’s files and attempts to fix issues without removing your preferences or app data. Since it doesn’t reset the app’s configuration, it’s less disruptive and usually takes less than a minute to complete.
The Reset option, on the other hand, removes the app’s stored settings and restores it to its default state. While this is more effective for persistent problems caused by corrupted app data, you’ll need to configure your preferences again afterward.
As a general rule:
- Use Repair for minor issues such as occasional crashes or slow performance.
- Use Reset if the app continues to malfunction after repairing it.
- Consider reinstalling the Snipping Tool only if both Repair and Reset fail to resolve the issue.
Following this order can save time and help you avoid unnecessary troubleshooting.
Does Resetting the Snipping Tool Delete Screenshots?
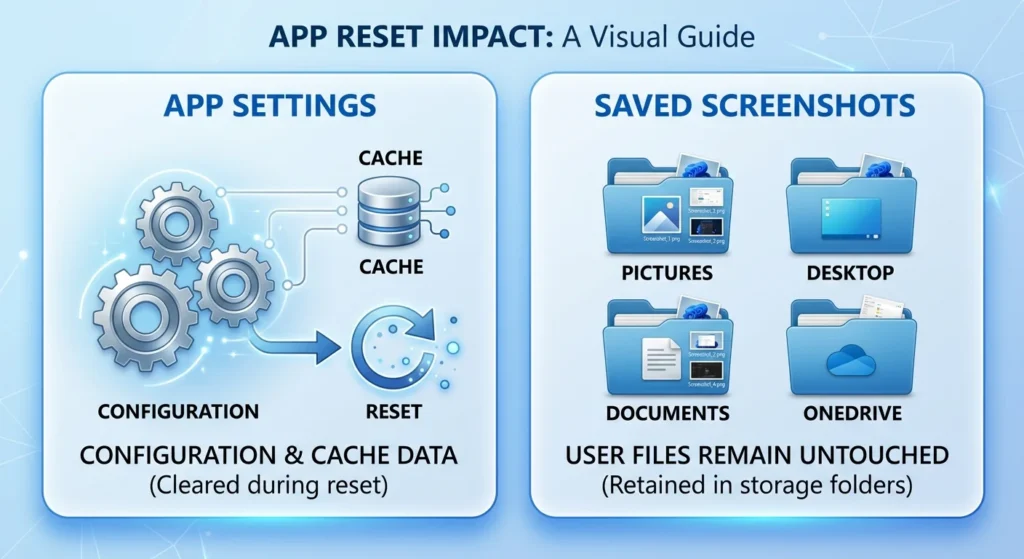
One of the most common concerns users have is whether resetting the Snipping Tool will erase their screenshots.
The good news is that resetting the app does not delete screenshots you’ve already saved.
Windows stores your saved screenshots in locations such as:
- Pictures
- Desktop
- Documents
- OneDrive (if enabled)
- Any custom folder you’ve chosen
These files are independent of the Snipping Tool’s settings, so they remain untouched during the reset process.
However, resetting the app does remove:
- App preferences
- Temporary app data
- Cached files
- Recent app settings
If you’ve taken a screenshot but haven’t saved it yet, or if it’s only stored temporarily in the clipboard, you may lose that unsaved capture after resetting the app. For this reason, always save important screenshots before proceeding.
Common Problems After Reset (and How to Fix Them)
In most cases, resetting the Snipping Tool resolves common issues. However, if a problem persists, the cause may be related to Windows rather than the app itself.
Here are some common issues and their solutions.
The Snipping Tool Still Won’t Open
If the app refuses to launch after a reset:
- Restart your computer.
- Check for Windows updates.
- Update the Snipping Tool through the Microsoft Store.
- Reinstall the app if necessary.
Windows + Shift + S Still Doesn’t Work
If the keyboard shortcut remains unresponsive:
- Restart Windows Explorer from Task Manager.
- Test the keyboard to ensure the keys work correctly.
- Check whether another application has overridden the shortcut.
- Restart your PC.
The App Shows a Blank or Black Window
A blank screen usually indicates a temporary system or graphics issue.
Try the following:
- Restart Windows.
- Update your graphics driver.
- Install the latest Windows updates.
- Reinstall the Snipping Tool.
Screenshots Aren’t Saving
If captures aren’t saving:
- Verify that you have permission to write to the selected folder.
- Save the screenshot to a different location.
- Ensure your storage drive isn’t full.
- Test saving another file to rule out folder permission issues.
Clipboard Copy Isn’t Working
If screenshots aren’t copying to the clipboard:
- Restart Windows.
- Test the clipboard with another application.
- Clear the clipboard history.
- Check whether clipboard syncing is causing conflicts.
Screen Recording Is Missing
The screen recording feature is only available in supported versions of Windows 11.
If you don’t see it:
- Update the Snipping Tool.
- Install the latest Windows updates.
- Confirm that your version of Windows supports screen recording.
The Reset Button Is Greyed Out
If you can’t click the Reset button:
- Sign in with an administrator account.
- Install pending Windows updates.
- Restart the computer.
- Reinstall the Snipping Tool if the issue persists.
Final Thoughts
Knowing how to reset the Snipping Tool is one of the quickest ways to resolve common issues such as crashes, freezing, screenshots not saving, or the Windows + Shift + S shortcut not working. Since Windows includes both Repair and Reset options, it’s best to start with Repair to preserve your app data whenever possible.
If repairing doesn’t resolve the problem, resetting the Snipping Tool restores it to its default state and often eliminates issues caused by corrupted settings or cached data. Should the problem continue even after a reset, updating Windows, reinstalling the app, or repairing Windows system files with SFC and DISM can provide a more permanent solution.
By following the steps in this guide, you should be able to restore the Snipping Tool and continue capturing screenshots and screen recordings without interruption.
Frequently Asked Questions
Open Settings > Apps > Installed apps, locate Snipping Tool, click the three-dot menu, choose Advanced options, and then select Reset. If possible, try Repair first.
No. Screen recordings that you’ve already saved remain in their storage location. Unsaved recordings or temporary data may be lost.
Start with Repair because it attempts to fix the app without removing its data. If the issue continues, use Reset.
No. Once the app has been reset, its previous settings cannot be restored automatically. You’ll need to configure any custom preferences again.
No. Screenshots you’ve already saved remain on your computer. Only the app’s settings and temporary data are removed.
Yes. Reinstalling the app can resolve issues caused by damaged installation files, especially if both Repair and Reset have failed.
A restart isn’t always required, but it’s recommended if the issue persists after the reset. Restarting helps Windows apply any pending changes.