Fix Snipping Tool Crashes on Windows 11: Complete Guide
If the Snipping Tool is crashing on Windows 11, the issue is usually caused by corrupted app files, outdated Windows updates, graphics driver conflicts, or damaged system files. Fortunately, you can fix the problem by repairing or resetting the app, updating Windows, reinstalling Snipping Tool, or running built-in repair tools like SFC and DISM.
Introduction
The Snipping Tool is one of the most useful screenshot utilities built into Windows 11. Whether you need to capture an image, annotate it, or record your screen, the app makes these tasks quick and convenient.
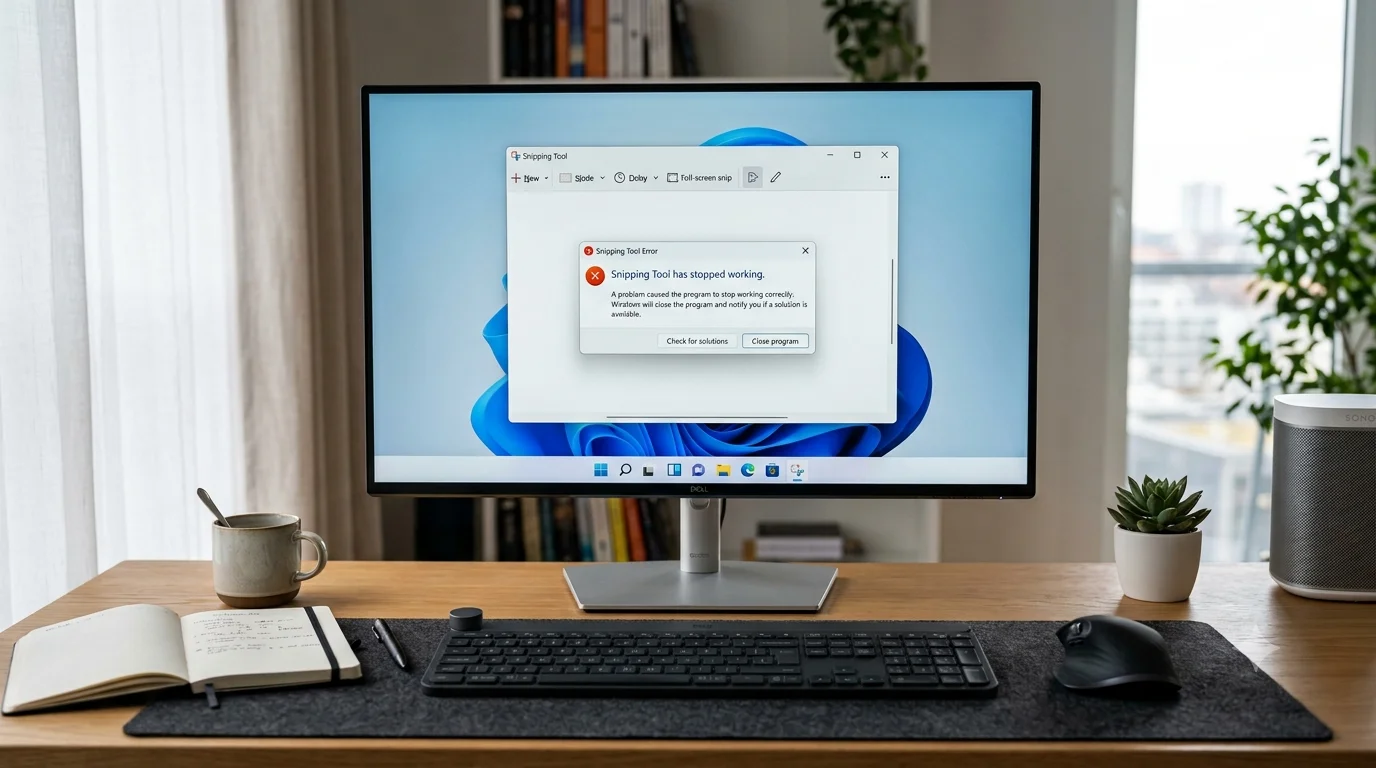
However, many users report that the Snipping Tool crashes immediately after opening, freezes while taking a screenshot, or closes unexpectedly after pressing Windows + Shift + S. In some cases, the app launches but displays a blank window or fails to save screenshots altogether.
Fortunately, you don’t have to reinstall Windows to solve these problems. In most situations, simple troubleshooting methods can restore the app within a few minutes. This guide explains the most effective fixes, beginning with the easiest solutions before moving to more advanced troubleshooting steps.
Why Does Snipping Tool Keep Crashing on Windows 11?
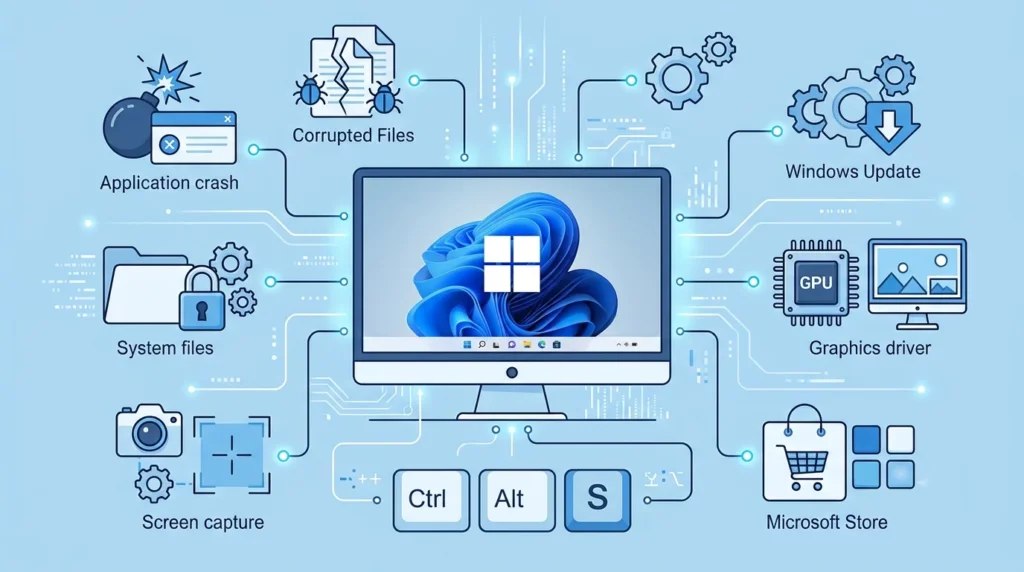
Several software and hardware-related factors can cause the Snipping Tool to crash. Identifying the underlying reason will help you choose the most effective solution.
Corrupted App Files
Over time, temporary files and application settings can become corrupted. As a result, Snipping Tool may crash during startup, freeze while capturing the screen, or stop responding altogether.
Typical symptoms include:
- The app opens and immediately closes.
- The screenshot editor never appears.
- A blank window is displayed.
- The application freezes indefinitely.
Outdated Windows Updates
Microsoft regularly releases updates that improve the stability of Windows 11 and its built-in applications. If your computer is running an older version, a known software bug could be responsible for the crashes.
Therefore, installing the latest Windows updates should always be one of your first troubleshooting steps.
Graphics Driver Problems
Since Snipping Tool captures everything displayed on your screen, it depends on a stable graphics driver. Consequently, outdated or corrupted GPU drivers can trigger unexpected crashes or prevent screenshots from being captured correctly.
You may notice:
- Black screenshots
- Blank capture windows
- Screen recording failures
- Unexpected application crashes
Corrupted System Files
Windows relies on essential system files to run built-in apps correctly. When those files become damaged, Snipping Tool and other Microsoft applications may begin crashing or behaving unpredictably.
Microsoft Store Problems
Because Snipping Tool is distributed through Microsoft Store, installation issues or corrupted Store data can also affect the application’s performance. Fortunately, repairing or reinstalling the app usually resolves these problems.
Third-Party Software Conflicts
Some applications interfere with screen capture features. For example, screen recorders, overlay utilities, keyboard remapping tools, and certain antivirus programs can conflict with Snipping Tool.
Incorrect Print Screen Configuration
Windows 11 lets you launch Snipping Tool by pressing the Print Screen key. If this shortcut is disabled or incorrectly configured, the application may not open even though it’s installed correctly.
Common Symptoms of Snipping Tool Crashes
The issue doesn’t always appear the same way. Depending on the underlying cause, you may experience one or more of the following problems:
- Snipping Tool opens and closes immediately.
- Windows + Shift + S doesn’t respond.
- The Print Screen key no longer launches the app.
- The screen dims, but no screenshot is captured.
- The screenshot toolbar freezes.
- The editor fails to open after capturing the screen.
- The application crashes while saving an image.
- Screen recording stops unexpectedly.
- The app won’t open at all.
Recognizing these symptoms can help you identify the most appropriate fix.
Fix 1: Restart the Snipping Tool Process
A temporary software glitch may leave Snipping Tool running in the background. Restarting the process often resolves minor issues without making permanent changes to your system.
Step 1
Press Ctrl + Shift + Esc to open Task Manager.
Step 2
Locate Snipping Tool in the list of running processes.
Step 3
Next, right-click the application and select End task.
Step 4
After closing Task Manager, launch Snipping Tool again from the Start menu.
Why This Works
Ending the background process removes any frozen instance of the application. As a result, Windows starts a fresh session the next time you open Snipping Tool.
Fix 2: Repair the Snipping Tool App
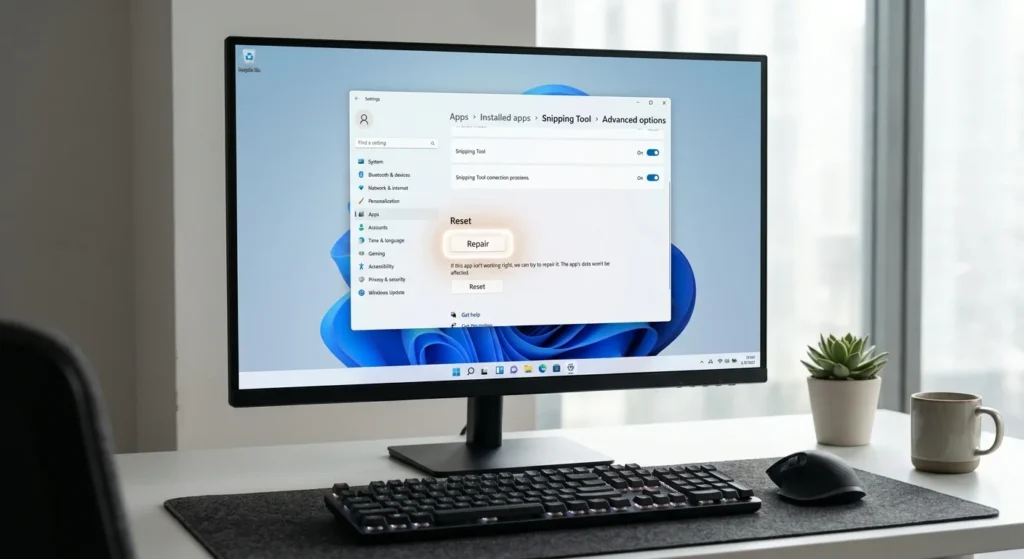
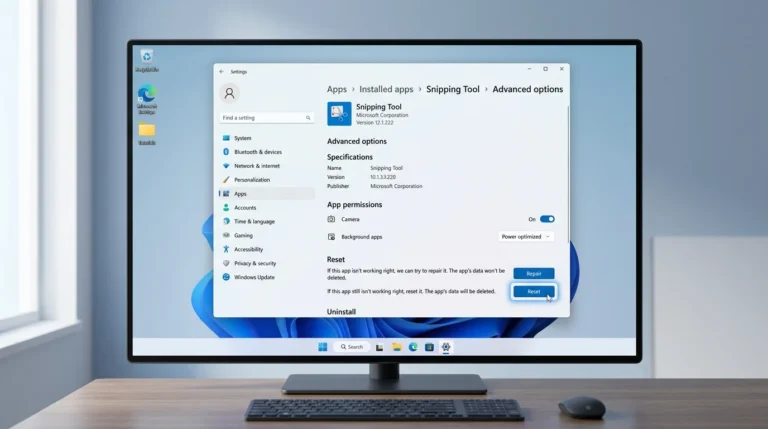
If restarting the app doesn’t help, use Windows’ built-in Repair feature. Unlike resetting the application, repairing replaces damaged files without deleting your settings.
Step 1
Open Settings.
Step 2
Navigate to Apps → Installed apps.
Step 3
Search for Snipping Tool.
Step 4
Click the three-dot menu beside the app and choose Advanced options.
Step 5
Scroll down and click Repair.
Windows will automatically scan the application and replace damaged files.
Test the Application
Once the repair finishes:
- Open Snipping Tool.
- Capture a screenshot.
- Save the image.
- Test the Windows + Shift + S shortcut.
If the application works correctly, no further troubleshooting is required.
Why Repair Is Safe
The Repair option does not remove:
- Saved screenshots
- App preferences
- Clipboard functionality
- Keyboard shortcuts
Instead, it focuses only on repairing damaged application files.
Fix 3: Reset Snipping Tool
If repairing the app doesn’t resolve the problem, resetting it should be your next step. This process restores Snipping Tool to its default state by clearing corrupted cache files and configuration data.
Step 1
Open Settings, then go to Apps → Installed apps.
Step 2
Find Snipping Tool and open Advanced options.
Step 3
Scroll to the Reset section.
Step 4
Click Reset, then confirm your choice.
Windows will automatically recreate the application’s data the next time you launch it.
What Happens After Resetting?
Resetting the app will:
- Remove corrupted cache files.
- Restore default settings.
- Rebuild application data.
- Resolve many startup-related crashes.
What Won’t Be Deleted?
Fortunately, resetting Snipping Tool does not remove:
- Saved screenshots
- Images stored in the Pictures folder
- Files saved to OneDrive
- Screenshots stored in other locations
Only the application’s local data and preferences are cleared.
When Should You Choose Reset Instead of Repair?
Use Repair when the app opens but behaves unexpectedly.
On the other hand, choose Reset if:
- The app crashes immediately after launching.
- Repair doesn’t fix the issue.
- Keyboard shortcuts stop responding.
- The interface refuses to load.
In many cases, resetting Snipping Tool restores normal functionality without requiring a complete reinstall.
Perfect. I’ll continue with the same optimized style.
Fix 4: Update Snipping Tool from Microsoft Store
Running an outdated version of Snipping Tool can lead to unexpected crashes, compatibility issues, and missing features. Therefore, checking for updates should be one of your first troubleshooting steps after repairing or resetting the app.
Step 1
Open the Microsoft Store from the Start menu.
Step 2
Next, click Library in the bottom-left corner of the window.
Step 3
Select Get updates to search for available updates.
Step 4
If an update for Snipping Tool appears, click Update and wait for the installation to finish.
Step 5
Finally, restart your computer and test Snipping Tool again.
Why This Works
Microsoft frequently releases updates that improve the stability of built-in Windows apps. In addition, these updates often fix bugs related to screen capturing, clipboard functionality, and screen recording.
If the crashes started after a Windows update, installing the latest version of Snipping Tool may resolve the issue immediately.
Fix 5: Reinstall Snipping Tool
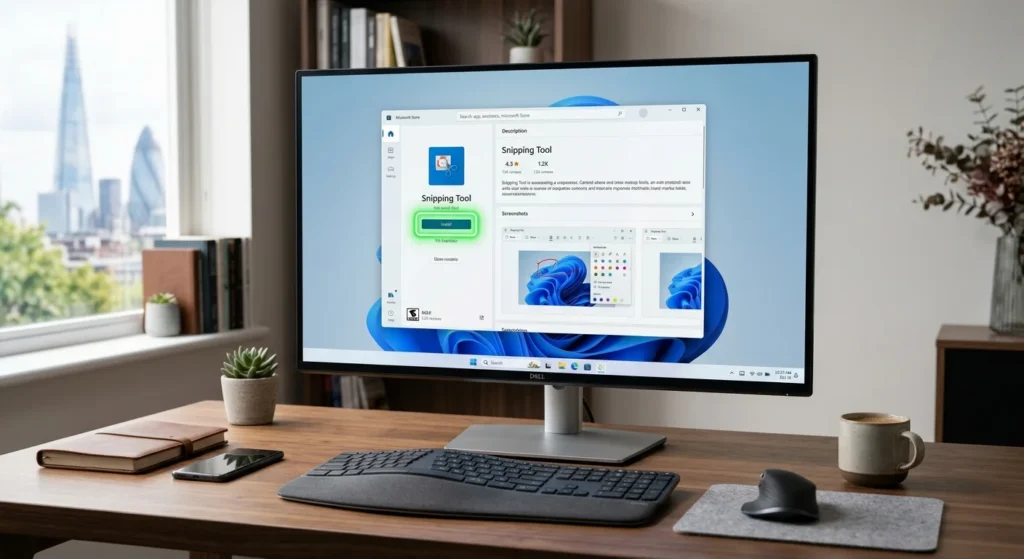
If updating the application doesn’t help, reinstalling it can replace damaged installation files and restore missing components.
Step 1: Uninstall Snipping Tool
- Open Settings.
- Navigate to Apps → Installed apps.
- Search for Snipping Tool.
- Click the three-dot menu beside the app.
- Choose Uninstall.
- Confirm your selection.
Step 2: Install Snipping Tool Again
After removing the application, open the Microsoft Store and search for Snipping Tool.
Next, click Install (or Get, depending on your system) and wait for Windows to complete the installation.
Step 3: Restart Your Computer
Once the installation finishes, restart your PC before opening the app.
Verify the Installation
Now, check whether you can:
- Launch Snipping Tool successfully.
- Capture a screenshot.
- Save the image.
- Use Windows + Shift + S.
- Record your screen without crashes.
If everything works correctly, the original installation was likely corrupted.
Why Reinstalling Helps
Unlike repairing or resetting the app, reinstalling replaces every application file with a fresh copy. Consequently, it resolves problems caused by missing or severely damaged files.
Fix 6: Install the Latest Windows Updates
Windows updates don’t just add new features; they also fix bugs that affect built-in applications such as Snipping Tool.
For that reason, keeping Windows fully updated is essential.
Step 1
Open Settings.
Step 2
Select Windows Update from the left navigation pane.
Step 3
Click Check for updates.
Step 4
Download and install every available update.
These updates may include:
- Quality updates
- Security patches
- Feature updates
- .NET Framework updates
Step 5
After installation completes, restart your computer.
Why This Works
Every month, Microsoft releases cumulative updates that improve Windows stability.
Besides fixing security vulnerabilities, these updates often resolve:
- Application crashes
- Microsoft Store problems
- Keyboard shortcut issues
- Performance bugs
- Compatibility errors
Even if Snipping Tool is fully updated, an outdated Windows build can still cause it to crash.
Fix 7: Update or Reinstall Your Graphics Driver
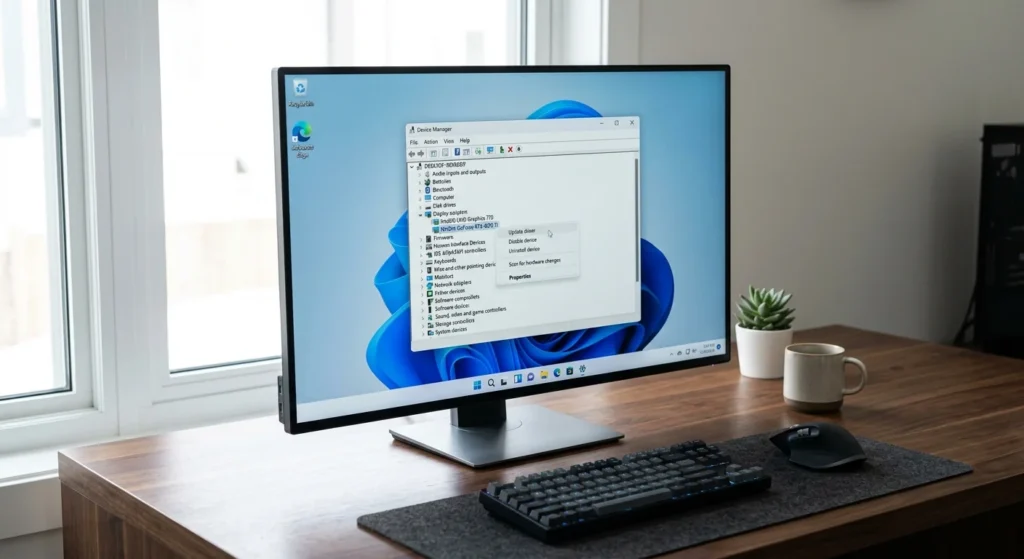
Your graphics driver plays a major role in screen capturing and recording. Therefore, driver issues can directly affect Snipping Tool.
If the graphics driver becomes outdated or corrupted, you may experience:
- Black screenshots
- Blank capture windows
- Screen recording failures
- Random application crashes
- Frozen screenshots
Method 1: Update the Driver Using Device Manager
Step 1
Right-click the Start button and choose Device Manager.
Step 2
Expand Display adapters.
Step 3
Right-click your graphics card.
Step 4
Select Update driver.
Step 5
Choose Search automatically for drivers.
If Windows finds a newer version, install it and restart your computer.
Method 2: Download the Latest Driver from the Manufacturer
Sometimes, Device Manager doesn’t provide the newest driver.
In that case, download the latest driver directly from your graphics card manufacturer.
This method is recommended for:
- Intel Graphics
- NVIDIA GeForce
- AMD Radeon
Installing the latest official driver often improves compatibility with Windows 11.
Method 3: Reinstall the Graphics Driver
If updating doesn’t solve the problem, reinstall the driver instead.
- Open Device Manager.
- Expand Display adapters.
- Right-click your graphics adapter.
- Select Uninstall device.
- Restart your PC.
Windows will automatically install a basic display driver during startup. Afterward, you can install the latest version from the manufacturer’s website.
When Is the Graphics Driver the Problem?
Driver-related issues are more likely if:
- Snipping Tool crashes only while taking screenshots.
- Screen recording fails every time.
- Screenshots appear completely black.
- Other screenshot applications also crash.
Fix 8: Run SFC and DISM to Repair System Files
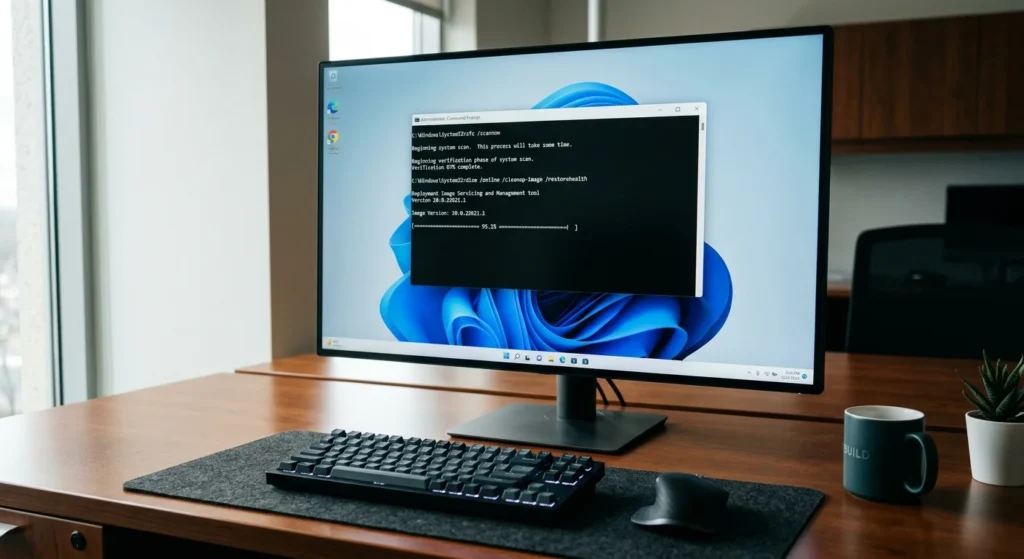
Corrupted Windows system files can prevent built-in applications from working correctly. Fortunately, Windows includes two command-line tools that can repair these files automatically.
The first tool is System File Checker (SFC), while the second is Deployment Image Servicing and Management (DISM).
Using both tools together often resolves persistent application crashes.
Step 1: Open Command Prompt as Administrator
- Click the Start button.
- Type Command Prompt or cmd.
- Right-click Command Prompt.
- Select Run as administrator.
Step 2: Run the SFC Scan
Enter the following command and press Enter.
sfc /scannowThe scan may take several minutes to complete.
If Windows detects corrupted system files, it will repair them automatically.
Step 3: Run the DISM Command
After the SFC scan finishes, type:
DISM /Online /Cleanup-Image /RestoreHealthThen press Enter.
DISM repairs the Windows image that SFC relies on to replace damaged files.
Step 4: Restart Your Computer
Once both scans are complete, restart your PC before testing Snipping Tool again.
SFC vs. DISM
| Tool | Purpose |
|---|---|
| SFC | Scans and repairs missing or corrupted Windows system files. |
| DISM | Repairs the Windows component store and restores the system image used by SFC. |
For the recommended Microsoft troubleshooting sequence, run DISM first and then SFC. DISM repairs the Windows component store that SFC can use to restore corrupted system files.
Why These Tools Are Effective
Unlike app-specific fixes, SFC and DISM repair Windows itself. As a result, they can resolve crashes affecting multiple built-in applications, including Snipping Tool, Paint, Photos, and Microsoft Store apps.
Excellent. Here’s the final optimized part. It follows the same structure with only one H1, H2/H3 hierarchy, higher transition-word usage, varied sentence openings, and improved Yoast readability.
Fix 9: Check the Print Screen Keyboard Setting
If the Print Screen (PrtScn) key no longer opens Snipping Tool, the shortcut may be disabled or assigned incorrectly. Fortunately, Windows 11 allows you to change this setting in just a few clicks.
Step 1
Open Settings.
Step 2
Navigate to:
Accessibility → Keyboard
Step 3
Scroll until you find the option:
Use the Print Screen button to open screen snipping
Step 4
If the setting is turned off, enable it.
On the other hand, if it’s already enabled, switch it off, restart your computer, and then enable it again.
Step 5
Finally, press the Print Screen key or Windows + Shift + S to check whether Snipping Tool opens correctly.
Why This Works
Occasionally, Windows fails to register the Print Screen shortcut after installing updates or changing keyboard settings. Refreshing the option forces Windows to recreate the shortcut configuration, which often restores normal functionality.
Fix 10: Perform a Clean Boot
Sometimes, Snipping Tool isn’t the actual problem. Instead, another application running in the background may interfere with screen capture services.
A Clean Boot starts Windows with only essential Microsoft services. As a result, you can determine whether a third-party application is causing the crashes.
Step 1
Press Windows + R, type:
msconfig
Then press Enter.
Step 2
When the System Configuration window opens, switch to the Services tab.
Step 3
Check the box labeled:
Hide all Microsoft services
Step 4
Next, click Disable all.
Step 5
Open the Startup tab and select Open Task Manager.
Step 6
Disable every non-essential startup application.
Step 7
Restart your computer.
Test Snipping Tool Again
After Windows starts, launch Snipping Tool and take a screenshot.
If the application no longer crashes, one of the disabled startup programs is likely responsible.
Common Software Conflicts
Applications that frequently interfere with Snipping Tool include:
- Screenshot utilities
- Screen recording software
- RGB lighting software
- Keyboard remapping tools
- Display overlay applications
- Clipboard managers
- Some antivirus programs
To identify the exact cause, re-enable startup programs one at a time until the crashes return.
Fix 11: Check Event Viewer for Crash Logs
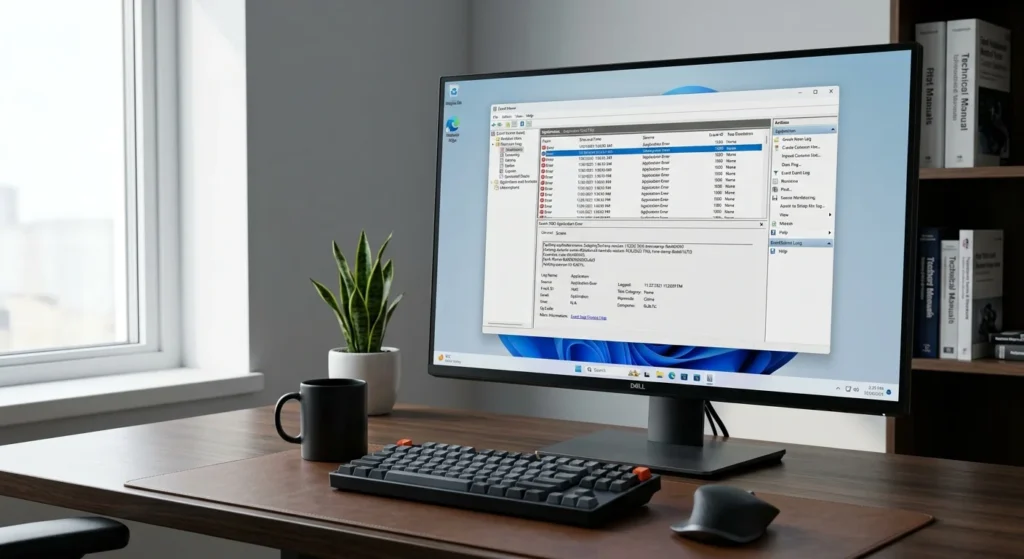
If none of the previous fixes solve the issue, Event Viewer can help you identify the underlying cause.
Unlike basic error messages, Event Viewer records detailed crash information that can point to the faulty application or system component.
Step 1
Right-click the Start button.
Then choose Event Viewer.
Step 2
Expand:
Windows Logs → Application
Step 3
Look for recent entries marked:
- Error
- Application Error
- Windows Error Reporting
Step 4
Open the latest entry related to Snipping Tool.
Step 5
Review the following information carefully:
- Faulting application name
- Faulting module name
- Exception code
- Fault offset
- Time of the crash
How to Interpret the Results
Each field provides useful troubleshooting information.
For example:
- Faulting application name confirms which program crashed.
- Faulting module identifies the file responsible for the failure.
- Exception code indicates the type of error, such as memory access violations or corrupted application files.
If the same error appears repeatedly, search Microsoft’s documentation using the module name or exception code for additional guidance.
Fix 12: Create a New Windows User Profile
In some situations, the issue isn’t caused by Snipping Tool at all. Instead, your Windows user profile may be corrupted.
Creating a new profile helps determine whether the problem is account-specific.
Step 1
Open Settings.
Step 2
Go to:
Accounts → Other users
Step 3
Click Add account.
Step 4
Create a new local account or sign in with another Microsoft account.
Step 5
Sign out of your current account and log in to the new one.
Step 6
Open Snipping Tool and test it again.
Why This Works
If Snipping Tool works normally in the new account, your original Windows profile is likely damaged.
Instead of reinstalling Windows, you can simply migrate your personal files to the new profile and continue using it.
What If Snipping Tool Still Crashes?
If you’ve completed every troubleshooting step and the problem remains, don’t worry. There are still a few options available.
Try the following:
- Restart your computer one more time after applying all fixes.
- Install any newly released Windows updates.
- Update Microsoft Store apps again.
- Report the problem using the Feedback Hub application.
- Contact Microsoft Support if the crashes began after a recent Windows update.
- Use an alternative screenshot application until Microsoft releases a permanent fix.
Most importantly, avoid downloading unofficial “Windows repair” utilities or editing the Windows Registry unless Microsoft specifically recommends doing so.
How to Prevent Snipping Tool from Crashing Again
Although crashes can’t always be prevented, following a few best practices significantly reduces the chances of future problems.
To keep Snipping Tool running smoothly:
- Install Windows updates regularly.
- Update Microsoft Store apps whenever new versions are available.
- Keep your graphics drivers up to date.
- Restart your PC after major Windows updates.
- Avoid installing multiple screenshot utilities that perform the same function.
- Remove software you no longer use.
- Create a System Restore point before making major system changes.
- Perform routine malware scans using trusted security software.
By following these recommendations, you’ll minimize software conflicts and improve overall system stability.

Final Thoughts
Experiencing the Snipping Tool crashing on Windows 11 can be frustrating, especially when you need to capture important information quickly. Fortunately, the problem is usually caused by software-related issues rather than hardware failures.
Start with the simplest fixes, such as restarting the application, repairing it, and resetting its data. If those methods don’t solve the issue, continue by updating Windows, reinstalling Snipping Tool, installing the latest graphics drivers, and running the SFC and DISM repair tools.
Finally, if the crashes continue, perform a Clean Boot, review Event Viewer logs, and test the application using a new Windows user profile. By following the troubleshooting steps in this guide, most users can restore Snipping Tool without reinstalling Windows or losing their files.
Frequently Asked Questions
In most cases, corrupted app files, damaged cache, outdated Windows updates, or Microsoft Store issues cause the application to crash during startup. Fortunately, repairing or resetting the app usually resolves the problem.
Absolutely. Reinstalling replaces the application’s files without deleting screenshots you’ve already saved.
No. Resetting the app only removes its local cache and configuration files. Any screenshots you’ve already saved to your Pictures folder, OneDrive, or another location remain safe.
This keyboard shortcut may stop working because Snipping Tool has crashed in the background, the shortcut is disabled, or another application is intercepting it. Therefore, restarting the app and checking the keyboard settings are good places to start.
Yes. Some antivirus programs monitor screen capture activity and may interfere with Snipping Tool. If you suspect this is the cause, temporarily disable the antivirus or add Snipping Tool to its exclusion list before testing again.
Yes. Outdated or corrupted graphics drivers can lead to black screenshots, screen recording failures, freezing, and unexpected crashes. Updating the driver often fixes these issues.
This usually happens when the Use the Print Screen button to open screen snipping option is disabled, or another application has taken control of the shortcut.