Snipping Tool Not Working in Windows 11: How to Fix It
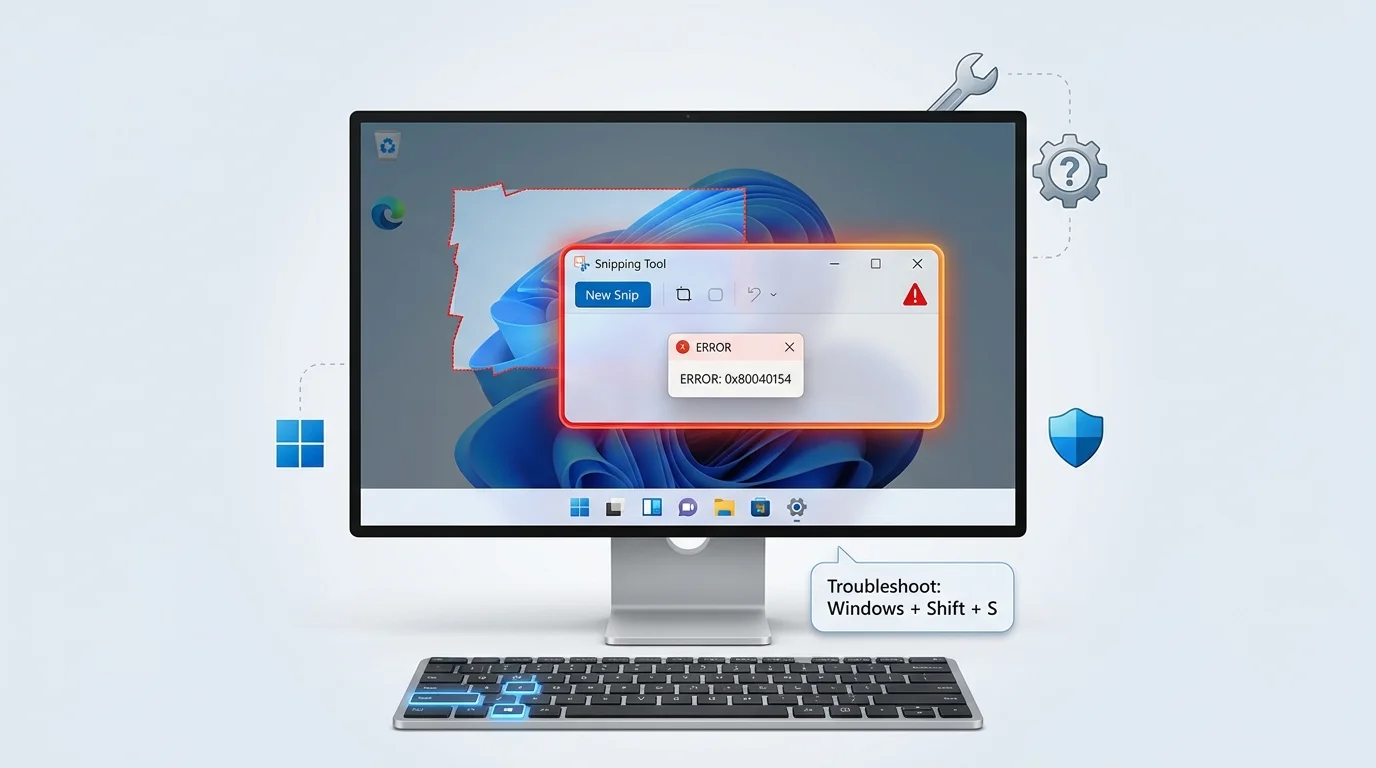
If Snipping Tool is not working in Windows 11, first check whether the problem affects the app itself or only the screenshot shortcut. Open Snipping Tool from the Start menu and select New. If the app works there, the issue may involve Windows + Shift + S, the Print Screen setting, notifications, or another application. If the app itself fails, try restarting it, repairing or resetting the app, updating Windows, reinstalling Snipping Tool, or repairing Windows system files.
Introduction
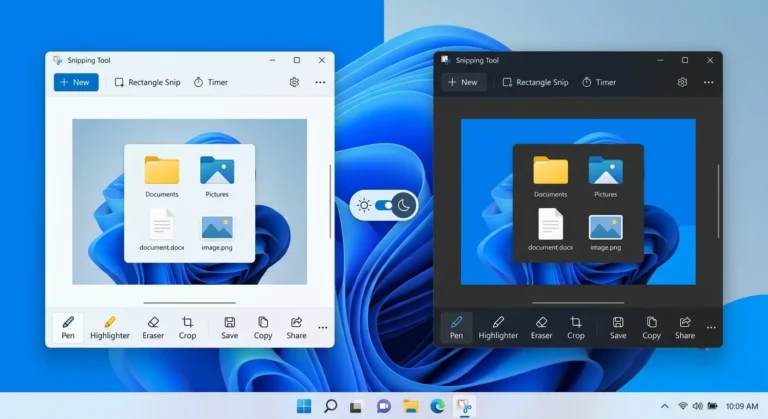
Snipping Tool is one of the easiest ways to capture screenshots in Windows 11. You can use it to capture a selected area, a window, or the entire screen, and current versions also support screen recording and additional editing features. Microsoft documents Windows + Shift + S, Windows + Shift + R, and Print Screen as ways to access Snipping Tool’s capture functions.
However, Snipping Tool does not always behave as expected. Sometimes the app will not open, while other problems affect only the keyboard shortcut. In other cases, the screenshot is captured but does not appear in the expected place, or the app freezes, closes, or fails to respond.
The good news is that you usually do not need to reset Windows to fix the problem. The best approach is to identify what is actually failing and then work through the least disruptive solution first.
How to Tell What Is Wrong With Snipping Tool
Before changing Windows settings, perform a quick test. This can tell you whether you are dealing with an app problem, shortcut problem, clipboard issue, or Windows problem.
Test Snipping Tool From the Start Menu
Select Start, type Snipping Tool, and open the app.
Then select New and try to capture a small area of your screen.
Microsoft’s current Snipping Tool documentation confirms that you can open the app from Start and use New to begin a capture.
If this works, the Snipping Tool app itself is probably functioning. The problem may instead involve a keyboard shortcut or Windows setting.
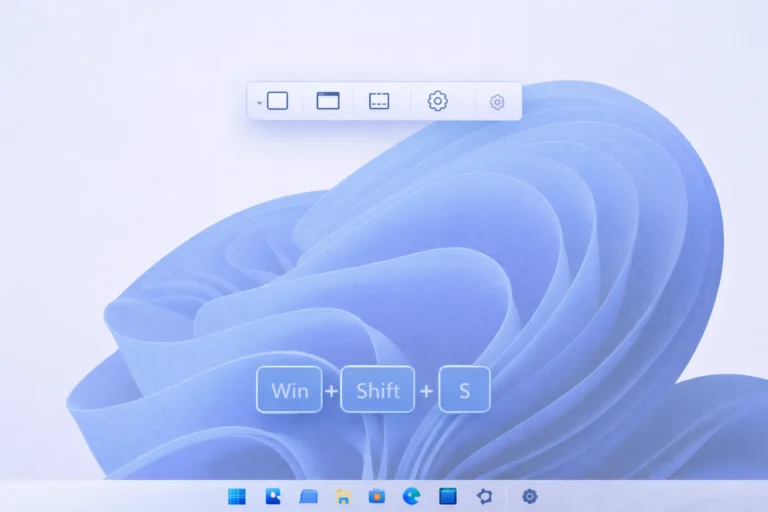
Test Windows + Shift + S
Press:
The screen should enter the snipping interface, allowing you to select an area to capture. Microsoft lists this as a supported Snipping Tool shortcut in Windows 11.
If the shortcut does nothing but the Snipping Tool app works from Start, focus your troubleshooting on the shortcut, keyboard, or Windows settings.
Check the Clipboard
After taking a screenshot, open Paint and press:
Ctrl + V
A successful paste indicates that the capture reached the clipboard even if you did not see the expected notification.
Microsoft explains that a captured snip is copied to the clipboard and can then be edited, saved, or shared.
Use the Symptom to Identify the Problem
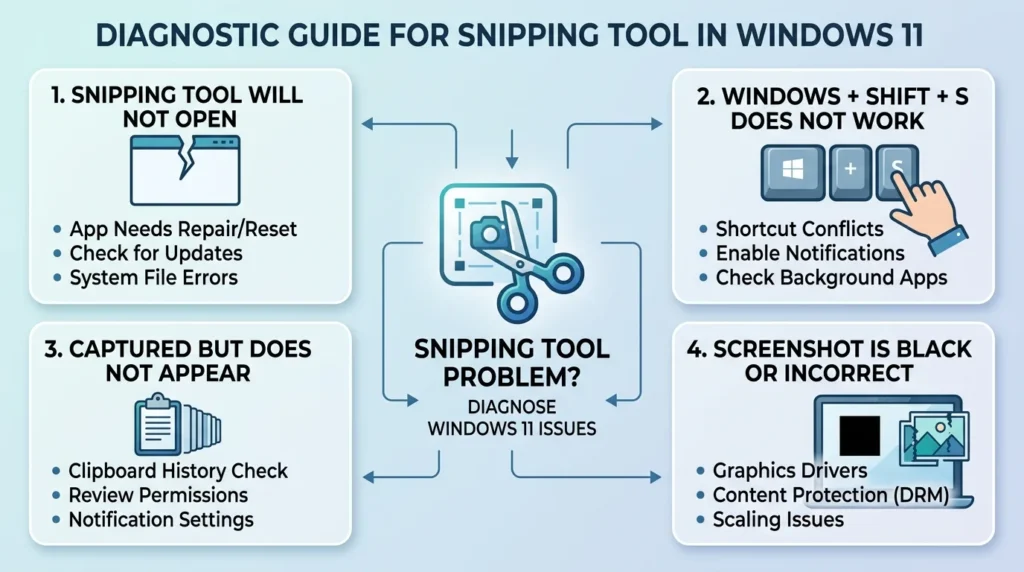
The following pattern can help you choose the right fix:
- Snipping Tool will not open: focus on the app, updates, Repair, Reset, or reinstalling.
- Windows + Shift + S does not work: check the shortcut and keyboard.
- Print Screen does not open Snipping Tool: check the Print Screen setting.
- The capture works, but you see no notification: check notification settings.
- The screenshot cannot be pasted: investigate the clipboard.
- The screenshot is black or incorrect: investigate display, protected content, or graphics-related issues.
- The app crashes or freezes: start with restarting, Repair, Reset, and updates.
Why Is Snipping Tool Not Working in Windows 11?
There is no single cause for every Snipping Tool problem. A temporary app glitch may be enough to cause the issue, but other cases can involve Windows settings, outdated software, damaged app data, keyboard shortcuts, or Windows system files.
Common possibilities include:
- A temporary Snipping Tool process failure
- A Windows or app update that needs to be installed
- Corrupted app data
- An incorrect Print Screen configuration
- A keyboard or shortcut problem
- Notification settings preventing the expected alert
- Clipboard problems
- Another screenshot or overlay application interfering
- Display or multiple-monitor configuration issues
- Corrupted Windows system files
Because these causes are different, applying every fix at random is inefficient. Start with the simple solutions below and move toward more advanced repairs only when necessary.
Fix 1: Restart Snipping Tool
The first solution is simple, but it can resolve temporary problems with the app.
Close Snipping Tool
If Snipping Tool is open, close the window normally.
Then open it again from Start and select New.
End Snipping Tool in Task Manager
If the app appears frozen or does not close normally:
- Press Ctrl + Shift + Esc to open Task Manager.
- Find Snipping Tool in the list of running processes.
- Select it.
- Choose End task.
- Open Snipping Tool again from Start.
- Select New and test a capture.
If the problem was caused by a stuck app process, Snipping Tool may start working normally after this restart.
Fix 2: Restart Windows Explorer
Windows Explorer manages important parts of the Windows desktop experience. Restarting it can be useful when Windows interface features behave unexpectedly.
To restart Windows Explorer:
- Press Ctrl + Shift + Esc.
- Find Windows Explorer in Task Manager.
- Right-click it.
- Select Restart.
- Wait for the desktop and taskbar to reload.
- Test Snipping Tool again.
Do not worry if the taskbar briefly disappears during the restart. It should return automatically.
Fix 3: Check the Windows + Shift + S Shortcut
If Snipping Tool works when opened from Start but Windows + Shift + S does not, the application may not be the problem.
Microsoft identifies Windows + Shift + S as the shortcut for opening the Snipping Tool image-capture overlay.
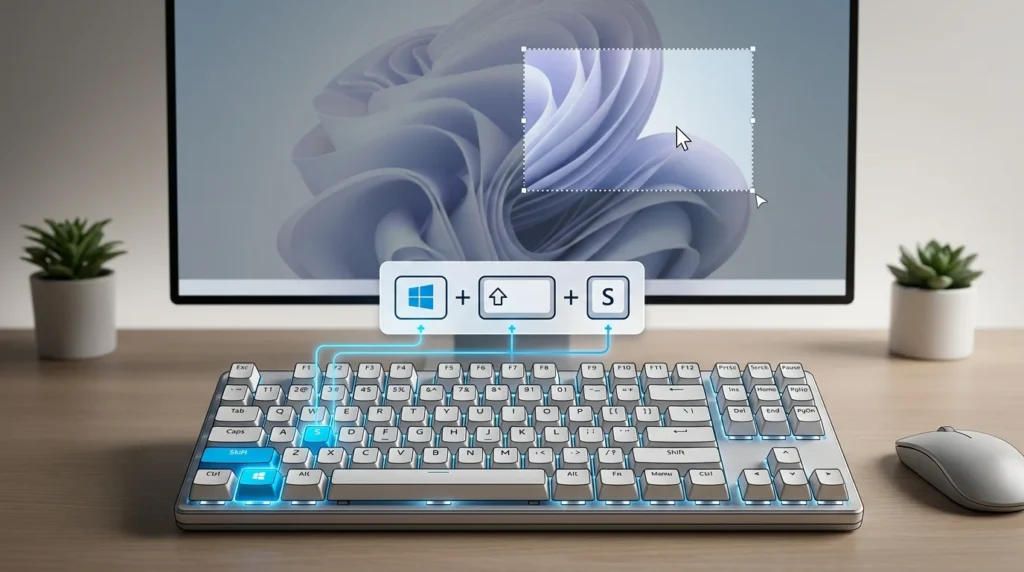
Try the following:
- Press the Windows key by itself and confirm that the Start menu opens.
- Test the Shift key with another shortcut.
- Test the S key by typing in a text field.
- Press Windows + Shift + S again.
- If possible, test with another keyboard.
If the shortcut works with another keyboard, your original keyboard may be the source of the problem.
Also close third-party screenshot utilities, gaming overlays, or keyboard-management software temporarily. Such applications can sometimes use similar keyboard combinations.
Fix 4: Check the Print Screen Setting
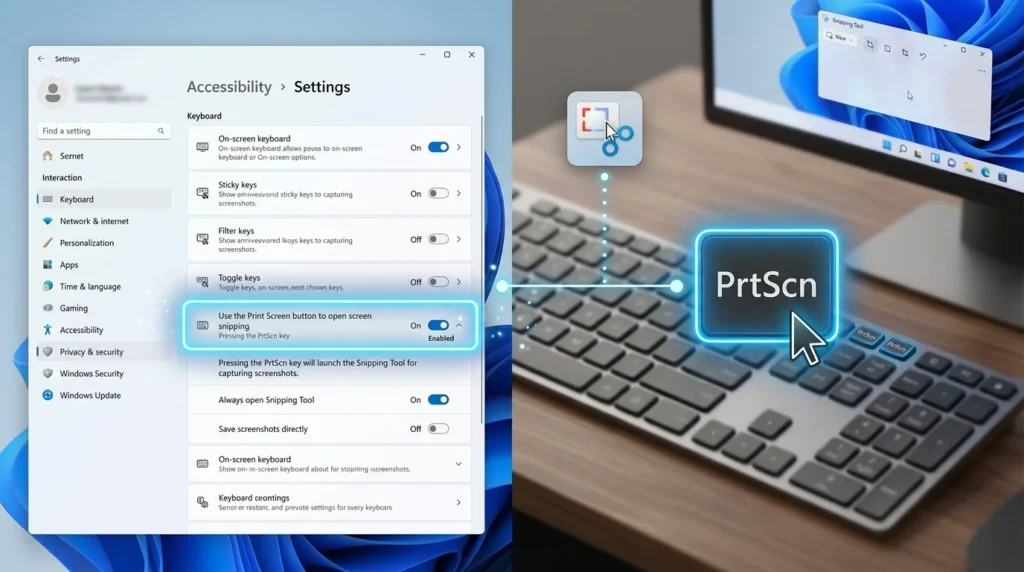
Windows 11 can use the Print Screen key to open screen snipping.
Microsoft documents the setting under:
Settings > Accessibility > Keyboard
Look for the option to Use the Print Screen button to open screen snipping.
Make sure the setting matches how you want the key to behave.
Then press PrtScn and test the capture again.
Keep in mind that Print Screen can also behave differently depending on the keyboard and device. Microsoft notes that some hardware may use alternative key combinations, such as Fn + Windows + Space Bar, when a dedicated Print Screen key is unavailable.
Fix 5: Check Snipping Tool Notifications
Sometimes the screenshot itself works, but the expected notification does not appear.
After taking a screenshot, Windows normally provides a notification that can be selected to open the capture in Snipping Tool.
If you do not see that notification, check your Windows notification settings.
Check Notification Settings
Open:
Settings > System > Notifications
Look for Snipping Tool and make sure notifications are allowed.
Also check whether Do Not Disturb or another notification mode is suppressing alerts.
Then take another screenshot.
If the screenshot is still being captured and can be pasted into Paint, the capture function may be working even though the notification is not.
Fix 6: Check Whether the Screenshot Reaches the Clipboard
A missing notification does not necessarily mean the screenshot failed.
Take a screenshot and immediately open Paint.
Then press:
Ctrl + V
If the screenshot appears, the capture reached the clipboard.
Microsoft explains that captured Snipping Tool images are automatically copied to the clipboard.
If pasting does not work, test the clipboard with another copied item. For example, copy a short piece of text and paste it into Notepad.
If ordinary clipboard operations also fail, the problem may extend beyond Snipping Tool.
Fix 7: Repair Snipping Tool in Windows 11
If Snipping Tool itself is malfunctioning, Windows 11 provides a built-in Repair option for supported apps.
Microsoft recommends using Repair before Reset when an app is not working correctly.
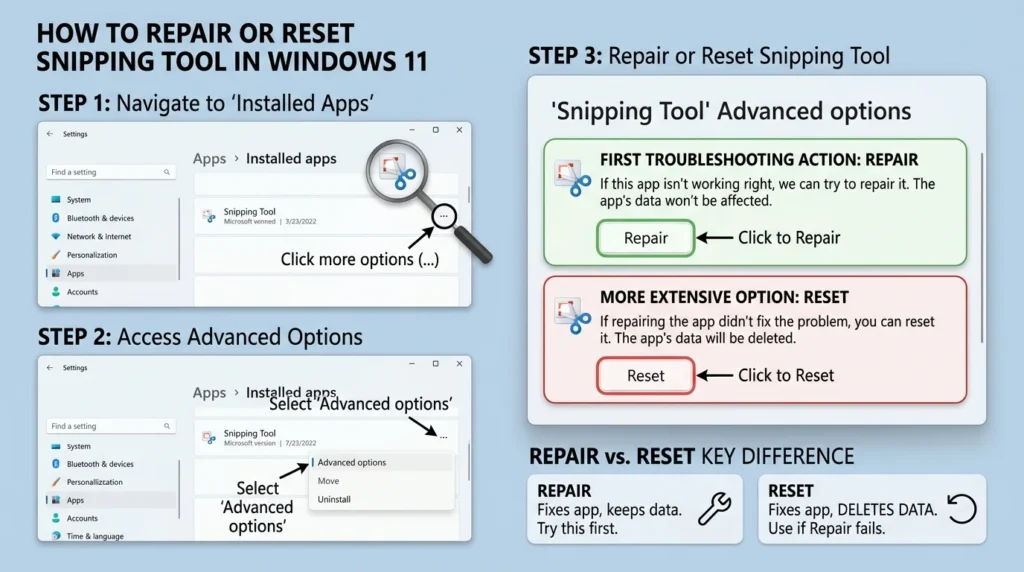
Follow these steps:
- Open Settings.
- Select Apps.
- Select Installed apps.
- Find Snipping Tool.
- Select the three-dot menu beside it.
- Select Advanced options.
- Select Repair if the option is available.
- Open Snipping Tool again.
- Test a new screenshot.
Repair attempts to correct the app without requiring a complete reset.
If Repair does not solve the problem, continue to the next step.
Fix 8: Reset Snipping Tool
Windows 11 also provides a Reset option for supported applications.
Use it when Repair does not resolve the problem.
Go to:
Settings > Apps > Installed apps > Snipping Tool > Advanced options
Then select Reset.
After the reset finishes, open Snipping Tool and test it again.
Microsoft specifically recommends Reset when Repair is unavailable or does not fix the app.
Because Reset can remove app data and settings, use it after trying the less disruptive Repair option.
Fix 9: Update Snipping Tool
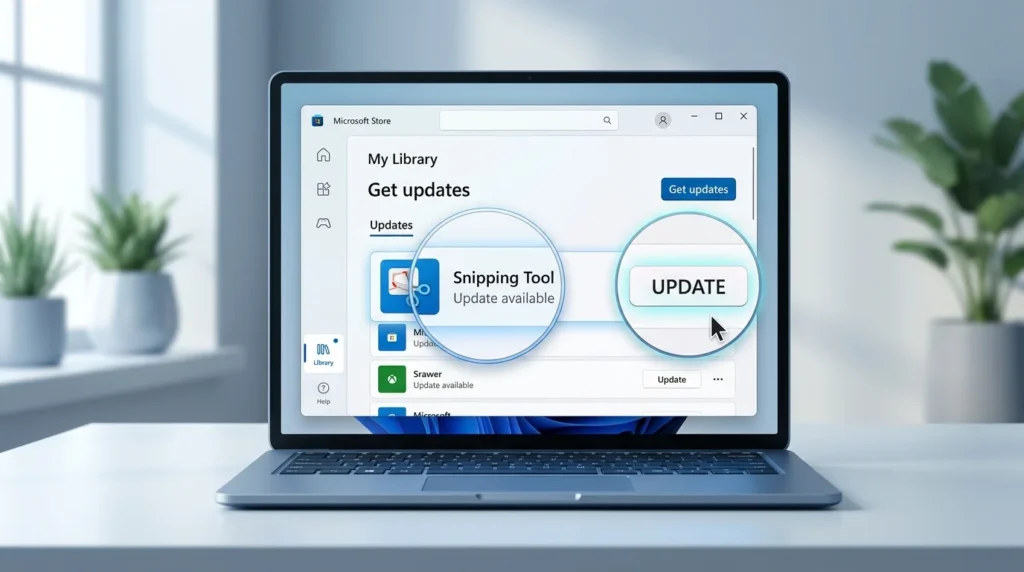
An outdated app can cause compatibility or stability problems.
Open the Microsoft Store and check for available app updates.
Microsoft’s guidance for Windows 11 apps recommends opening the Microsoft Store and using Library > Get updates to update Store applications.
After updating:
- Close Snipping Tool.
- Restart Windows if an update requests it.
- Open Snipping Tool again.
- Test both New and Windows + Shift + S.
Updating the app is particularly worth trying when the problem started after a Windows or application change.
Fix 10: Check for Windows 11 Updates
Windows updates can include bug fixes, security improvements, and compatibility changes.
To check manually:
- Open Settings.
- Select Windows Update.
- Select Check for updates.
- Install available updates.
- Restart the PC if Windows asks you to.
Microsoft’s current Windows 11 instructions use Settings > Windows Update > Check for updates, followed by Download & install when updates are available.
After restarting, test Snipping Tool again.
Fix 11: Reinstall Snipping Tool
If Repair, Reset, and updates do not help, reinstalling the app is a reasonable next step.
Microsoft currently provides official instructions for uninstalling and reinstalling the Windows Snipping Tool app. The documented process applies to supported Windows versions and provides installers for common architectures, including Windows 64-bit, 32-bit, and ARM64.
Uninstall Snipping Tool
- Open Settings.
- Select Apps.
- Select Installed apps.
- Find Snipping Tool.
- Select the three-dot menu.
- Select Uninstall.
- Confirm the uninstall.
Reinstall Snipping Tool
After uninstalling, use Microsoft’s official Snipping Tool installer instructions to install the appropriate version for your Windows device.
After installation, restart Windows and test the application.
Do not download modified or unofficial Snipping Tool installers from random websites. Use Microsoft’s official distribution or support instructions.
Fix 12: Run DISM to Repair Windows Components
If Snipping Tool still does not work, the problem may involve Windows components rather than the app alone.
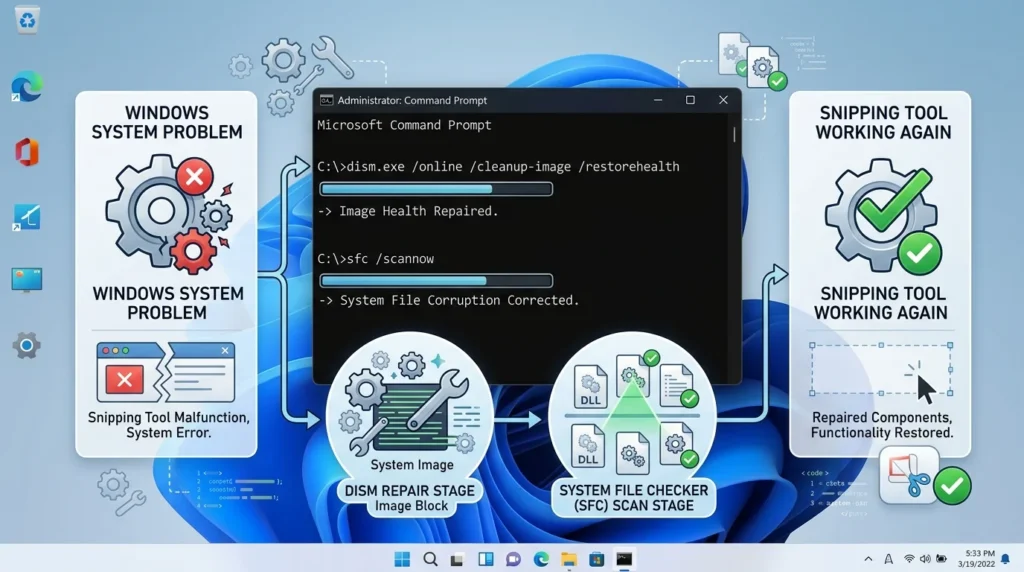
Microsoft recommends using Deployment Image Servicing and Management (DISM) and System File Checker (SFC) to repair corrupted Windows components and system files. Microsoft recommends running DISM before SFC.
First, open Command Prompt as administrator.
Then run:
DISM.exe /Online /Cleanup-image /RestorehealthPress Enter and allow the operation to finish.
The process can take several minutes.
When DISM completes successfully, continue with SFC.
Fix 13: Run System File Checker
System File Checker checks protected Windows system files for corruption and can replace damaged files with cached copies.
Open Command Prompt as administrator and run:
sfc /scannowPress Enter.
Do not close the Command Prompt window while the verification is running.
Microsoft’s current documentation states that SFC can detect corrupted system files and help repair problems that cause Windows to malfunction.
When the scan reaches 100 percent, read the result.
If corrupted files were repaired, restart Windows and test Snipping Tool again.
Fix 14: Check Multiple Monitors and Display Settings
If Snipping Tool works on one display but produces a black, incorrect, or unexpected capture on another, investigate your display configuration.
Try these tests:
- Temporarily disconnect the second monitor.
- Test Snipping Tool on the primary display.
- Check your display resolution.
- Check Windows display scaling.
- Set the monitor you normally use as the main display.
- Test the capture again.
This is especially useful if the problem started after adding a monitor, changing display scaling, or changing your graphics configuration.
Also remember that some protected content may intentionally prevent normal screenshot capture. A black screenshot does not always mean that Snipping Tool itself is broken.
Fix 15: Close Conflicting Screenshot and Overlay Apps
Another screenshot application may interfere with the same keyboard shortcuts or capture functions.
Temporarily close applications such as:
- Third-party screenshot tools
- Screen-recording utilities
- Gaming overlays
- Keyboard customization software
- Remote-access applications
Then test:
Windows + Shift + S
If Snipping Tool starts working after closing another application, reopen the applications one at a time to identify which one is causing the conflict.
Fix 16: Check Your Keyboard
If the Snipping Tool app works normally but keyboard shortcuts do not, test the physical keyboard.
Try:
- The Windows key.
- The Shift key.
- The S key.
- The Print Screen key.
- An external keyboard, if available.
You can also use Snipping Tool directly from Start as a temporary workaround.
If another keyboard makes the shortcut work, the problem is probably related to the original keyboard rather than Snipping Tool.
What to Do Based on the Snipping Tool Problem
Not every Snipping Tool failure requires the same solution.
Snipping Tool Will Not Open
Try these fixes in order:
- Restart Snipping Tool.
- End the app process in Task Manager.
- Repair Snipping Tool.
- Reset Snipping Tool.
- Update the app.
- Update Windows.
- Reinstall Snipping Tool.
- Run DISM and SFC.
Windows + Shift + S Is Not Working
If Snipping Tool opens normally from Start, focus on the shortcut.
Try:
- Test the Windows key.
- Test Shift and S separately.
- Try another keyboard.
- Close third-party screenshot utilities.
- Close gaming overlays.
- Restart Windows.
- Test the shortcut again.
Microsoft confirms that Windows + Shift + S is the Snipping Tool shortcut for opening the screenshot overlay.
Snipping Tool Opens but Immediately Closes
Start with app-level troubleshooting:
- End the Snipping Tool process.
- Restart Windows.
- Repair the app.
- Reset the app.
- Update Snipping Tool.
- Reinstall the app.
- Run DISM and SFC if the problem continues.
Snipping Tool Captures but Does Not Appear
First determine whether the image is actually being captured.
Take a screenshot and press Ctrl + V in Paint.
If the image appears, the capture is working. Check notifications and the Snipping Tool interface rather than immediately reinstalling the application.
Snipping Tool Screenshot Is Not Saving
After taking the capture, open it in Snipping Tool and use the Save button.
Microsoft’s Snipping Tool documentation confirms that captured images can be edited and saved from the Snipping Tool window.
If saving fails, check:
- Whether the destination folder is accessible
- Whether the file name is valid
- Whether your storage drive has available space
- Whether the app works after Repair or Reset
Screenshot Is Black or Blank
A black capture can have several causes.
Try:
- Capturing a different window
- Capturing the desktop
- Disconnecting a second monitor temporarily
- Checking display settings
- Closing overlays
- Testing another application
Some protected content can also restrict screenshot capture, so a black result does not automatically prove that Snipping Tool is defective.
Print Screen Is Not Opening Snipping Tool
Check:
Settings > Accessibility > Keyboard
Then verify the setting that allows the Print Screen button to open screen snipping. Microsoft documents this setting for Windows 11.
Also test Windows + Shift + S.
If Windows + Shift + S works but Print Screen does not, the issue is more likely related to the Print Screen configuration or keyboard.
What to Try Before Resetting Windows
A Snipping Tool problem rarely justifies resetting your entire Windows installation as the first step.
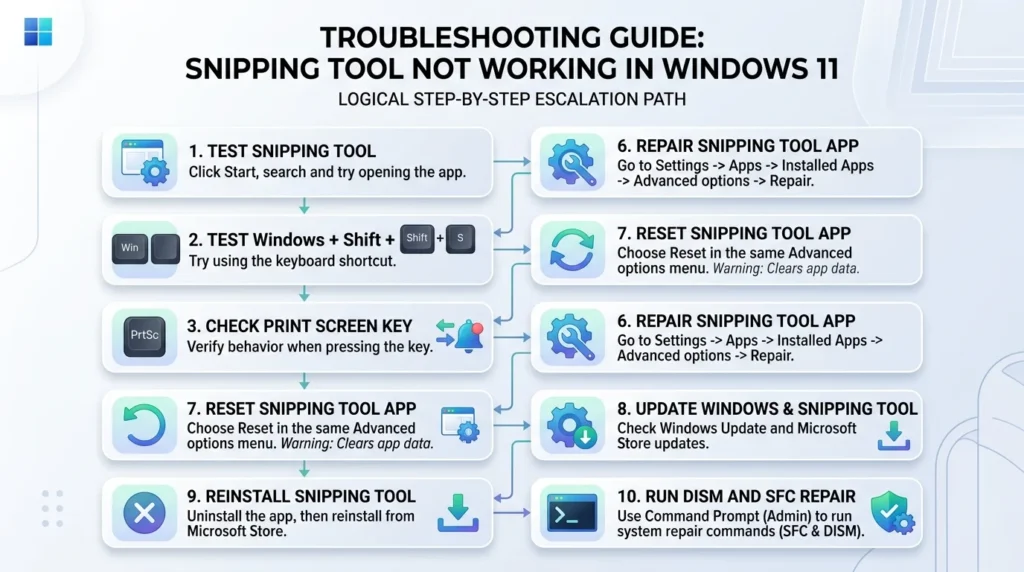
Use this escalation order instead:
- Restart Snipping Tool.
- End the app process.
- Restart Windows Explorer.
- Test Windows + Shift + S.
- Check the Print Screen setting.
- Check notifications.
- Test the clipboard.
- Repair Snipping Tool.
- Reset Snipping Tool.
- Update Snipping Tool.
- Update Windows.
- Reinstall Snipping Tool.
- Run DISM.
- Run SFC.
- Investigate display or third-party software conflicts.
This approach minimizes unnecessary changes to your computer.
Temporary Alternatives if Snipping Tool Still Does Not Work
If you need to capture something immediately, Windows provides other screenshot methods.
Use Print Screen
Press PrtScn to capture the screen to the clipboard, depending on your Windows and keyboard configuration.
You can then open Paint and press Ctrl + V. Microsoft documents Print Screen as a way to capture the screen and copy it to the clipboard.
Use Windows + Print Screen
On supported hardware, Windows + PrtScn can save a screenshot automatically.
Microsoft identifies the Screenshots folder under:
Pictures > Screenshots
Use Paint With Clipboard Captures
If you can capture the screen but Snipping Tool’s editor is not working, paste the screenshot into Paint and save it manually.
This gives you a temporary way to capture important information while you continue troubleshooting Snipping Tool.
Final Thoughts
When Snipping Tool is not working in Windows 11, do not immediately assume that the entire app needs to be reinstalled. First determine whether the failure involves the app, Windows + Shift + S, Print Screen, notifications, the clipboard, or the display.
Start with simple steps such as restarting Snipping Tool, checking the shortcut, and testing the clipboard. If those steps do not help, use Windows’ built-in Repair and Reset options. Next, update or reinstall Snipping Tool and Windows.
For persistent problems, DISM followed by SFC can help repair corrupted Windows components and system files.
The key is to troubleshoot the specific symptom instead of applying every solution at once. That makes it easier to identify the actual cause while avoiding unnecessary changes to your Windows 11 installation.
Frequently Asked Questions
Snipping Tool problems can be caused by a temporary app failure, outdated software, incorrect screenshot settings, shortcut problems, notification issues, corrupted app data, conflicting applications, or damaged Windows system files. Start by testing the app directly from Start to determine whether the problem is with Snipping Tool itself or only a shortcut
If Windows + Shift + S does nothing, test the Windows, Shift, and S keys separately. Then try opening Snipping Tool from Start. If the app works there, investigate keyboard shortcut conflicts and third-party screenshot or overlay applications.
Open Settings > Apps > Installed apps, find Snipping Tool, open its Advanced options, and select Repair when available. Microsoft recommends Repair as an app-level troubleshooting option before Reset.
Go to Settings > Apps > Installed apps > Snipping Tool > Advanced options and select Reset. Use Reset if Repair does not solve the problem.
Make sure the captured image opens in Snipping Tool and that you are using the Save option. If saving continues to fail, check the destination folder, available storage, and Snipping Tool’s app state. Repairing or resetting the app may also help.
A black screenshot can result from display configuration problems, certain protected content, or other software affecting screen capture. Test the desktop or another ordinary application first, then check multiple monitors, display settings, and overlays.
Check Settings > Accessibility > Keyboard and make sure the option to use the Print Screen button for screen snipping is enabled. Microsoft documents this setting in Windows 11.