How to Change Snipping Tool Theme in Windows 11
You can change the Snipping Tool theme in Windows 11 by opening Snipping Tool > Settings > App Theme and selecting Light, Dark, or Use System Settings. This option is available in recent versions of the Snipping Tool app, so make sure the app is updated through the Microsoft Store if you cannot find the setting.
Introduction
The Snipping Tool is Microsoft’s built-in screenshot and screen recording app for Windows 11. While most people use it to capture screenshots, many users also want to personalize its appearance by switching between Light Mode and Dark Mode. A darker interface can reduce eye strain during long work sessions, while the Light theme offers better visibility in bright environments.
This guide explains how to change the Snipping Tool theme in Windows 11, what each theme option does, why the setting may be missing, and how to fix common problems. By the end of this article, you’ll know how to customize the app and keep it synchronized with your Windows theme.
Can You Change the Snipping Tool Theme in Windows 11?
Yes. Microsoft allows users to customize the appearance of the Snipping Tool in Windows 11. Instead of being limited to the default interface, you can choose a theme that matches your preferences, or let the app follow your system settings automatically.
The theme feature is available in updated versions of the Snipping Tool. If you installed Windows 11 recently or regularly update apps through the Microsoft Store, you should already have access to this option.
What Theme Options Are Available?
The Snipping Tool offers three appearance options:
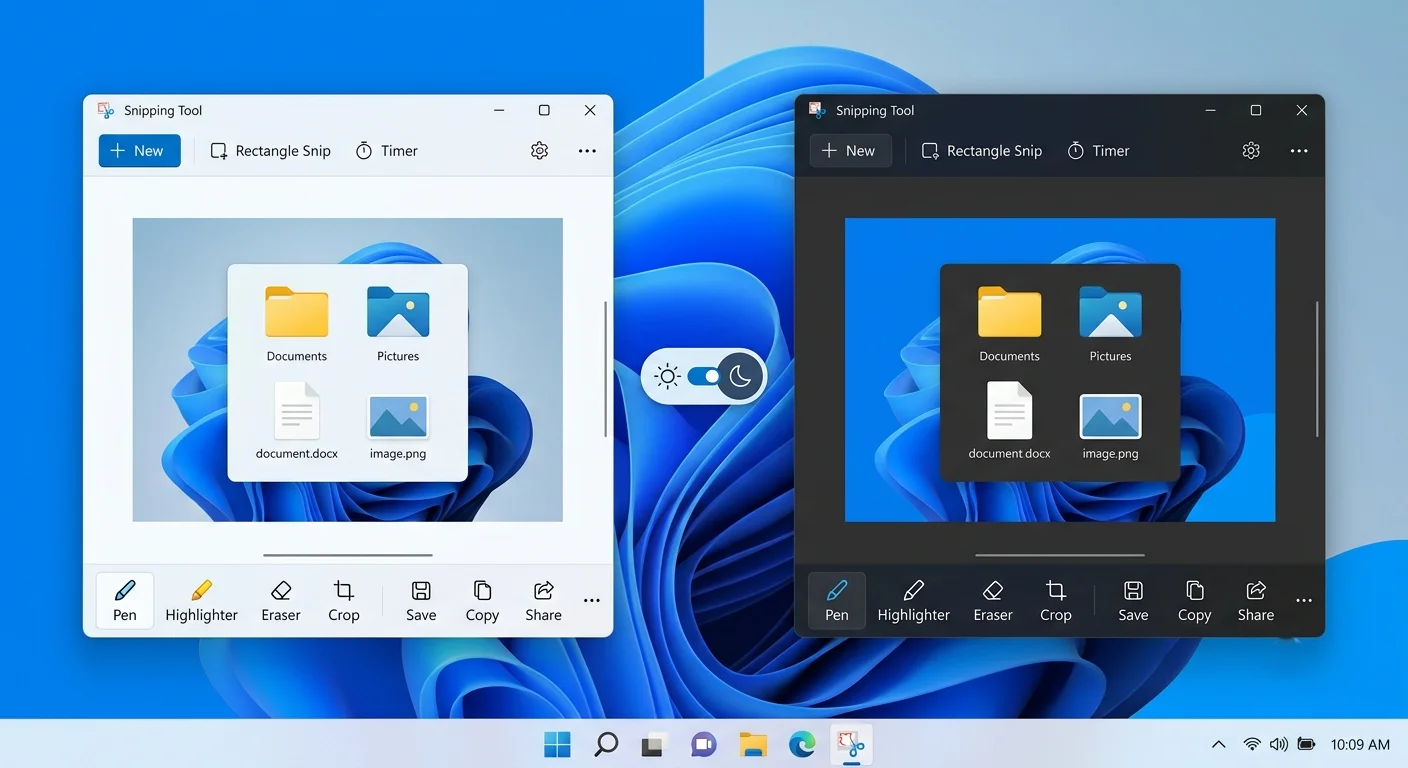
- Light: Uses a bright interface that’s ideal for well-lit environments.
- Dark: Displays a darker interface that is easier on the eyes, especially at night.
- Use System Setting: Automatically matches the current Windows 11 theme. If Windows switches between Light and Dark Mode, the Snipping Tool changes with it.
Each option affects only the app’s interface. Your screenshots remain unchanged regardless of the selected theme.
Who Can Use This Feature?
Theme customization is available for users running Windows 11 with a supported version of the Snipping Tool. If you do not see the App Theme option in the settings, the app may be outdated, or your Windows installation may require updates.
To avoid compatibility issues, install the latest Snipping Tool updates from the Microsoft Store before changing the app’s appearance.
How to Change the Snipping Tool Theme in Windows 11
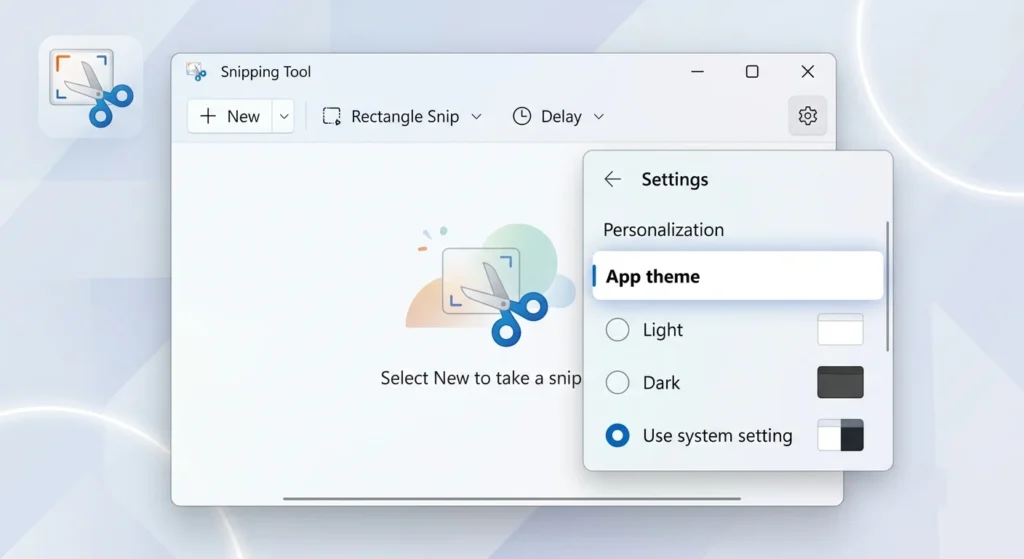
Changing the Snipping Tool theme takes only a few clicks. Follow these steps to switch between Light Mode, Dark Mode, or the system theme.
Step 1: Open Snipping Tool
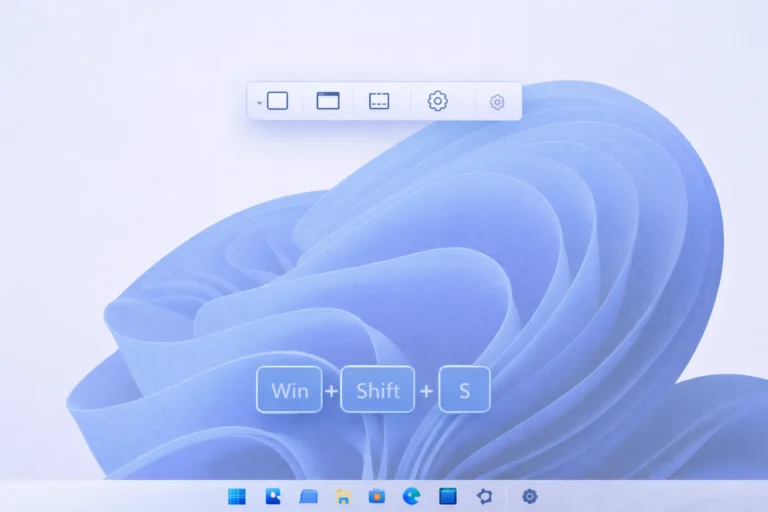
Click Start, type Snipping Tool, and open the app from the search results. You can also press Windows + Shift + S to launch the capture toolbar, then open the full application if needed.
Step 2: Open the Settings Menu
Inside the Snipping Tool window, click the three-dot menu in the upper-right corner and select Settings. This page contains all available customization options, including appearance, screenshot preferences, and screen recording settings.
Step 3: Find the Appearance Section
Scroll through the Settings page until you locate the Appearance section. Depending on your app version, this section may be labeled App Theme.
If the section is missing, update the app before continuing.
Step 4: Select Your Preferred App Theme
Under App Theme, choose one of the following options:
- Light
- Dark
- Use System Setting
The interface changes immediately after you make your selection, so you can instantly preview the new appearance.
Step 5: Verify the Theme Change
Return to the main Snipping Tool window and confirm that the interface reflects your chosen theme. If you selected Use System Settings, changing the Windows theme under Settings > Personalization > Colors should automatically update the Snipping Tool appearance as well.
What Does Each Theme Option Mean?
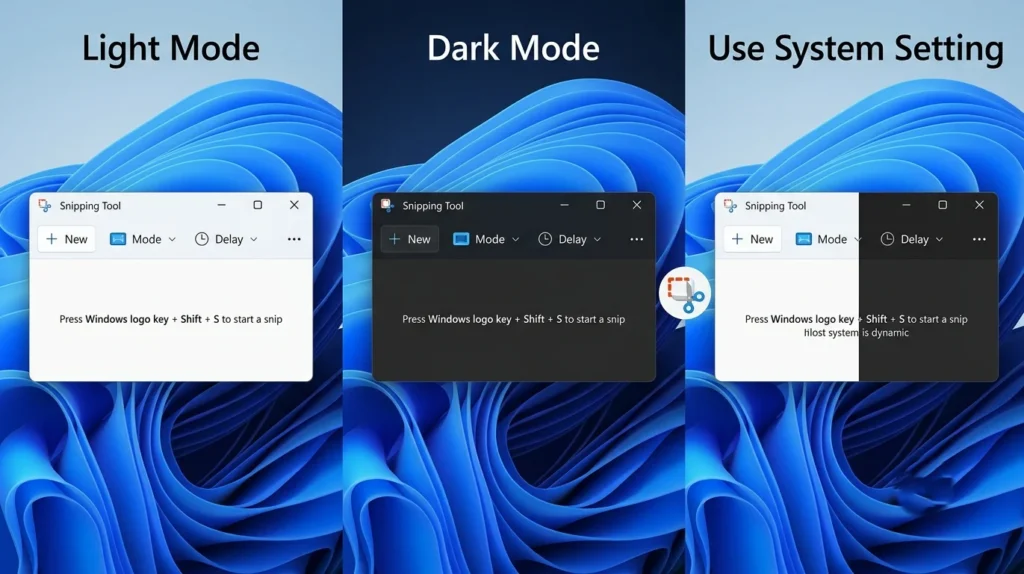
Choosing the right theme depends on your work environment and personal preference. Although all three options provide the same features and tools, they change how the application’s interface looks.
| Theme | Description | Best For |
|---|---|---|
| Light | Displays a bright interface with light backgrounds and dark text. | Daytime use or bright workspaces. |
| Dark | Uses dark backgrounds with light text to reduce glare. | Nighttime use or low-light environments. |
| Use System Setting | Automatically matches the current Windows 11 theme. | Users who frequently switch between Light and Dark Mode. |
No matter which option you choose, the Snipping Tool’s screenshot quality, editing features, and saved image format remain exactly the same. The theme changes only the appearance of the application.
Why Is the Theme Option Missing in Snipping Tool?
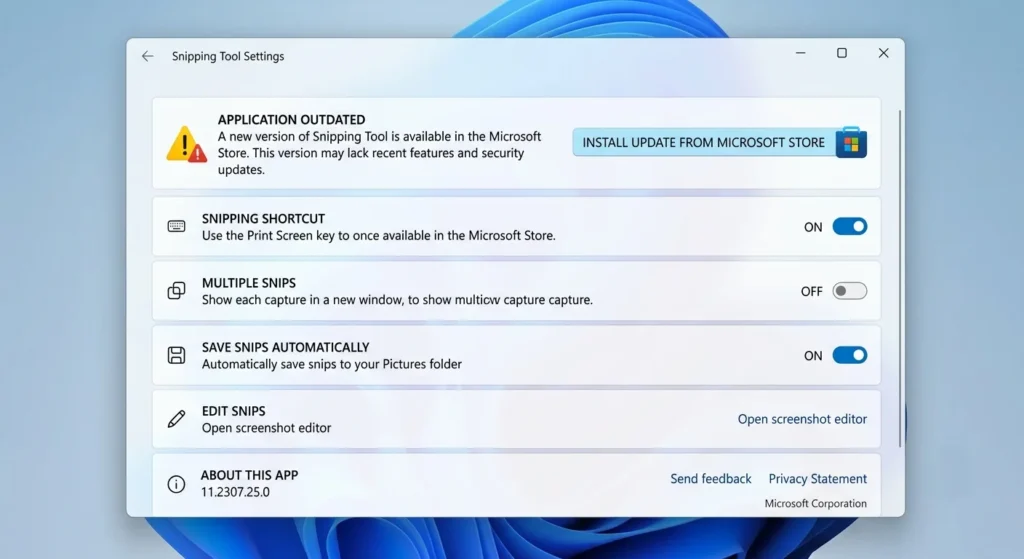
If you cannot find the App Theme setting, don’t worry. Several common reasons can prevent this feature from appearing.
Your Snipping Tool Is Outdated
Older versions of the Snipping Tool do not include the theme customization feature. Microsoft regularly adds new options through Microsoft Store updates.
Open the Microsoft Store, check for updates, and install the latest version of the Snipping Tool before looking for the setting again.
Your Windows 11 Version Is Too Old
Some Snipping Tool features require newer Windows 11 builds. If your operating system hasn’t been updated for a long time, certain settings, including appearance options, may not be available.
Install the latest Windows updates and restart your computer before opening the app again.
Microsoft Store Updates Are Pending
Sometimes Windows downloads app updates but waits for you to install them manually. Pending updates can prevent new features from appearing.
Launch the Microsoft Store, open the Library, and click Get updates. After the installation finishes, reopen the Snipping Tool.
The Feature Hasn’t Reached Your Device Yet
Microsoft occasionally rolls out new features gradually instead of releasing them to everyone at once. If your device is fully updated but the theme option is still unavailable, wait for the next app update and check again later.
How to Update Snipping Tool to Get the Latest Features
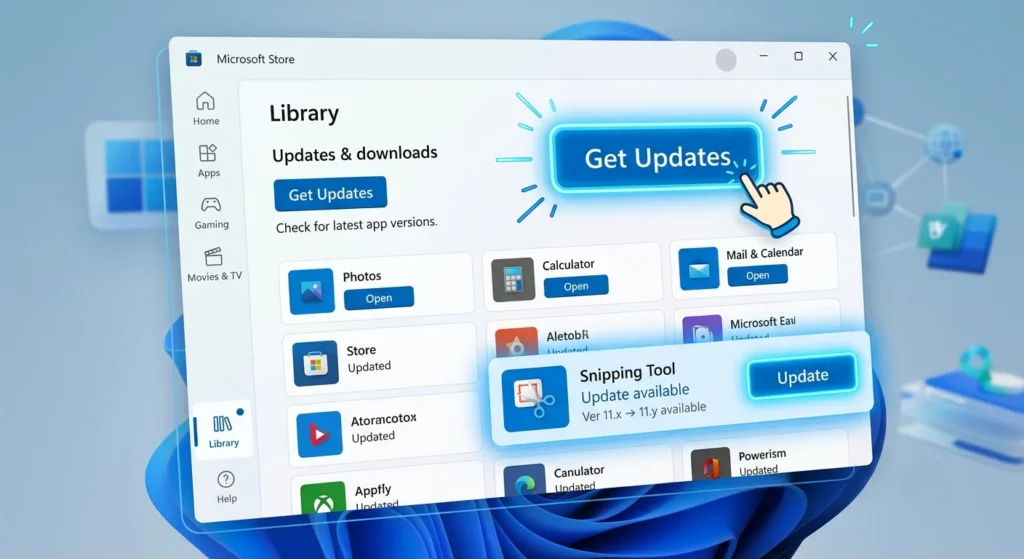
Keeping the Snipping Tool updated ensures you receive the newest improvements, bug fixes, and customization options.
Update through the Microsoft Store
Open the Microsoft Store and select Library from the left sidebar. Click Get updates to search for available app updates. If an update for the Snipping Tool appears, install it and wait for the process to finish.
Check Your Windows Version
Press Windows + I to open Settings, then go to Windows Update and select Check for updates. Install any available updates, as newer Windows builds often include compatibility improvements for built-in apps.
Restart the App After Updating
After updating both Windows and the Snipping Tool, completely close the application and reopen it. If necessary, restart your computer to ensure all new features load correctly before checking the Settings menu again.
How to Make Snipping Tool Follow the Windows Theme Automatically
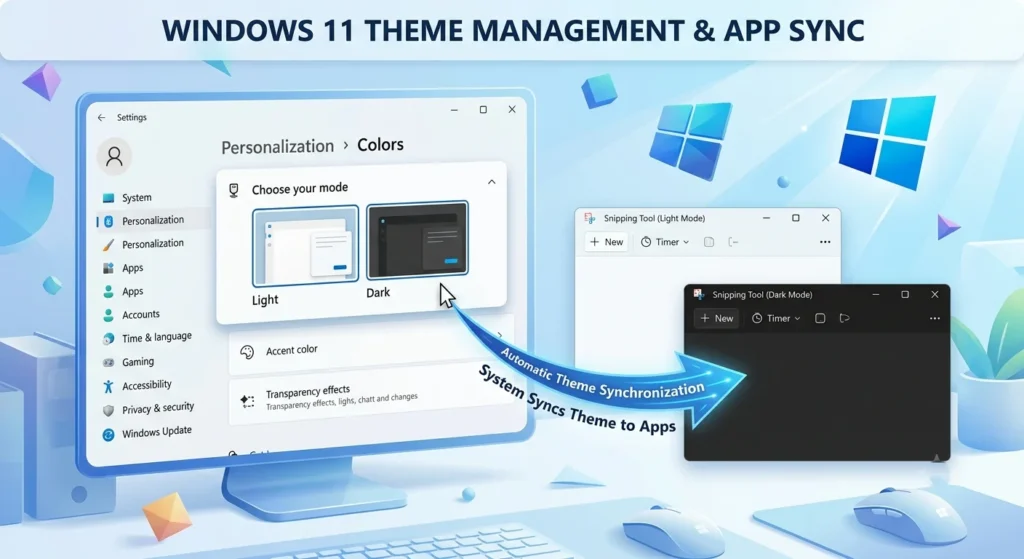
If you frequently switch between Light Mode and Dark Mode in Windows 11, you don’t have to change the Snipping Tool theme every time. Instead, you can let the app follow your system settings automatically.
Enable System Theme
Open the Snipping Tool, go to Settings, and select Use System Settings under App Theme. This option tells the app to match the appearance of Windows automatically.
Change Windows Color Mode
Next, open Settings > Personalization > Colors in Windows 11. Under Choose your mode, select either Light or Dark. The Snipping Tool will update its appearance to match the selected Windows theme when Use System Settings is enabled.
Verify Automatic Theme Switching
After changing the Windows theme, reopen the Snipping Tool or switch back to its main window. The interface should automatically reflect your Windows appearance settings without requiring any additional changes.
Does Changing the Snipping Tool Theme Affect Screenshots?
No. Changing the Snipping Tool theme only affects the application’s user interface. It does not change the quality, resolution, format, or appearance of the screenshots you capture.
Whether you choose the Light theme, Dark theme, or Use System Setting, every screenshot is saved exactly the same way. Your image quality depends on the display resolution and the file format you select, not on the app’s theme.
The editing tools also work the same regardless of the selected appearance. Features such as cropping, highlighting, drawing, text annotations, and screen recording remain unchanged.
Similarly, sharing screenshots through email, messaging apps, or cloud storage is unaffected. The theme simply changes how the Snipping Tool looks while you’re using it.
Tips for Using Snipping Tool in Dark Mode
Dark Mode can make the Snipping Tool more comfortable to use, especially if you spend long hours taking screenshots or recording your screen. The following tips can help you get the best experience.
- Use Dark Mode during evening hours to reduce eye strain in low-light environments.
- Enable automatic saving so your screenshots are stored immediately after capture, reducing the chance of losing important images.
- Learn keyboard shortcuts such as Windows + Shift + S to capture screenshots faster without opening the full application.
- Turn on screenshot borders if you frequently capture white windows or webpages, making screenshot edges easier to distinguish.
- Keep the app updated through the Microsoft Store to receive new features, appearance improvements, and security updates.
Following these practices improves your overall workflow while keeping the Snipping Tool easy to use.
Common Problems and How to Fix Them
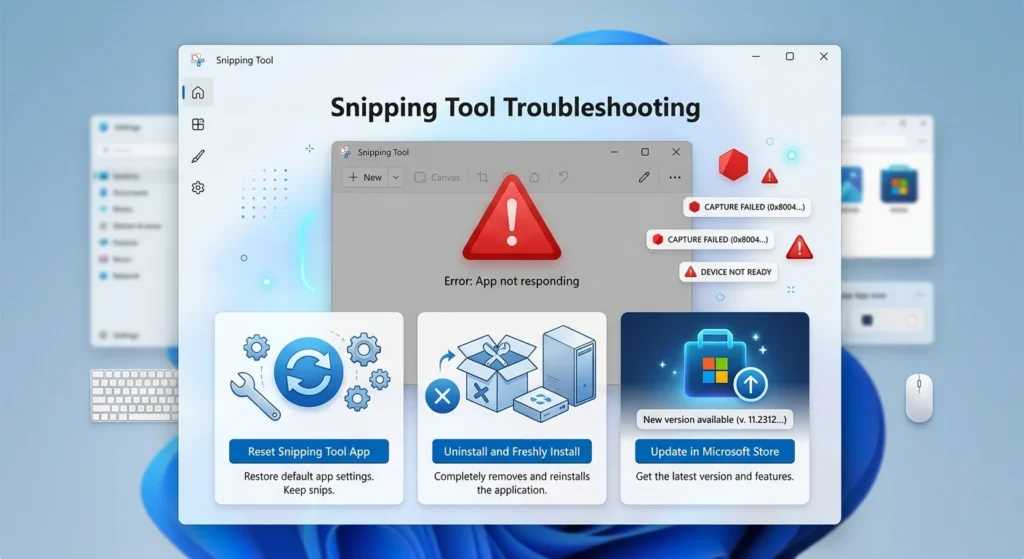
Even though changing the theme is straightforward, you may occasionally encounter issues. Fortunately, most problems can be resolved within a few minutes.
Theme Doesn’t Change
If the interface remains the same after selecting a different theme, close the Snipping Tool completely and reopen it. If the issue continues, restart your computer and try again.
Dark Mode Is Missing
A missing Dark Mode option usually indicates that you’re using an older version of the Snipping Tool or Windows 11. Update both the app and your operating system before checking the Settings menu again.
Settings Won’t Save
If the app forgets your selected theme after closing, it may be experiencing temporary configuration issues. Resetting the application often resolves this problem.
To reset the Snipping Tool:
- Open Settings in Windows.
- Go to Apps > Installed apps.
- Find Snipping Tool.
- Open Advanced options.
- Click Reset.
This restores the app to its default configuration without removing it from your computer.
Reinstall Snipping Tool
If resetting doesn’t solve the problem, reinstalling the application may help.
Remove the Snipping Tool from Windows, restart your computer, and install the latest version through the Microsoft Store. A clean installation replaces damaged files and ensures you have the newest features available.
Snipping Tool Theme vs Windows Theme
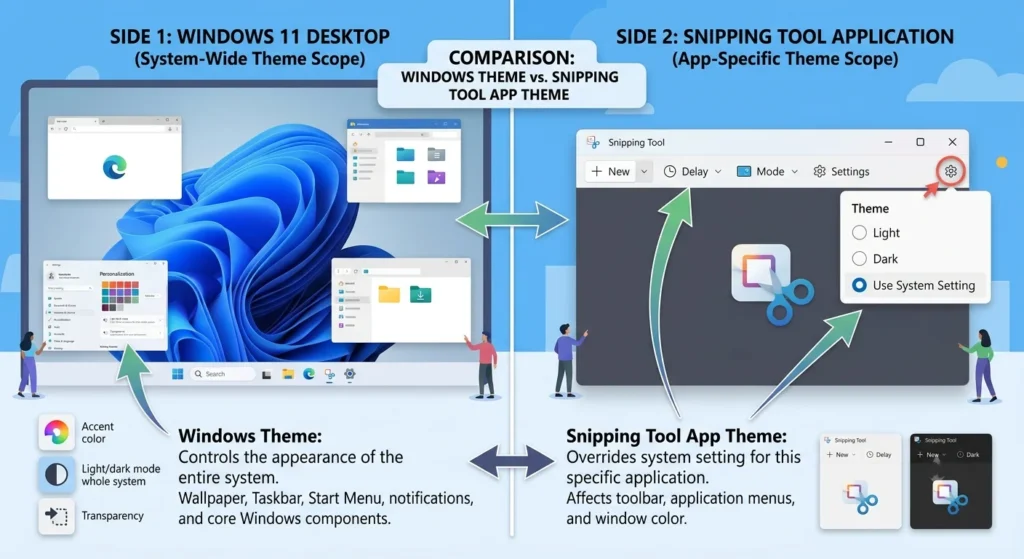
Although the two settings are related, they don’t control the same parts of your computer. Understanding the difference helps you choose the right option for your needs.
| Feature | Snipping Tool Theme | Windows Theme |
|---|---|---|
| Changes the Snipping Tool interface | Yes | Yes (when using Use System Setting) |
| Changes the Start Menu | No | Yes |
| Changes the Taskbar | No | Yes |
| Changes File Explorer | No | Yes |
| Changes screenshot quality | No | No |
| Automatically follows Windows appearance | Yes (when Use System Setting is selected) | System-wide |
If you only want the Snipping Tool to look different, change the App Theme inside the application. However, if you want every supported Windows app to switch between Light Mode and Dark Mode together, change the Windows color mode and select Use System Settings in the Snipping Tool.
Final Thoughts
Changing the Snipping Tool theme in Windows 11 is a simple way to personalize the app without affecting how your screenshots are captured or saved. Whether you prefer the clean look of Light Mode, the eye-friendly appearance of Dark Mode, or the convenience of Use System Settings, Windows 11 gives you the flexibility to choose the option that fits your workflow.
If the theme setting is missing, updating both the Snipping Tool and Windows 11 is usually enough to unlock the latest appearance features. Keeping the app up to date also ensures you receive performance improvements, bug fixes, and new functionality as Microsoft continues to enhance the Snipping Tool.
With the right theme selected and the latest version installed, you can enjoy a more comfortable screenshot experience while maintaining the same reliable capture quality and editing tools.
Frequently Asked Questions
Open Snipping Tool, click the three-dot menu, select Settings, and choose Dark under App Theme. If you don’t see this option, update the app through the Microsoft Store first.
Yes. The Snipping Tool lets you choose Light, Dark, or Use System Settings. You can switch between them at any time without affecting your screenshots.
The App Theme setting is usually missing because you’re using an older version of the Snipping Tool or an outdated Windows 11 build. Updating both Windows and the Snipping Tool normally resolves the issue.
No. The selected theme only changes the application’s appearance. It does not affect screenshot resolution, image quality, editing tools, or supported file formats.
Older versions of Windows 10 generally do not include the same built-in theme customization found in the modern Windows 11 Snipping Tool. Feature availability depends on your Windows version and the installed app version.
Open Snipping Tool > Settings > App Theme and select Use System Settings if you want the app to match your Windows appearance automatically. Alternatively, choose Light to return to the standard light interface.