How to Add Snipping Tool to Taskbar in Windows 10
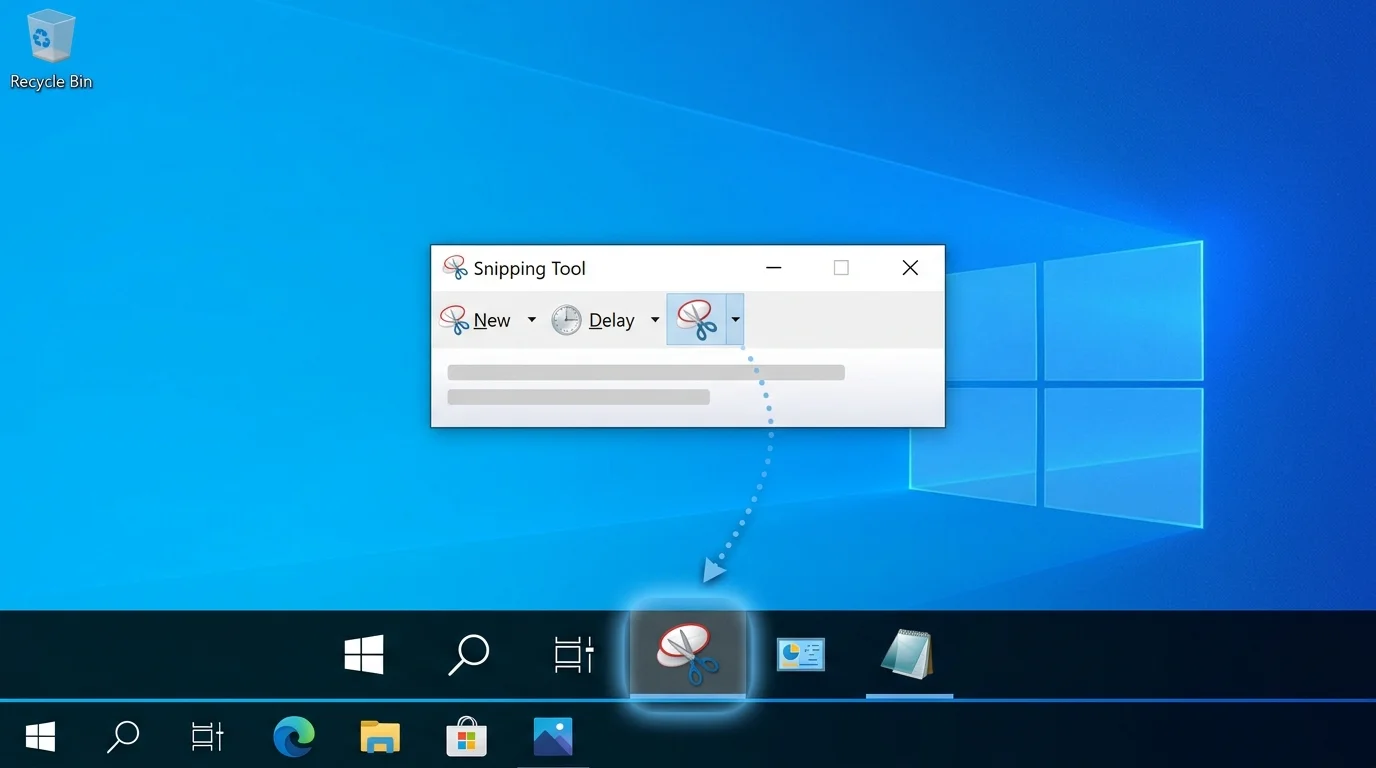
If you frequently take screenshots, you can add Snipping Tool to the taskbar in Windows 10 for faster access. The easiest method is to search for Snipping Tool, right-click the app, and select Pin to taskbar. You can also pin it after opening the app or create a shortcut if the normal option is unavailable.
Introduction
Taking screenshots on Windows 10 does not have to involve searching through menus every time. The built-in Snipping Tool makes it easy to capture part or all of your screen, but finding the app repeatedly can become inconvenient.
Fortunately, Windows 10 lets you pin frequently used applications directly to the taskbar. Once Snipping Tool is pinned, you can open it with a single click whenever you need to capture something on your screen.
In this guide, you will learn how to add Snipping Tool to the taskbar in Windows 10 using the simplest method first. You will also find alternative methods, troubleshooting steps, and keyboard shortcuts if the normal pinning option does not appear.
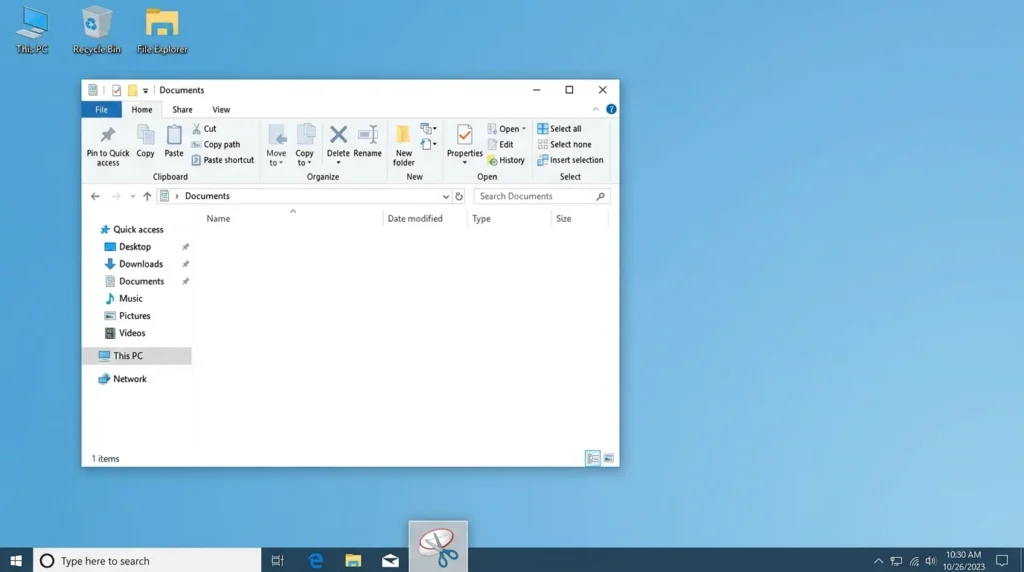
How to Add Snipping Tool to Taskbar in Windows 10
The quickest way to add Snipping Tool to your Windows 10 taskbar is through Search.
Method 1: Pin Snipping Tool From Windows Search
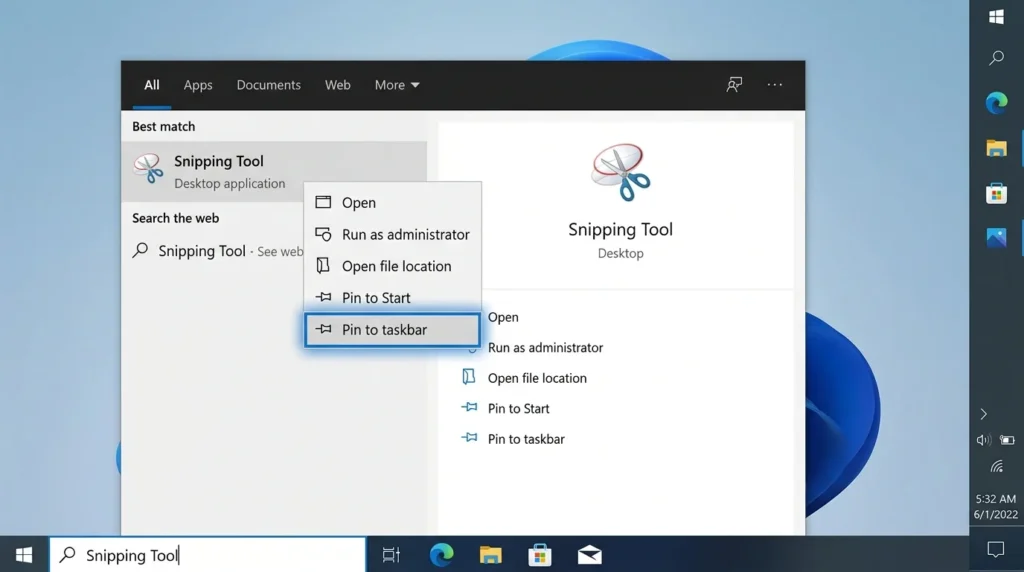
Follow these steps:
- Click the Search box on the Windows 10 taskbar.
- Type Snipping Tool.
- Wait for Snipping Tool to appear in the search results.
- Right-click Snipping Tool.
- Select Pin to taskbar.
- Check the taskbar for the Snipping Tool icon.
That’s it. The Snipping Tool shortcut should now remain on your taskbar for quick access.
Microsoft’s general Windows taskbar guidance confirms that you can search for an app, right-click its result, and select Pin to taskbar.
Method 2: Open Snipping Tool and Pin It From the Taskbar
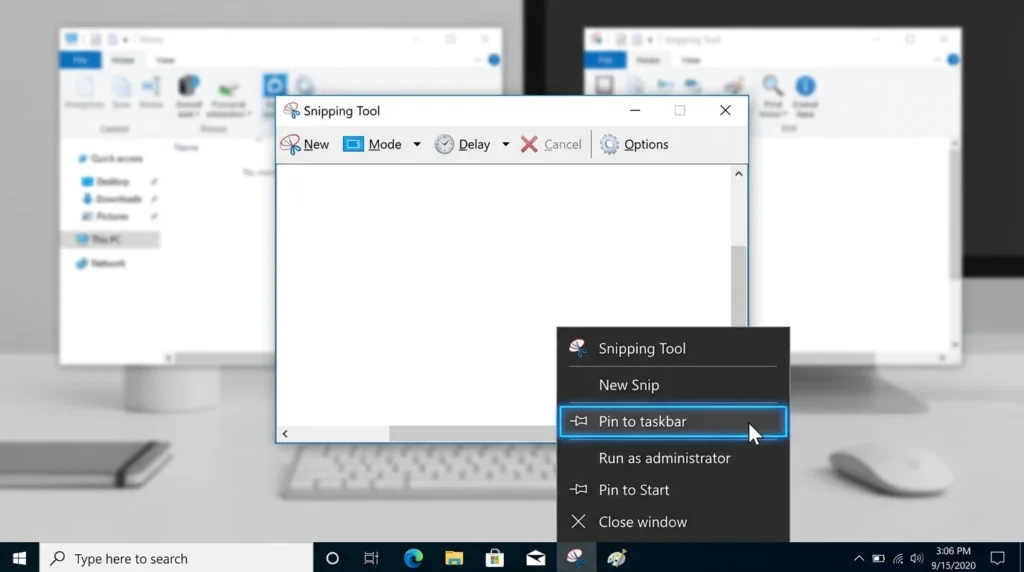
If you cannot find the Pin to taskbar option in Search, try opening Snipping Tool first.
- Open Windows Search.
- Type Snipping Tool.
- Select the app to open it.
- Look for the Snipping Tool icon on the taskbar.
- Right-click the Snipping Tool icon.
- Select Pin to taskbar.
After you pin the app, you can close Snipping Tool. Its icon should remain on the taskbar.
This method is useful because Windows supports pinning an application directly from its taskbar icon while the app is open.
How to Find Snipping Tool on Windows 10
If searching for Snipping Tool does not immediately show the app, try looking through the Start menu.
- Click the Start button.
- Browse the installed applications.
- Look for Snipping Tool.
- Right-click the app.
- Select More if that option appears.
- Select Pin to taskbar.
The exact menu structure can vary between Windows 10 builds. Therefore, using Windows Search is generally the easiest approach.
How to Pin Snipping Tool Using SnippingTool.exe
On traditional Windows 10 installations, the Snipping Tool executable may be located at:
C:\Windows\System32\SnippingTool.exeMicrosoft Q&A contains Windows 10 guidance identifying this location and describing the executable as the traditional Snipping Tool.
If you need to check the file manually:
- Open File Explorer.
- Go to your Windows installation drive.
- Open the Windows folder.
- Open System32.
- Look for SnippingTool.exe.
- If the file exists, you can use it to create a shortcut or try the available pinning options.
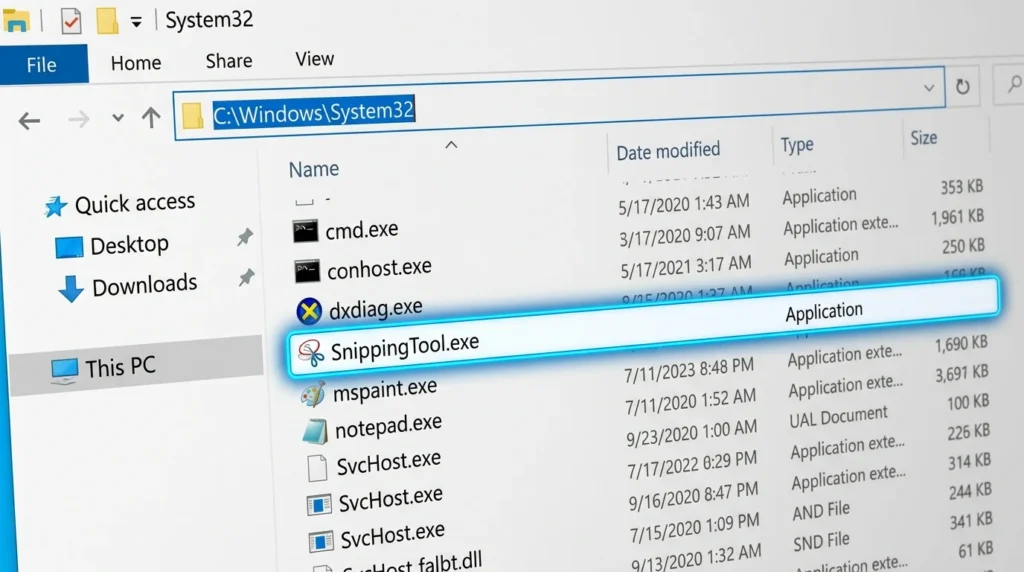
Important: Do Not Modify the System32 File
Do not rename, move, or delete SnippingTool.exe from the System32 folder.
System32 contains important Windows system files. If you only need quick access to Snipping Tool, create a shortcut rather than modifying the original executable.
Also, this method should be considered a fallback, not the first choice. Some Windows 10 versions and installations may use different Snipping Tool components or locations. For that reason, Windows Search is preferable when the application is available there.
How to Create a Snipping Tool Desktop Shortcut
If you cannot pin Snipping Tool directly, creating a shortcut can provide another way to access it.
Create a Shortcut From the Apps Folder
Windows provides an Apps folder that can be accessed through the Run dialog.
- Press Windows + R.
- Type:
shell:AppsFolder- Press Enter.
- Find Snipping Tool.
- Right-click the app.
- Select Create shortcut.
- If Windows asks whether you want to place the shortcut on the desktop, select Yes.
Microsoft documents the shell: AppsFolder method for creating desktop shortcuts for installed apps.
Once the shortcut is available, you can use it to launch Snipping Tool even if finding the application through the Start menu is inconvenient.
What to Do If “Pin to Taskbar” Is Missing
Sometimes the Pin to Taskbar option may not appear where you expect it. If that happens, don’t worry. Try these solutions in order.
1. Search for Snipping Tool Again
Open Windows Search and type Snipping Tool.
Make sure you are selecting the actual application rather than a document, web result, or unrelated search result.
2. Open Snipping Tool First
Launch Snipping Tool and then right-click its icon on the taskbar.
If Windows displays Pin to taskbar, select it.
3. Try the Start Menu
Open Start and locate Snipping Tool in the installed applications.
Right-click it and check for Pin to taskbar. Depending on your Windows 10 build, you may need to select More first.
4. Check the Traditional Executable
If Snipping Tool cannot be found through the normal interface, check:
C:\Windows\System32\SnippingTool.exeHowever, do not assume this file must exist on every Windows 10 installation. Windows versions and app implementations can differ.
5. Restart Windows Explorer
If the taskbar itself is behaving strangely, restarting Windows Explorer can sometimes refresh the taskbar interface.
To do this:
- Press Ctrl + Shift + Esc to open Task Manager.
- Find Windows Explorer in the process list.
- Right-click Windows Explorer.
- Select Restart.
- Wait for the taskbar to reload.
- Try pinning Snipping Tool again.
Restarting Windows Explorer does not reinstall Snipping Tool. It simply reloads the Windows shell, including the taskbar.
Why Can’t I Find Snipping Tool on Windows 10?
There are several possible reasons.
Your Windows 10 version may use a different Snipping Tool setup than another computer. In addition, the application may not appear where you expect it in the Start menu.
If Search does not find it, check the Start menu and then look for the traditional executable in:
C:\Windows\System32\SnippingTool.exeMicrosoft Q&A discussions also document cases where users could locate the traditional Windows 10 Snipping Tool through this System32 path.
If the executable is missing, do not download a random SnippingTool.exe file from an unofficial website. A system file should come from a trusted Windows installation or Microsoft-supported recovery process.
How to Open Snipping Tool Without Pinning It
You do not have to pin Snipping Tool to capture a screenshot.
Use Windows Search
Press the Windows key and type Snipping Tool. Then select the application from the search results.
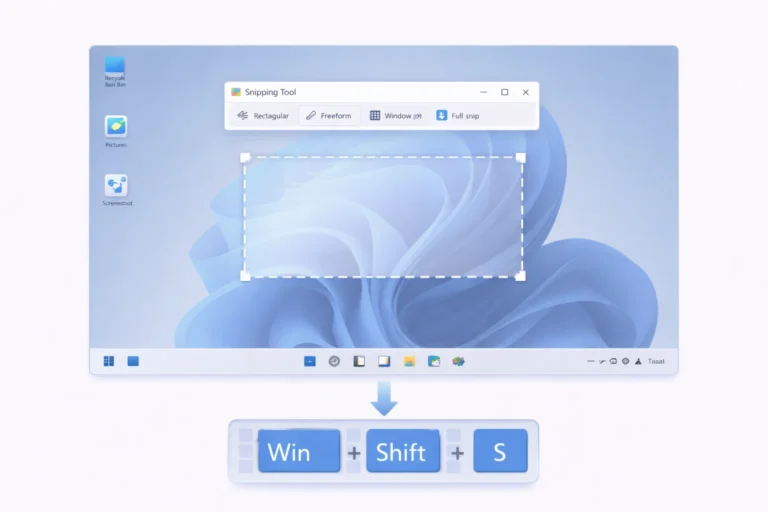
Use Windows + Shift + S
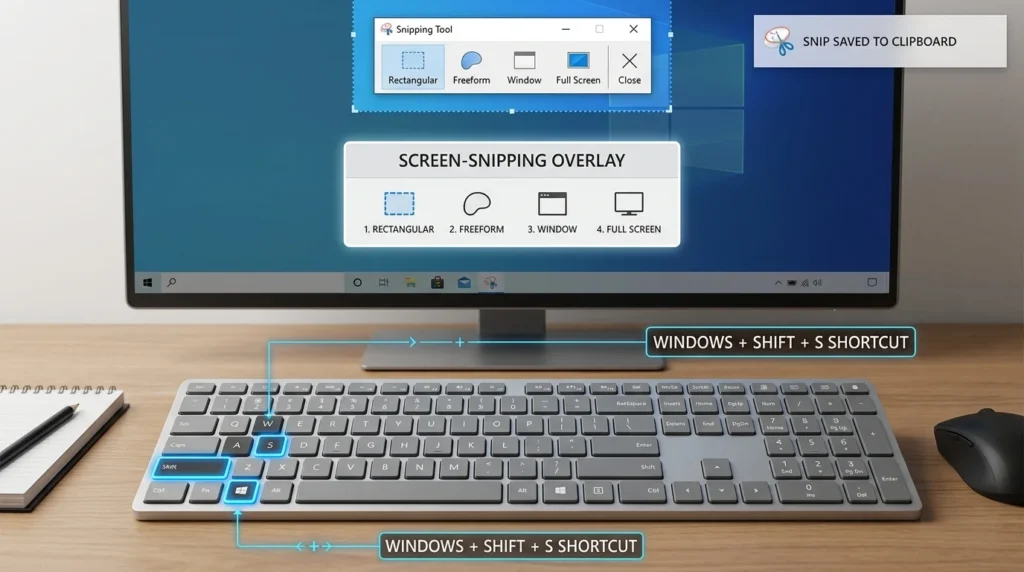
Windows 10 also supports the Windows + Shift + S keyboard shortcut for quickly opening the screen-snipping interface.
This shortcut is particularly useful when you want to capture an area of the screen without first opening the full Snipping Tool application.
However, if you regularly use Snipping Tool’s application window, pinning the app to the taskbar can still be more convenient.
Snipping Tool vs. Windows + Shift + S
Both options can help you capture screenshots, but they serve slightly different purposes.
| Feature | Snipping Tool | Windows + Shift + S |
|---|---|---|
| Open Snipping Tool | Yes | No |
| Quickly capture part of the screen | Yes | Yes |
| Pin the app to the taskbar | Yes | No |
| Requires searching for the app | Not after pinning | No |
| Best for | Regular access to the app | Fast screen captures |
If you take screenshots frequently, keeping Snipping Tool on the taskbar gives you another convenient way to launch it.
How to Remove Snipping Tool From the Taskbar
If you no longer want Snipping Tool on your taskbar, you can remove the pinned shortcut without uninstalling the application.
- Right-click the Snipping Tool icon on the taskbar.
- Select Unpin from taskbar.
The application remains installed. You are only removing its shortcut from the taskbar.
Microsoft confirms that an app can be removed from the taskbar by right-clicking its pinned icon and selecting Unpin from taskbar.
Can You Pin Other Windows 10 Apps to the Taskbar?
Yes. The same basic process works for many Windows applications.
Open Windows Search, type the application name, right-click the result, and select Pin to taskbar when the option is available.
You can also pin an application that is already open by right-clicking its taskbar icon and selecting Pin to taskbar.
This makes the taskbar useful for keeping frequently used applications within easy reach.
Final Thoughts
Adding Snipping Tool to the Windows 10 taskbar is simple. In most cases, the fastest approach is to search for Snipping Tool, right-click the application, and choose Pin to taskbar.
If that option is not available, open Snipping Tool first and check its taskbar icon. You can also look for the traditional SnippingTool.exe file in C:\Windows\System32 or create an application shortcut as an alternative.
Once pinned, Snipping Tool stays within easy reach, making frequent screenshot tasks much faster.
Note: Windows 10 reached the end of Microsoft’s standard support lifecycle on October 14, 2025. The steps in this guide are specifically for Windows 10 systems, but users should consider Microsoft’s supported upgrade options if their hardware supports a newer Windows version.
Frequently Asked Questions
Yes. Search for Snipping Tool, right-click the application, and select Pin to taskbar. You can also open the app and pin it from its taskbar icon.
On traditional Windows 10 installations, the Snipping Tool executable can be found at C:\Windows\System32\SnippingTool.exe. However, the exact implementation can vary between Windows versions and installations.
Try opening Snipping Tool first and then right-clicking its taskbar icon. You can also search for the application through the Start menu and check its context menu.
Search for Snipping Tool, right-click the application, and choose Pin to taskbar. If you cannot find it, check the Start menu or look for the traditional executable in System32.
Yes. Windows provides an Apps folder that you can open with shell: AppsFolder. From there, you can right-click an application and use Create shortcut.
Yes. Right-click the Snipping Tool icon on the taskbar and select Unpin from taskbar.