Where Are Snipping Tool Images Saved in Windows 11?Guide
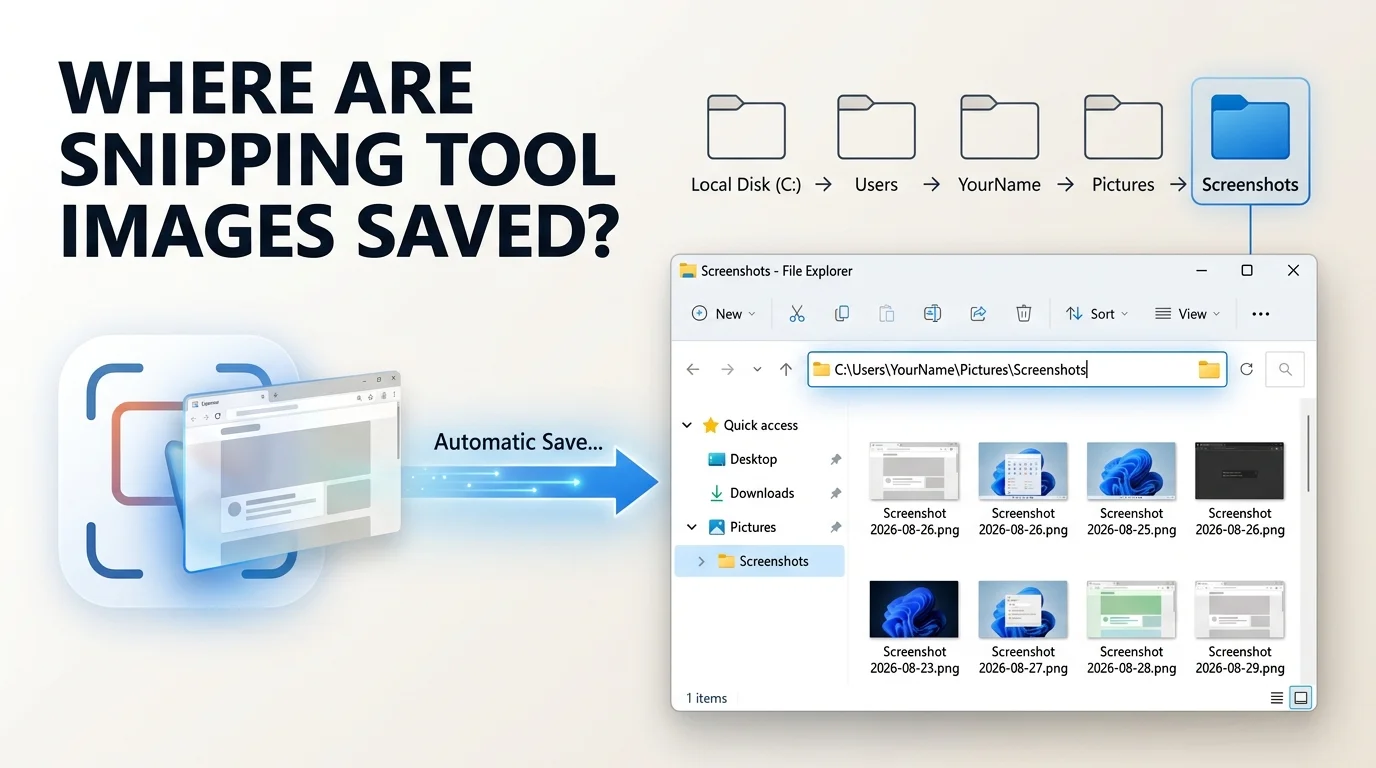
If you’re wondering where Snipping Tool images are saved in Windows 11, start by checking the Pictures > Screenshots folder. When Snipping Tool is set to automatically save screenshots, this is the usual location for captured images.
The standard Windows path is:
C:\Users\YourName\Pictures\Screenshots
However, your screenshots may be somewhere else if you changed the Snipping Tool save location, manually saved the image to another folder, or use OneDrive to back up your Pictures folder.
In this guide, you’ll learn where Snipping Tool images are stored, how to find them quickly, how to change their save location, and what to do if a screenshot seems to have disappeared.
Where Are Snipping Tool Images Saved in Windows 11?
Automatically saved Snipping Tool screenshots are normally found in the Screenshots folder inside Pictures.
You can get there by opening:
File Explorer → Pictures → Screenshots
The typical file path is:
C:\Users\YourName\Pictures\Screenshots
Here, YourName represents your Windows user account name.
Keep in mind that this is the usual location, not a guarantee for every Windows 11 computer. Snipping Tool’s screenshot save location can be changed, so a missing image doesn’t necessarily mean the screenshot was deleted.
How to Open the Snipping Tool Screenshots Folder
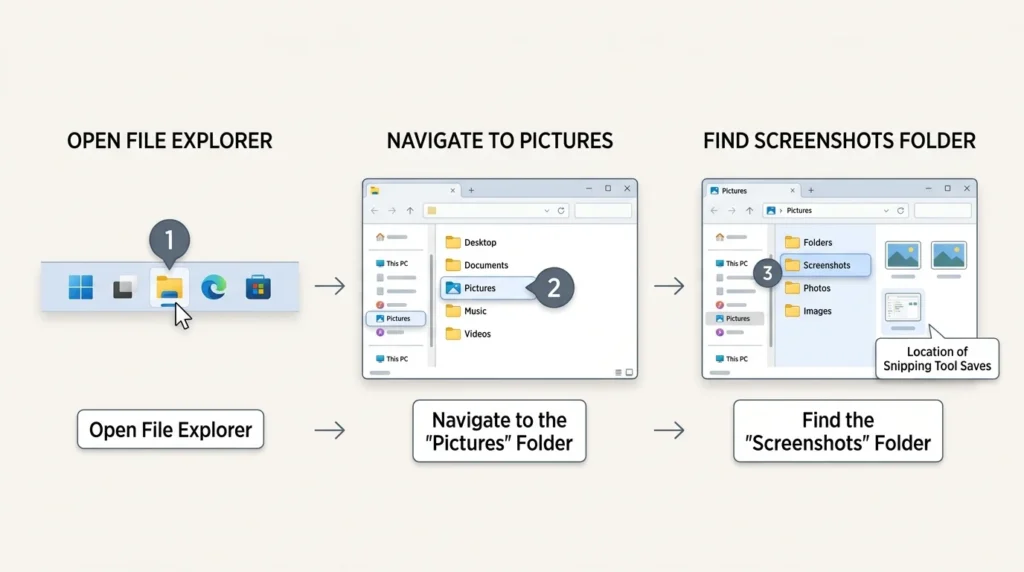
The easiest way to check for your screenshots is through File Explorer.
- Press Windows + E to open File Explorer.
- Select Pictures from the left-side navigation.
- Open the Screenshots folder.
- Look for the screenshot you recently captured.
You can also enter this shortcut into File Explorer’s address bar:
%UserProfile%\Pictures\Screenshots
Press Enter, and Windows will attempt to open the standard Screenshots folder.
If your Snipping Tool save location has been changed, however, this shortcut may not contain your latest screenshot.
Does Snipping Tool Automatically Save Screenshots in Windows 11?
Yes. Current versions of Snipping Tool support automatic saving for captured screenshots.
That doesn’t mean every screenshot you take will always be found in the same folder. The automatic-save setting and screenshot destination can be changed, and manually saved images can be placed in a location of your choice.
There is also an important difference between capturing a screenshot and saving a screenshot as a file.
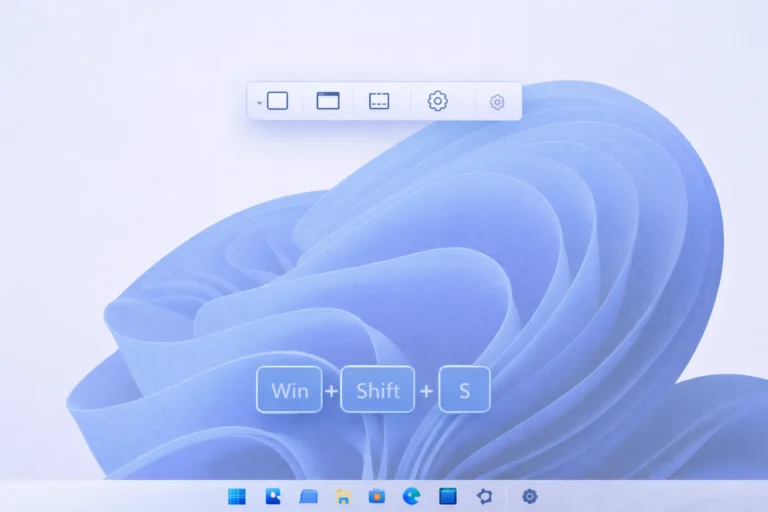
For example, Windows + Shift + S captures a selected area of the screen and places the capture on the clipboard. You can then open Snipping Tool to edit or save the image.
How to Turn On Automatic Saving in Snipping Tool
To check whether automatic screenshot saving is enabled:
- Open Snipping Tool from the Start menu or Windows Search.
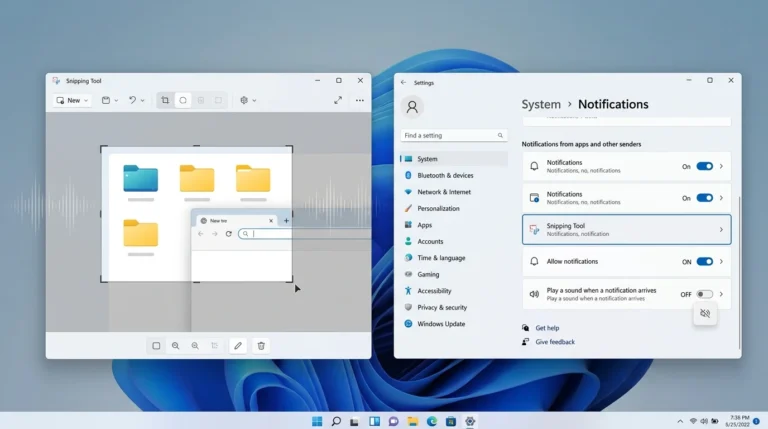
- Click the three-dot menu in the upper-right corner.
- Select Settings.
- Look for the screenshot-saving option.
- Turn on automatic saving if you want new captures to be saved automatically.
The exact wording of the setting can vary slightly between Snipping Tool versions.
If automatic saving is disabled, capturing an image doesn’t necessarily mean you’ll find a new image file waiting in the Screenshots folder.
How to Find Snipping Tool Images in Windows 11
If you’ve just captured an image and can’t remember where it went, there are several quick ways to find it.
Method 1: Check the Pictures Folder
Start with:
File Explorer → Pictures → Screenshots
Once you’re inside the folder, sort the files by Date modified. Your newest screenshots should then be easier to identify.
Method 2: Search for the Image
If the Screenshots folder is empty, use File Explorer’s search feature.
For example, you can search for:
*.png
Then sort the results by Date modified.
This is especially useful if you’ve previously changed the screenshot save location or saved images in different folders.
Method 3: Check Snipping Tool Settings
If you still can’t find the image, open:
Snipping Tool → Three-dot menu → Settings
Check the screenshot-saving options and the configured save location.
If the destination was changed in the past, your screenshots may be going to a custom folder instead of the standard Pictures > Screenshots location.
Where Does Snipping Tool Save Screenshots When OneDrive Is Enabled?
OneDrive can make screenshot locations slightly confusing because your Windows Pictures folder can be included in OneDrive backup.
If Pictures is being backed up or synchronized with OneDrive, check the Pictures folder associated with your OneDrive setup as well.
A possible location is:
C:\Users\YourName\OneDrive\Pictures\Screenshots
However, don’t assume this exact path applies to every computer. Your OneDrive configuration and account setup determine where the synchronized folder appears.
You can check whether Pictures is being backed up by opening OneDrive settings and looking under Sync and backup.
OneDrive’s current setup allows standard Windows folders, including Pictures, to be backed up. If Pictures is part of that setup, screenshots stored there can also appear through your OneDrive files.
How to Change the Snipping Tool Save Location
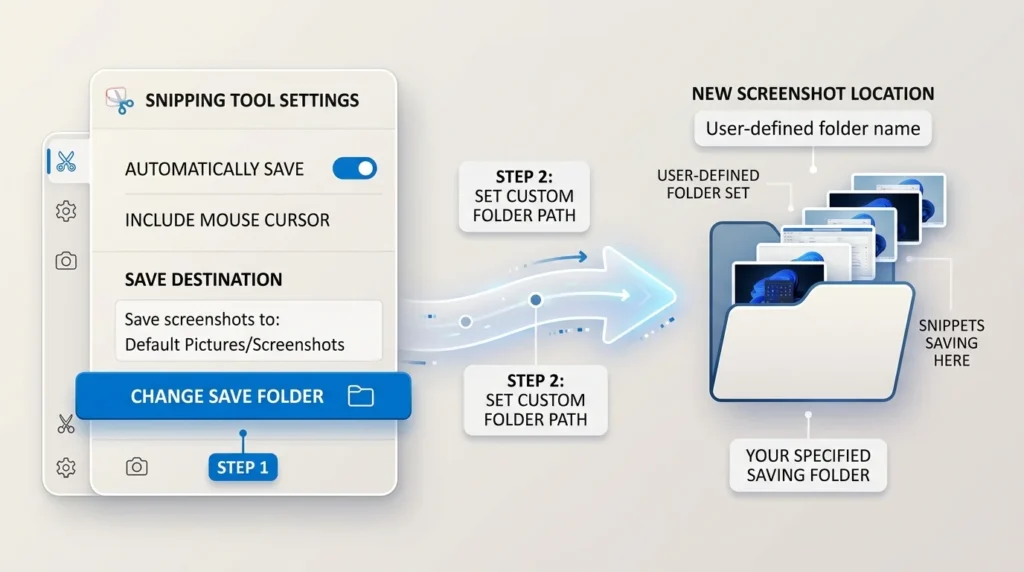
You don’t have to keep automatically saved screenshots in the default folder.
Snipping Tool includes settings for controlling where screenshots are automatically saved. This can be useful if you take a lot of screenshots for work, school, tutorials, or other projects and want them organized in a dedicated folder.
Steps to Change the Screenshot Folder
- Open Snipping Tool.
- Click the three-dot menu.
- Select Settings.
- Find the screenshot-saving section.
- Look for the option to change the screenshot location.
- Choose the folder you want to use.
- Confirm the change if Windows asks for confirmation.
Afterward, newly captured screenshots should use the configured destination for automatic saving.
Can You Save Snipping Tool Screenshots to the Desktop?
Yes. You can use a Desktop folder as the destination if Snipping Tool allows you to select it as the automatic screenshot location.
However, keeping a large number of screenshots directly on the Desktop can make it cluttered. A dedicated folder such as Desktop > Screenshots is usually easier to manage.
Remember that changing the automatic-save location doesn’t necessarily move screenshots that were already saved in the old folder.
Where Are Manually Saved Snipping Tool Images Stored?
Manually saved screenshots are different from automatically saved screenshots.
When you choose Save or Save as after capturing an image, you can select the folder and filename yourself.
That means there isn’t one universal location for every Snipping Tool image.
Depending on what you selected, a manually saved screenshot could be in:
- Desktop
- Downloads
- Documents
- Pictures
- A project folder
- An external drive
- Another custom location
If you can’t remember where you saved it, use File Explorer to search for recently modified image files.
For example:
*.png
You can then sort the results by date to narrow down the possibilities.
Why Can’t I Find My Snipping Tool Screenshot?
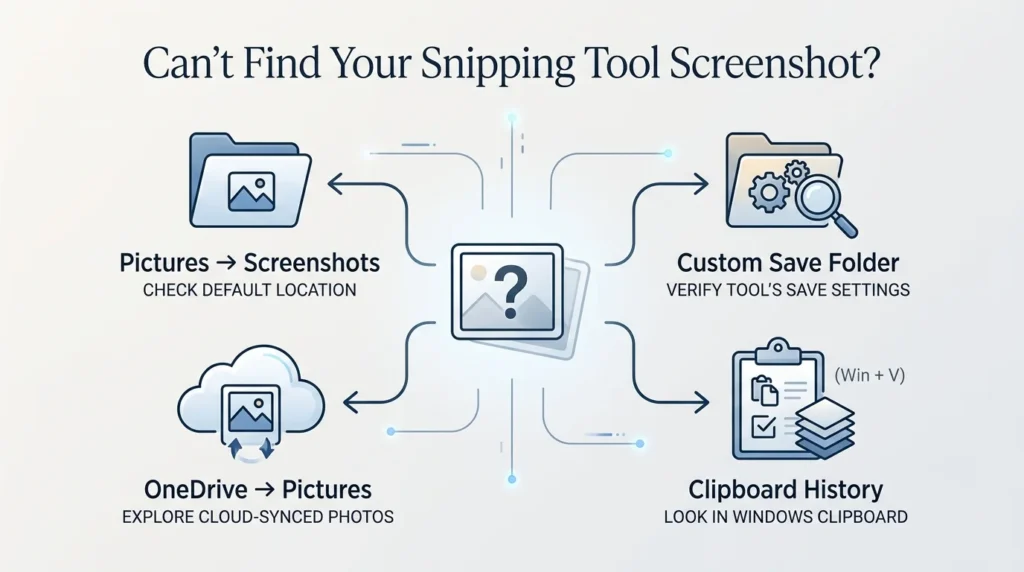
There are several reasons a Snipping Tool screenshot may not appear where you expect it.
1. The Screenshot Save Location Was Changed
The screenshot folder may have been changed from its original location.
Open Snipping Tool → Settings and check the current screenshot-saving location.
This is one of the first things to check if the standard Screenshots folder doesn’t contain your image.
2. You Manually Saved the Image Somewhere Else
If you clicked Save or Save as, you may have selected a different destination.
Think about the folder you chose when saving the screenshot. If you don’t remember, search your computer for recently modified PNG files.
3. The Screenshot Was Copied to the Clipboard
A screenshot captured with Windows + Shift + S is placed on the clipboard.
If you haven’t saved it as a file, you may still be able to paste it into another application.
You can also press:
Windows + V
to open Clipboard History.
Clipboard History isn’t enabled by default on Windows. If it hasn’t been turned on, Windows will give you the option to enable it.
4. Your Pictures Folder Uses OneDrive
If your Pictures folder is backed up to OneDrive, your screenshots may be associated with the OneDrive version of that folder.
Check:
OneDrive → Pictures → Screenshots
OneDrive’s current folder-backup system can include the Pictures folder, so this is worth checking when your local Pictures folder doesn’t contain the screenshot.
5. You’re Looking at the Wrong Screenshot Folder
Windows provides several ways to capture screenshots, and they don’t all behave the same way.
For example, Windows + Shift + S is designed to capture a selected area and place the result on the clipboard. Other screenshot methods can save files differently.
So before assuming your screenshot is missing, make sure you’re checking the location associated with the capture method you actually used.
How to Find a Missing Snipping Tool Screenshot
If your screenshot isn’t in the usual folder, work through these checks in order.
Step 1: Check Pictures > Screenshots
First, open:
%UserProfile%\Pictures\Screenshots
Look for recently created image files.
Step 2: Check the Snipping Tool Save Location
Open:
Snipping Tool → Settings
Check where automatic screenshots are currently being saved.
If the location was changed, use that folder instead of the standard Screenshots directory.
Step 3: Check OneDrive
If you use OneDrive, open your OneDrive folder and look under:
Pictures → Screenshots
Also check whether the Pictures folder is included in OneDrive’s backup settings.
Step 4: Search for PNG Files
Open File Explorer and search:
*.png
Then sort the results by Date modified.
This is one of the quickest ways to locate a screenshot when you don’t know its exact folder.
Step 5: Check Clipboard History
Press:
Windows + V
If Clipboard History was already enabled and the screenshot is still available, you may find the captured image there.
If you captured the screenshot recently but never saved it as a file, this check can be particularly useful.
What Happens When You Press Windows + Shift + S?
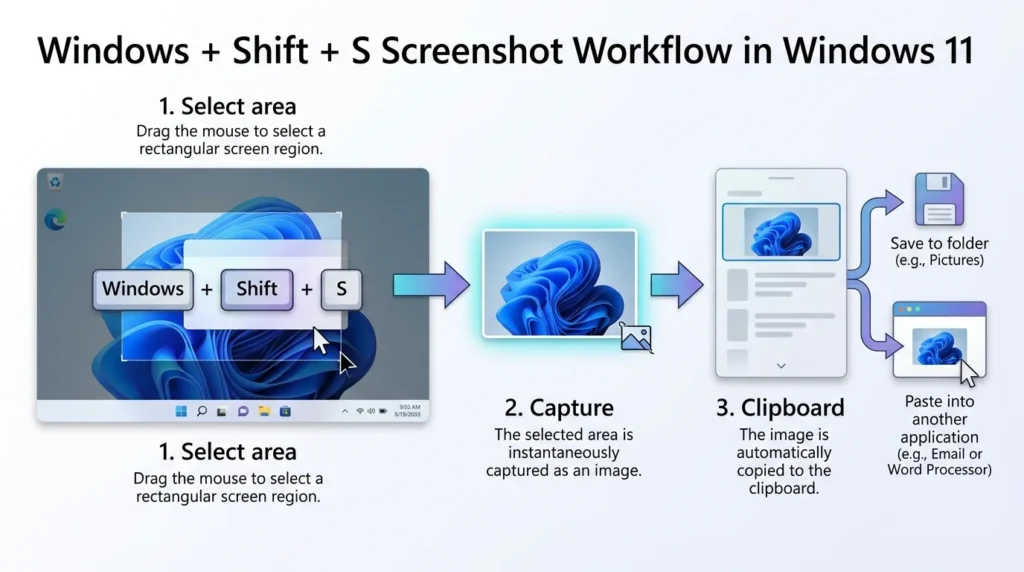
When you press Windows + Shift + S, Windows opens its screen-snipping interface so you can select an area of your screen.
The captured image is placed on the clipboard, after which you can open Snipping Tool and work with the capture.
This is why you shouldn’t automatically assume that every image captured with Windows + Shift + S has already been saved as a normal image file.
If you’re trying to locate one, check both the Snipping Tool’s configured save location and the clipboard.
What Is the Difference Between a Saved Screenshot and a Clipboard Image?
A saved screenshot and a clipboard image are two different things.
A saved screenshot is an image file stored in a folder on your computer or in another configured location.
A clipboard image is captured content that Windows is holding so it can be pasted into another application.
For example, after capturing part of your screen, you can paste the image into a compatible application with:
Ctrl + V
If you only copied the screenshot to the clipboard and never saved it, there may not be a PNG file sitting in the Screenshots folder.
This distinction is one of the main reasons people think Snipping Tool has lost their screenshot when the image was actually only copied to the clipboard.
Where Are Screenshots Saved by Other Windows 11 Screenshot Tools?
Not every Windows screenshot method uses Snipping Tool in exactly the same way.
Windows + Print Screen
Windows also supports screenshot capture using Windows + Print Screen.
This shortcut behaves differently from Windows + Shift + S because it is designed to capture the screen and save the resulting screenshot as an image file.
If you’re troubleshooting a screenshot, make sure you remember which shortcut you used.
Print Screen
The Print Screen key can copy screen content to the clipboard rather than creating a saved image file in the folder you’re checking.
This is why pressing Print Screen and then looking in Pictures > Screenshots may not give you the result you expected.
The important point is that Windows screenshot shortcuts don’t all have identical save behavior.
How to Open the Snipping Tool Screenshot Folder Quickly
If you’re using the standard Pictures location, there’s a quick way to open the folder.
Press:
Windows + E
Then enter:
%UserProfile%\Pictures\Screenshots
Press Enter.
Windows will open that location if the folder exists there.
If you previously changed Snipping Tool’s automatic save location, however, use the location shown in Snipping Tool Settings: Where are Snipping Tool images saved in Windows 11?
Final Thought
So, where are Snipping Tool images saved in Windows 11?
In most cases, automatically saved screenshots are found here:
C:\Users\YourName\Pictures\Screenshots
You can also open the standard location quickly with:
%UserProfile%\Pictures\Screenshots
If your screenshot isn’t there, don’t assume it has been deleted. Check Snipping Tool Settings, look in your OneDrive Pictures folder if you use OneDrive, search File Explorer for recently modified PNG files, and check Clipboard History with Windows + V.
The key is to distinguish between a screenshot that was automatically saved, one that was manually saved, and one that was only copied to the clipboard.
Frequently Asked Questions
Automatically saved Snipping Tool screenshots are normally stored in the Pictures > Screenshots folder. If you’ve changed the save location or use a backed-up Pictures folder, the actual location may be different.
Start by checking Pictures > Screenshots. If it isn’t there, check Snipping Tool’s current save location, your OneDrive Pictures folder, and Clipboard History.
Current Windows 11 versions of Snipping Tool support automatic screenshot saving. Whether your captures are automatically saved depends on the relevant Snipping Tool settings.
Open Snipping Tool → three-dot menu → Settings, then check the screenshot-saving options and change the configured folder if the option is available in your version.
They can be available through OneDrive when your Pictures folder is included in OneDrive backup or synchronization. Check OneDrive → Pictures → Screenshots if you can’t find a screenshot in your local Pictures folder.
The location depends on the folder you select in the Save dialog. A manually saved image can be stored anywhere you choose.
If you captured it recently and Clipboard History was enabled, press Windows + V to check whether the image is still available. If it was never saved and is no longer available in the clipboard, recovery may not be possible.