
How to Record Meetings With Snipping Tool (Step-by-Step Guide)
Online meetings have become a daily part of work, education, and collaboration. Sometimes you may want to record a meeting to review important details later or share it with team members who couldn’t attend.
If you are using Windows 11, the built-in Snipping Tool now includes a screen recording feature, making it possible to capture meetings directly from your computer screen.
In this guide, you will learn how to record meetings with Snipping Tool, including step-by-step instructions, shortcuts, supported meeting platforms, and important limitations.
Can You Record Meetings With Snipping Tool?
Yes, you can record meetings using Snipping Tool in Windows 11. Microsoft added a screen recording feature to the Snipping Tool in recent Windows updates, allowing users to record part of their screen as a video.
This feature works well for recording:
- Online meetings
- Webinars
- Training sessions
- Presentations
- Tutorials
However, it is important to know that Snipping Tool records screen video only. It does not record system audio or microphone audio in most versions, which may limit its usefulness for some meeting recordings.
Requirements Before Recording a Meeting
Before you start recording meetings with Snipping Tool, make sure you meet the following requirements.
Windows 11 Device
The screen recording feature is available only in Windows 11, not Windows 10.
Updated Snipping Tool
Make sure the Snipping Tool is updated through the Microsoft Store.
Meeting Open on Your Screen
The meeting should already be running in your browser or app, such as:
- Zoom
- Microsoft Teams
- Google Meet
Once everything is ready, you can start recording the meeting.
How to Record Meetings With Snipping Tool (Step-by-Step)
Follow these simple steps to record your meeting.
Step 1: Open the Snipping Tool
Click the Start menu and search for Snipping Tool, then open the application.
You can also use the shortcut:
Windows + Shift + S
This opens the Snipping Tool interface.
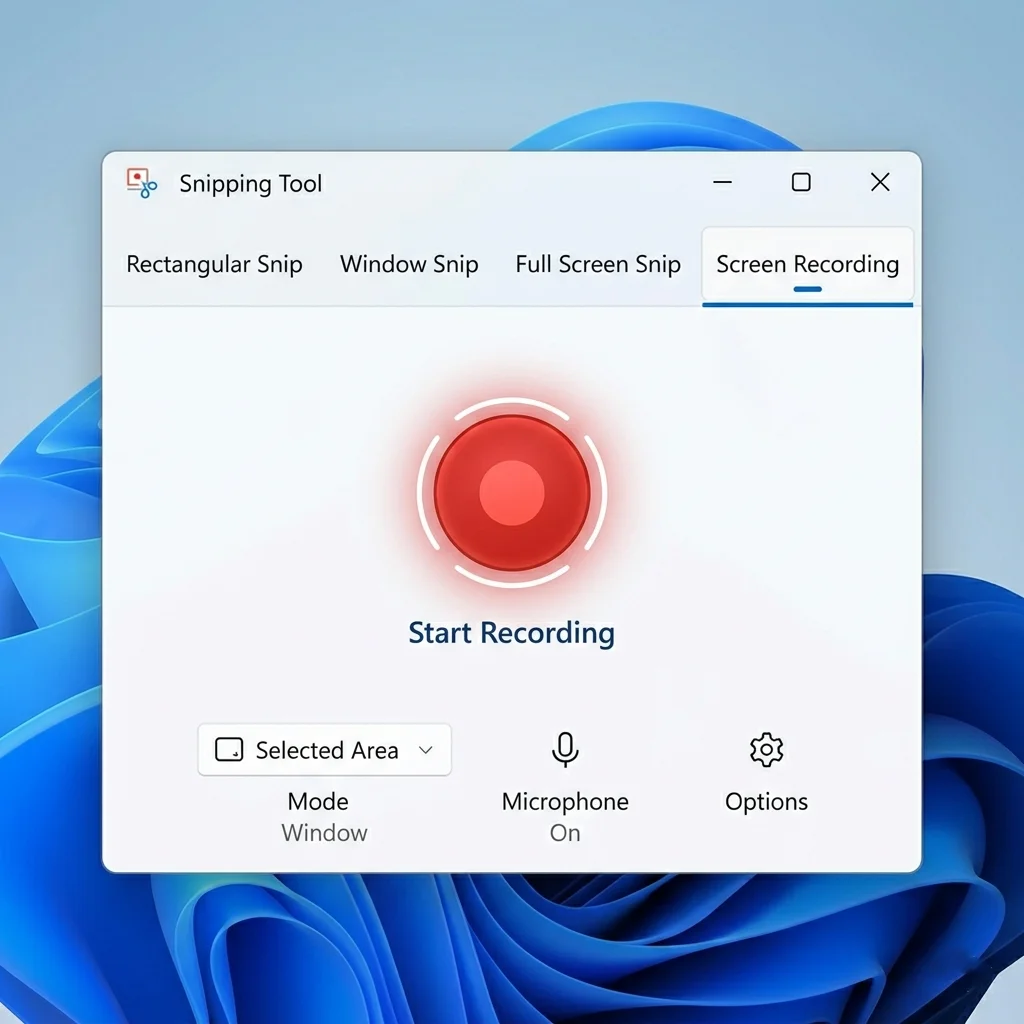
Step 2: Switch to Screen Recording Mode
At the top of the Snipping Tool window, you will see two options:
- Screenshot
- Screen Record
Click Screen Record to activate the recording feature.
Step 3: Select the Meeting Area
Click New, then drag your cursor to select the area of the screen where the meeting is displayed.
You can record:
- The entire meeting window
- A specific section of the screen
- A shared presentation area
Step 4: Start Recording the Meeting
After selecting the screen area, click Start.
Snipping Tool will display a short 3-second countdown, then the recording begins.
Make sure the meeting window stays visible during the recording.
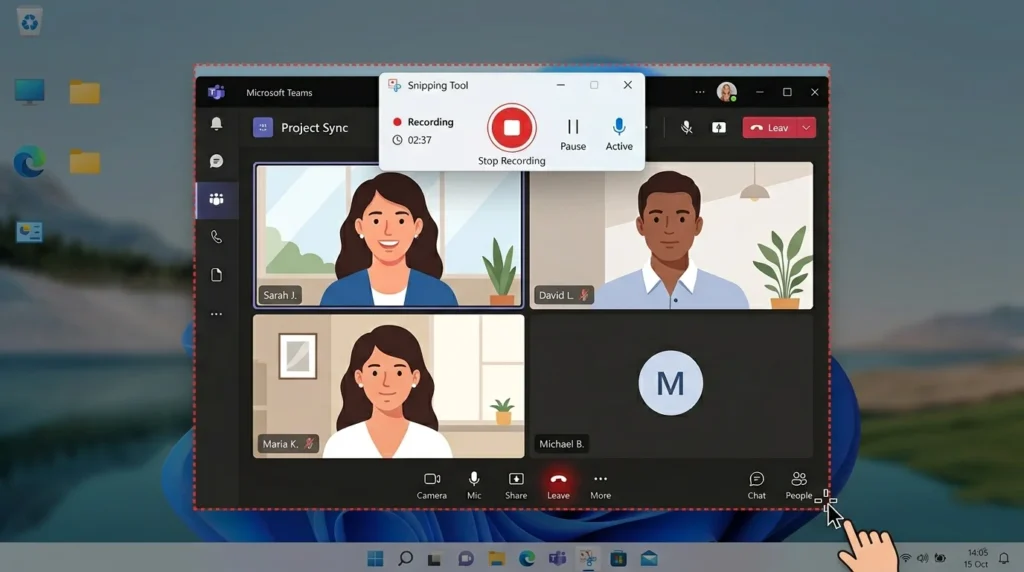
Step 5: Stop and Save the Recording
When the meeting segment is finished:
- Click the Stop button
- The recorded video will open in the Snipping Tool preview window
- Click Save
Choose a location on your computer to store the recording.
The file will be saved in MP4 format.
How to Record Zoom Meetings With Snipping Tool
You can use Snipping Tool to record Zoom meetings if you are not the meeting host or if Zoom recording permissions are disabled.
Steps:
- Open the Zoom meeting
- Launch Snipping Tool
- Select Screen Record
- Choose the Zoom meeting window
- Start recording

Keep in mind that audio may not be captured, depending on the version of Snipping Tool you are using.
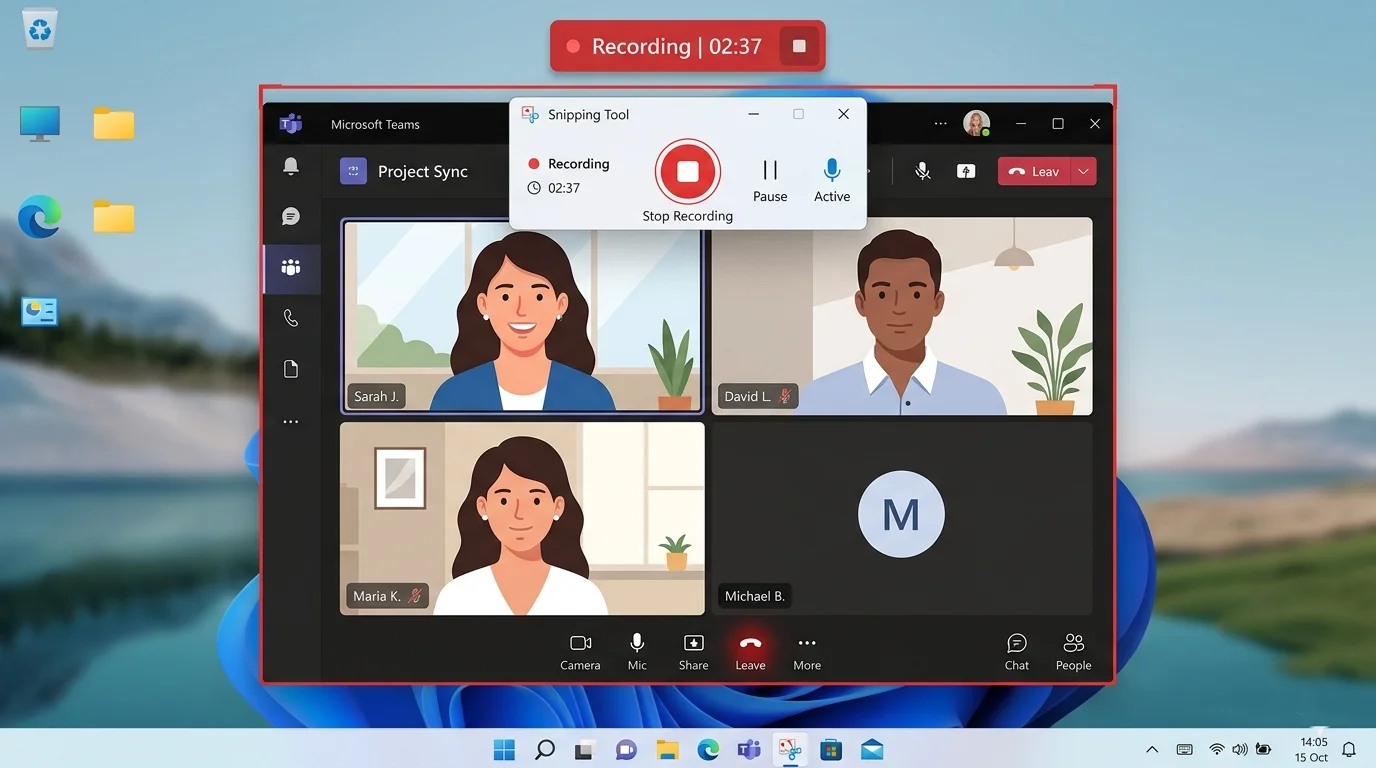
How to Record Microsoft Teams Meetings
To record a Microsoft Teams meeting using Snipping Tool:
- Join the Teams meeting
- Open Snipping Tool
- Choose Screen Record
- Select the meeting window
- Start recording
This method works well for capturing slides, presentations, or screen sharing.
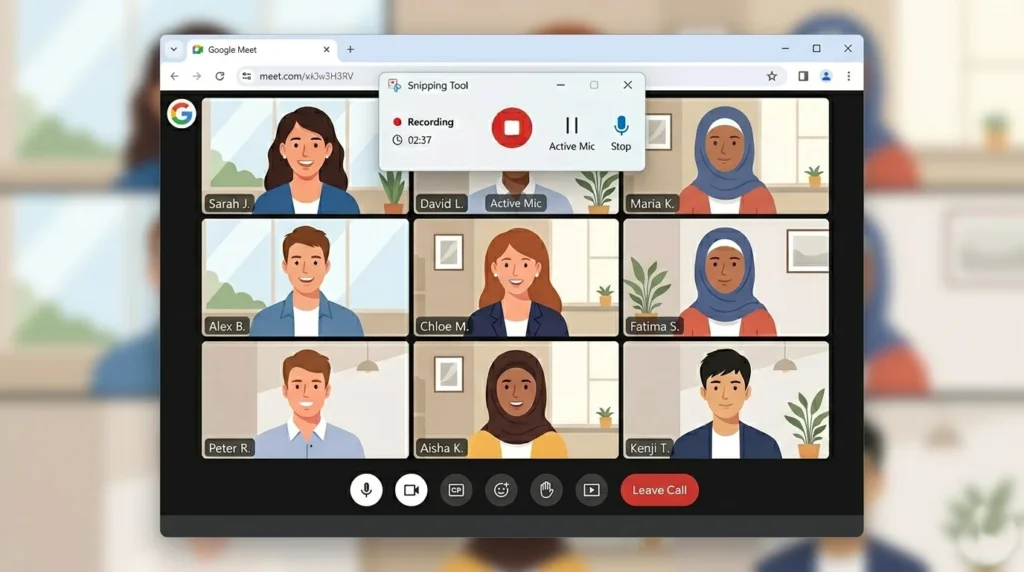
How to Record Google Meet Sessions
Google Meet meetings can also be recorded using the Snipping Tool.
Steps:
- Open the meeting in your browser
- Start Snipping Tool recording
- Select the Google Meet window
- Record the meeting presentation
This method is useful when Google Meet recording is not available in your account plan.
Does Snipping Tool Record Meeting Audio?
Currently, the Snipping Tool does not reliably record system audio or microphone audio.
This means:
- Participants’ voices may not be recorded
- Only screen visuals are captured
If you need an audio recording, you may need to use other screen recording tools such as:
- Xbox Game Bar
- OBS Studio
- Clipchamp
Where Snipping Tool Saves Meeting Recordings
After recording, the file can be saved manually to your preferred location.
Common save locations include:
- Desktop
- Documents folder
- Videos folder
The recording is typically saved as:
MP4 video format
This format is widely supported and can be shared easily.
Limitations of Recording Meetings With Snipping Tool
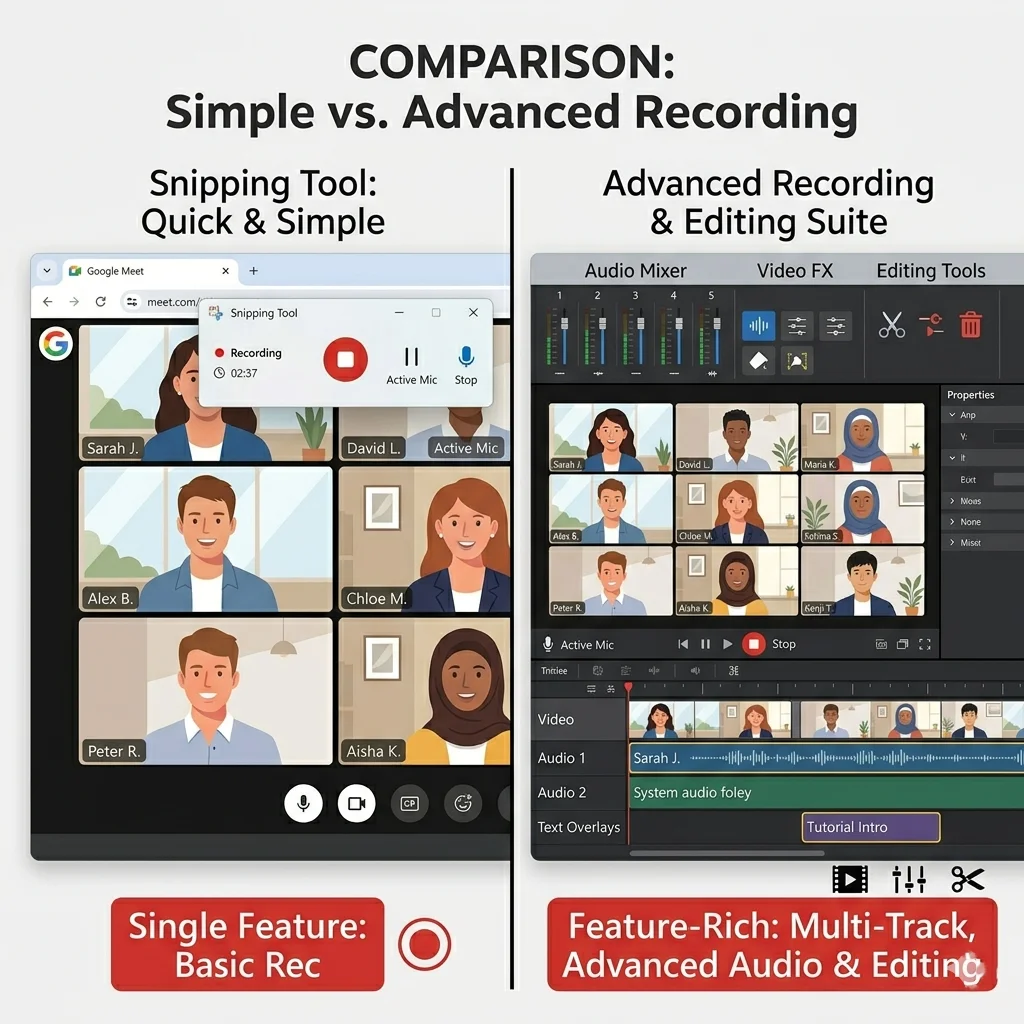
While Snipping Tool is convenient, it has several limitations.
No Audio Recording
Most versions do not capture system or microphone audio.
Limited Editing Tools
You cannot trim or edit recordings directly.
Not Ideal for Long Meetings
Snipping Tool works better for short recordings rather than hour-long meetings.
No Webcam Recording
It records only the screen area you select.
Best Use Cases for Recording Meetings With Snipping Tool
Despite its limitations, Snipping Tool can still be useful in many situations.
It works well for:
- Recording short meeting highlights
- Capturing shared presentations
- Saving quick tutorials
- Documenting troubleshooting sessions
- Recording training clips
For quick visual capture, it is a simple and lightweight solution.
Alternatives for Recording Meetings on Windows
If you need advanced recording features, consider these alternatives.
Xbox Game Bar
Built-in Windows screen recorder that can capture audio and gameplay.
OBS Studio
A powerful free screen recording and streaming software with advanced controls.
Clipchamp
Microsoft’s video editor with screen recording capability.
These tools provide better audio recording and editing features compared to the Snipping Tool.
Tips for Recording Online Meetings Legally
Before recording any meeting, always consider privacy and legal guidelines.
Important tips include:
- Inform participants before recording
- Follow company or organization policies
- Respect privacy laws in your region
- Avoid recording confidential discussions
Getting permission helps maintain ethical and professional communication.
Final Thought
Learning how to record meetings with Snipping Tool is helpful when you need a quick and simple way to capture meeting visuals on Windows 11.
While the tool is easy to use and built directly into Windows, it does have limitations, such as a lack of audio recording and minimal editing features. For short recordings and quick documentation, however, it can still be a practical solution.
If you frequently record meetings, you may want to explore more advanced screen recording tools. But for occasional use, Snipping Tool provides a convenient built-in option for recording your screen.
Frequently Asked Questions
Yes, Snipping Tool can record the Zoom meeting screen, but it may not capture audio.
The screen recording feature is available only in Windows 11.
Recordings are saved in MP4 video format.
Snipping Tool is better suited for short recordings rather than full-length meetings.
