Full Guide to Snipping Tool on Windows 10
The Snipping Tool on Windows 10 is one of the simplest yet most powerful built-in tools for taking screenshots. Whether you want to capture part of your screen, annotate an image, or quickly save a screenshot without installing extra software, Snipping Tool gets the job done.
This complete guide explains what the Snipping Tool is, how to use it, all snip types, keyboard shortcuts, editing options, and common problems with fixes, all in one place.
What Is the Snipping Tool in Windows 10?
The Snipping Tool is a free screenshot utility built directly into Windows 10. It allows users to capture screenshots in different formats, mark them up, and save or copy them for later use.
Unlike the traditional Print Screen key, Snipping Tool lets you:
- Select a specific area of the screen
- Capture a single window
- Annotate screenshots instantly
- Save images in multiple formats
Even though Microsoft introduced Snip & Sketch, the Snipping Tool is still available and widely used on Windows 10.
How to Open Snipping Tool on Windows 10

There are several ways to launch the Snipping Tool. Use whichever is fastest for you.
Open from the Start Menu
- Click the Start button
- Scroll to Windows Accessories
- Click Snipping Tool
Open Using Windows Search
- Press Windows + S
- Type Snipping Tool
- Click the app from the results
Open Using Run Command
- Press Windows + R
- Type snippingtool
- Press Enter
Pin Snipping Tool for Quick Access
- Right-click Snipping Tool
- Select Pin to Start or Pin to taskbar
How to Take a Screenshot with Snipping Tool
Taking screenshots with Snipping Tool is straightforward.
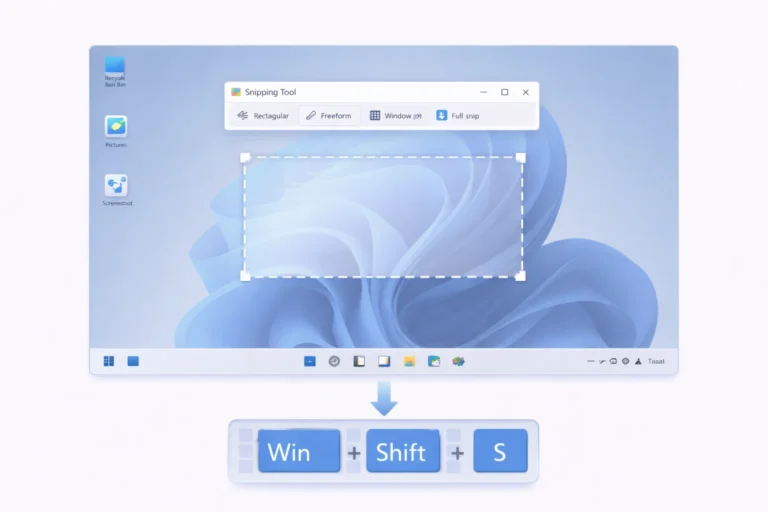
Snip Types Explained
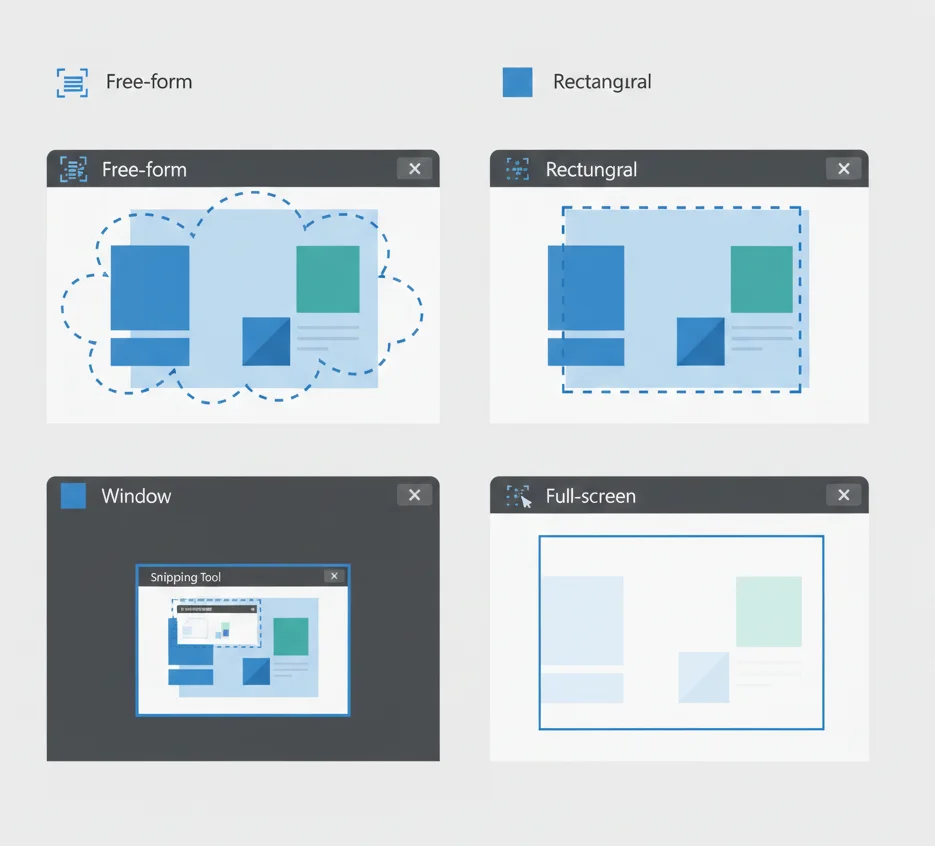
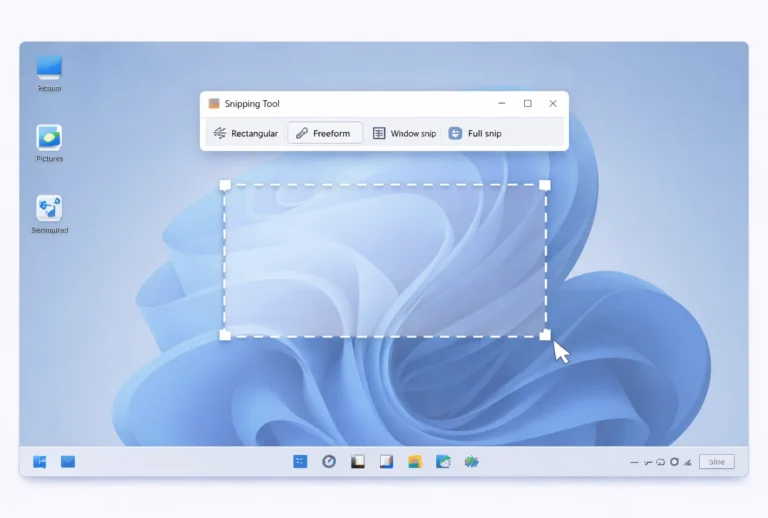
Free-form Snip
Draw a freehand shape around the area you want to capture.
Rectangular Snip
Drag a rectangle to capture a specific portion of the screen.
Window Snip
Capture a single open window (browser, app, dialog box).
Full-screen Snip
Capture the entire screen instantly.
Step-by-Step Screenshot Process

- Open Snipping Tool
- Click New
- Select the snip type
- Capture your screen
- Edit or save the screenshot
Snipping Tool Keyboard Shortcuts (Windows 10)
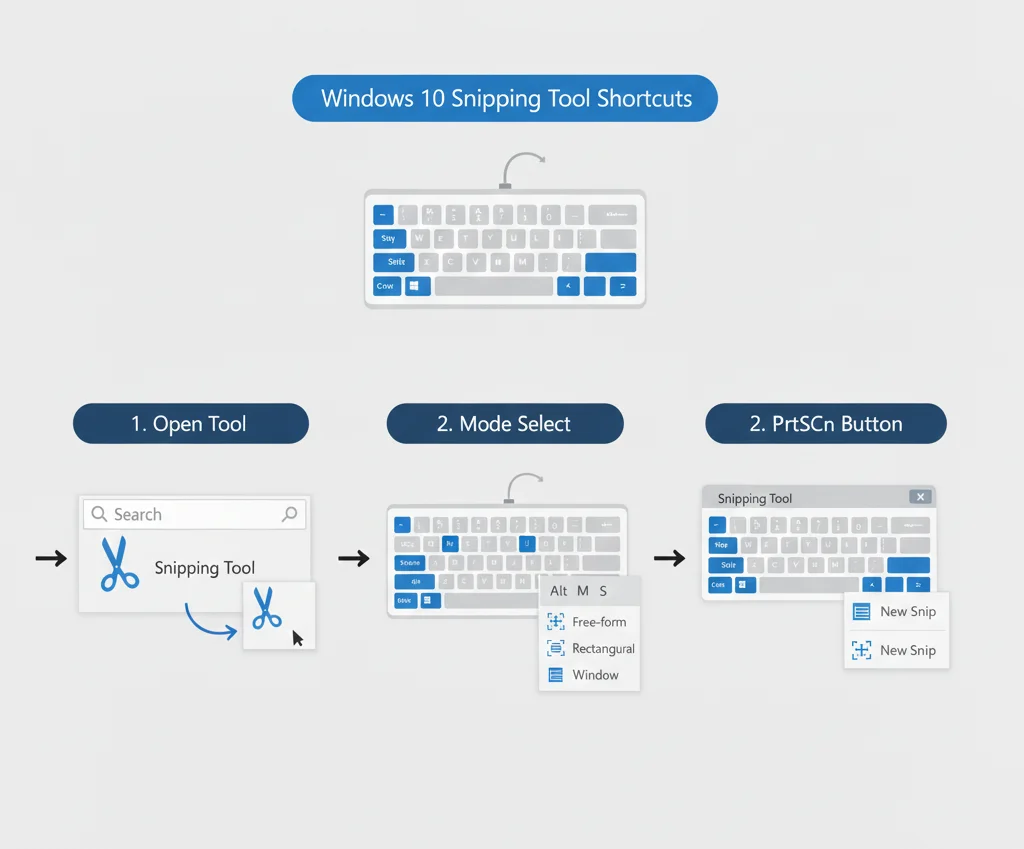
Keyboard shortcuts make the Snipping Tool much faster to use.
| Shortcut | Action |
|---|---|
| Alt + N | Take a new snip |
| Ctrl + S | Save the screenshot |
| Ctrl + C | Copy snip to clipboard |
| Alt + M | Change snip mode |
| Esc | Cancel snipping |
Tip: For faster access, you can also use Windows + Shift + S to open the snipping overlay (Snip & Sketch).
How to Edit and Save Screenshots

After capturing a snip, the Snipping Tool opens an editing window.
Editing Tools Available
- Pen – draw or underline
- Highlighter – emphasize areas
- Eraser – remove annotations
Save Options
You can save screenshots in:
- PNG (best quality)
- JPG
- GIF
You can also copy screenshots directly to the clipboard and paste them into emails, documents, or image editors.
Where Are Snipping Tool Screenshots Saved?
By default, Snipping Tool does not auto – save screenshots.
- You must manually click File → Save As
- Choose your preferred folder
- Select the file format
If you copy the snip, it stays in your clipboard until replaced.
Common Snipping Tool Problems on Windows 10
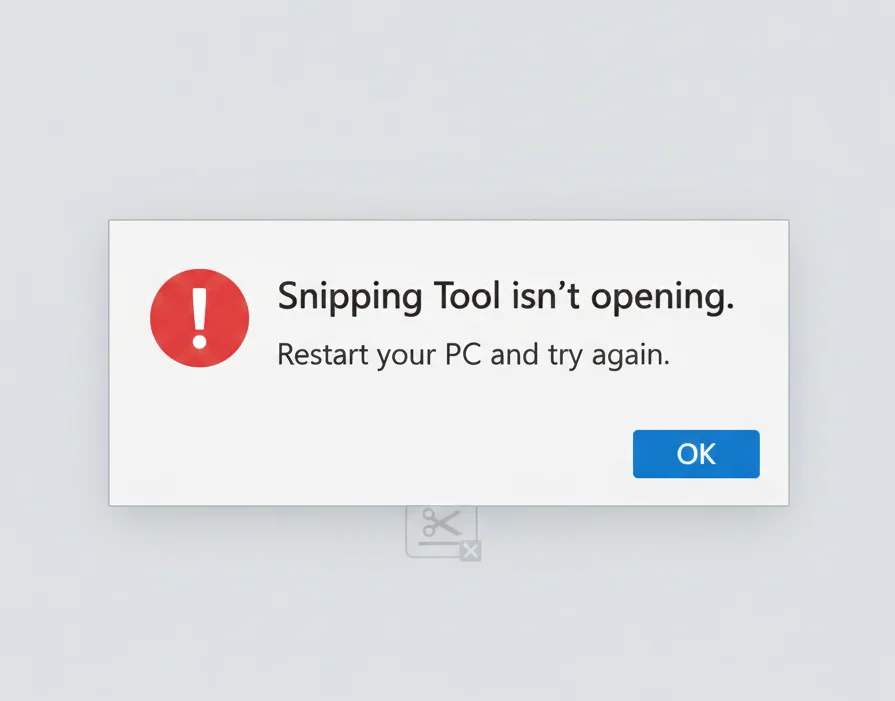
Snipping Tool Not Opening
Possible causes:
- Corrupted system files
- Disabled Windows features
- Outdated Windows version
Fix: Restart Windows Explorer or update Windows.
Snipping Tool Not Working
This can happen due to:
- Keyboard shortcut conflicts
- App glitches
Fix: Reset the app or use Snip & Sketch as a temporary alternative.
Snipping Tool Shortcut Not Working
Fix:
Go to Settings → Ease of Access → Keyboard and enable Print Screen shortcuts if disabled.
Snipping Tool vs Snip & Sketch (Windows 10)
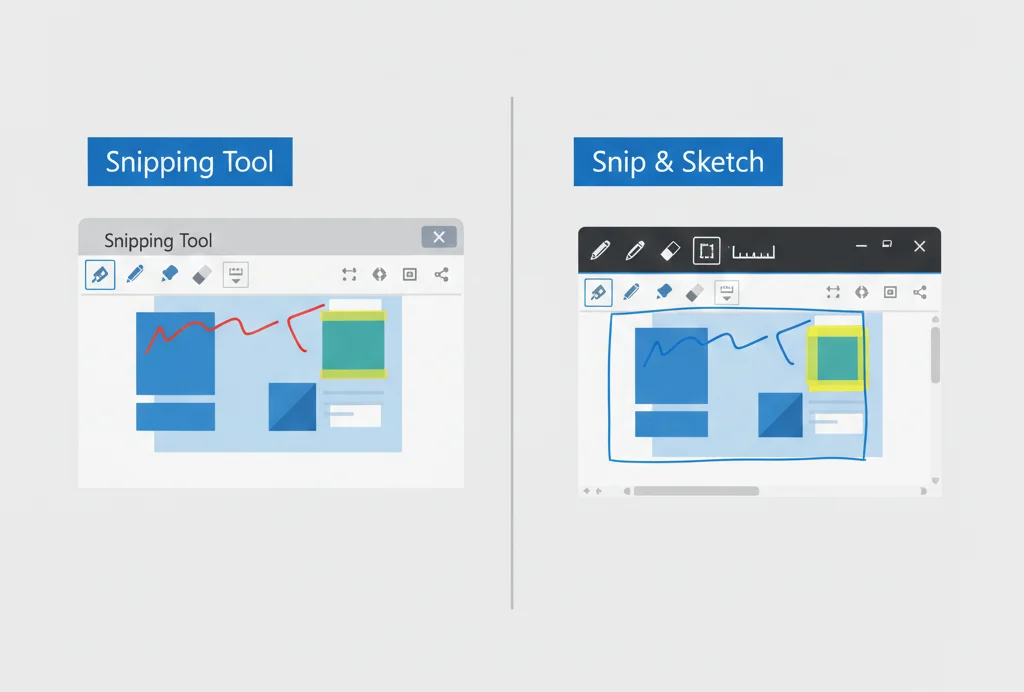
| Feature | Snipping Tool | Snip & Sketch |
|---|---|---|
| Built into Windows | Yes | Yes |
| Delayed snip | Yes | Limited |
| Annotation tools | Basic | Advanced |
| Keyboard shortcut | Limited | Win + Shift + S |
| Screen recording | No | No |
Which should you use?
For simple screenshots, Snipping Tool is perfect. For faster workflows and annotations, Snip & Sketch is better.
Useful Tips to Use Snipping Tool Like a Pro
- Use Delay to capture menus and tooltips
- Pin the tool to the taskbar for one-click access
- Combine with Clipboard History (Windows + V)
- Save frequently used snips as templates
Best Alternatives to Snipping Tool
If you need advanced features like scrolling screenshots or screen recording, consider third-party tools. However, for everyday use, Snipping Tool remains reliable and lightweight.
Final Thoughts
The Snipping Tool on Windows 10 remains one of the easiest ways to capture, edit, and share screenshots without installing extra software. Once you learn its features and shortcuts, it becomes an essential productivity tool.
If you regularly work with screenshots, bookmarking this guide will save you time and frustration.
Frequently Asked Questions
Yes, it is still included and works normally.
Yes, it comes preinstalled with Windows 10.
No, it only captures screenshots.
Microsoft introduced Snip & Sketch, but Snipping Tool still exists.
Usually due to system glitches or outdated Windows versions.