
Snipping Tool vs Print Screen: Which Screenshot Method Is Better in Windows?
If you are confused about Snipping Tool vs Print Screen, you’re not alone. Both tools let you take screenshots in Windows 10 and Windows 11, but they work differently.
The Print Screen (PrtSc) key captures your entire screen instantly. On the other hand, the Snipping Tool allows you to select specific areas, annotate images, and save screenshots with more control.
So which one should you use?
Let’s break it down clearly.
Quick Comparison: Snipping Tool vs Print Screen
| Feature | Print Screen | Snipping Tool |
|---|---|---|
| Capture full screen | Yes | Yes |
| Capture selected area | No | Yes |
| Annotation tools | No | Yes |
| Instant clipboard copy | Yes | Yes |
| Auto save to file | Win + PrtSc | (Manual save required) |
| Delay timer | No | Yes |
Quick answer:
- Use Print Screen for speed.
- Use Snipping Tool for control and editing.
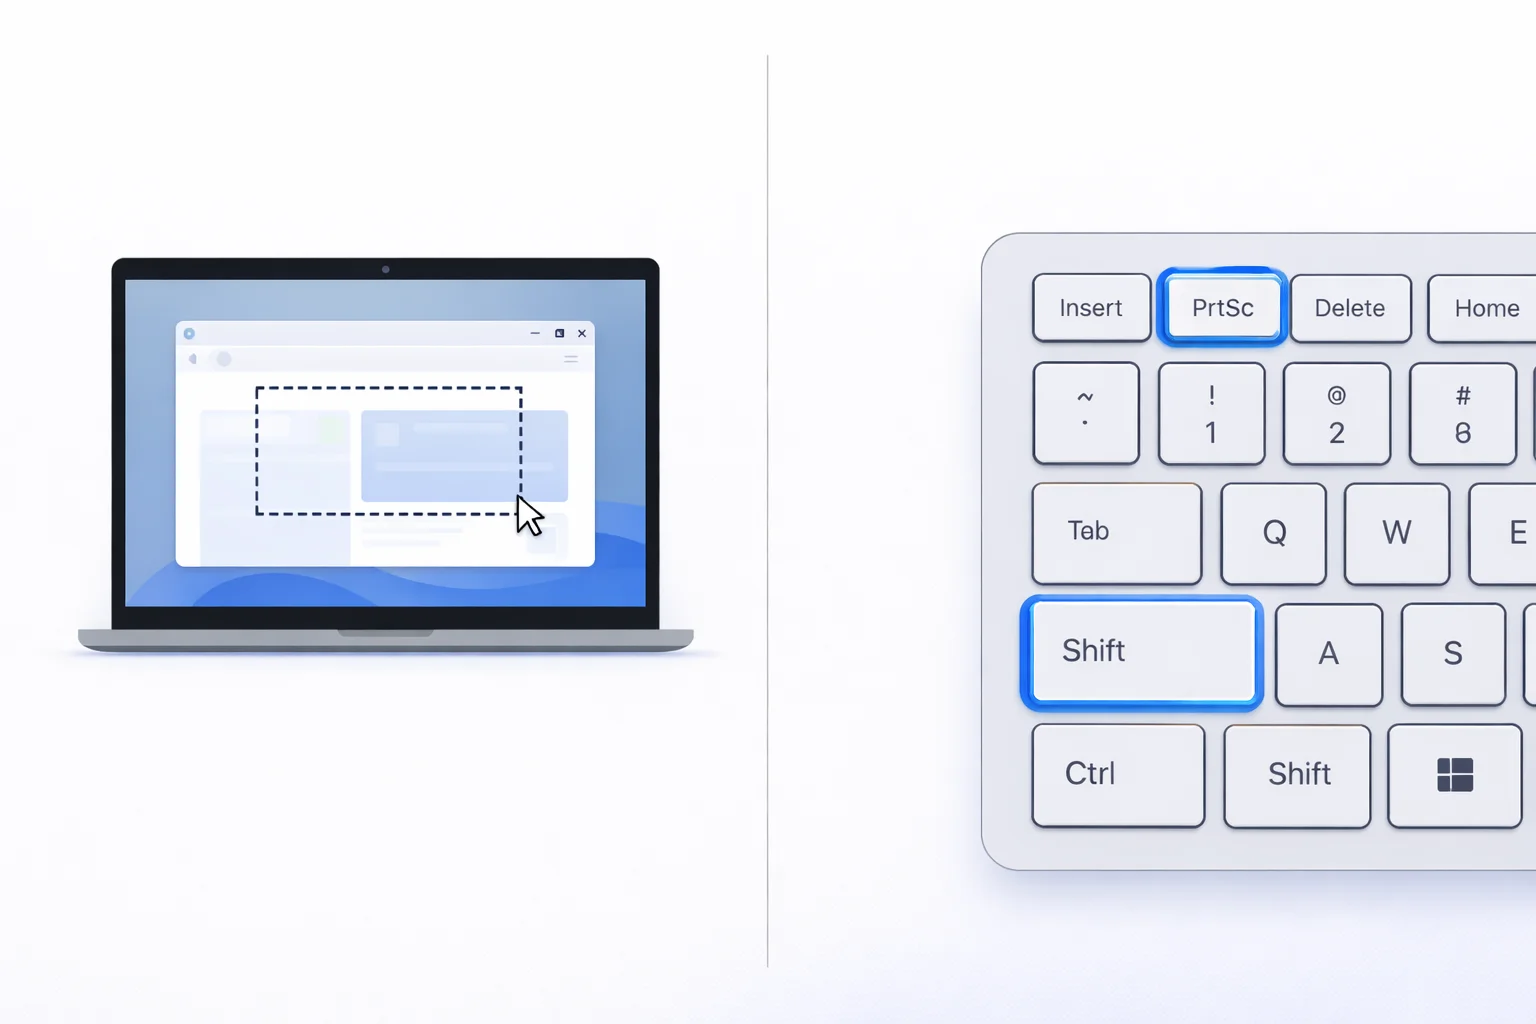
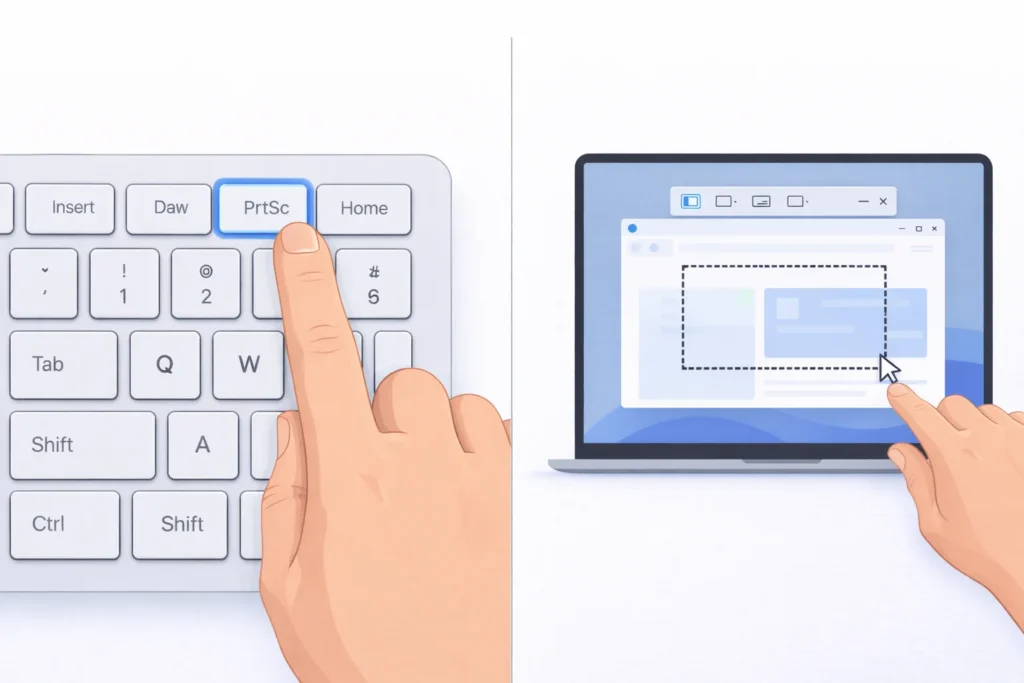
What Is the Print Screen (PrtSc) Key?
The Print Screen key is a built-in keyboard shortcut that captures your screen instantly.
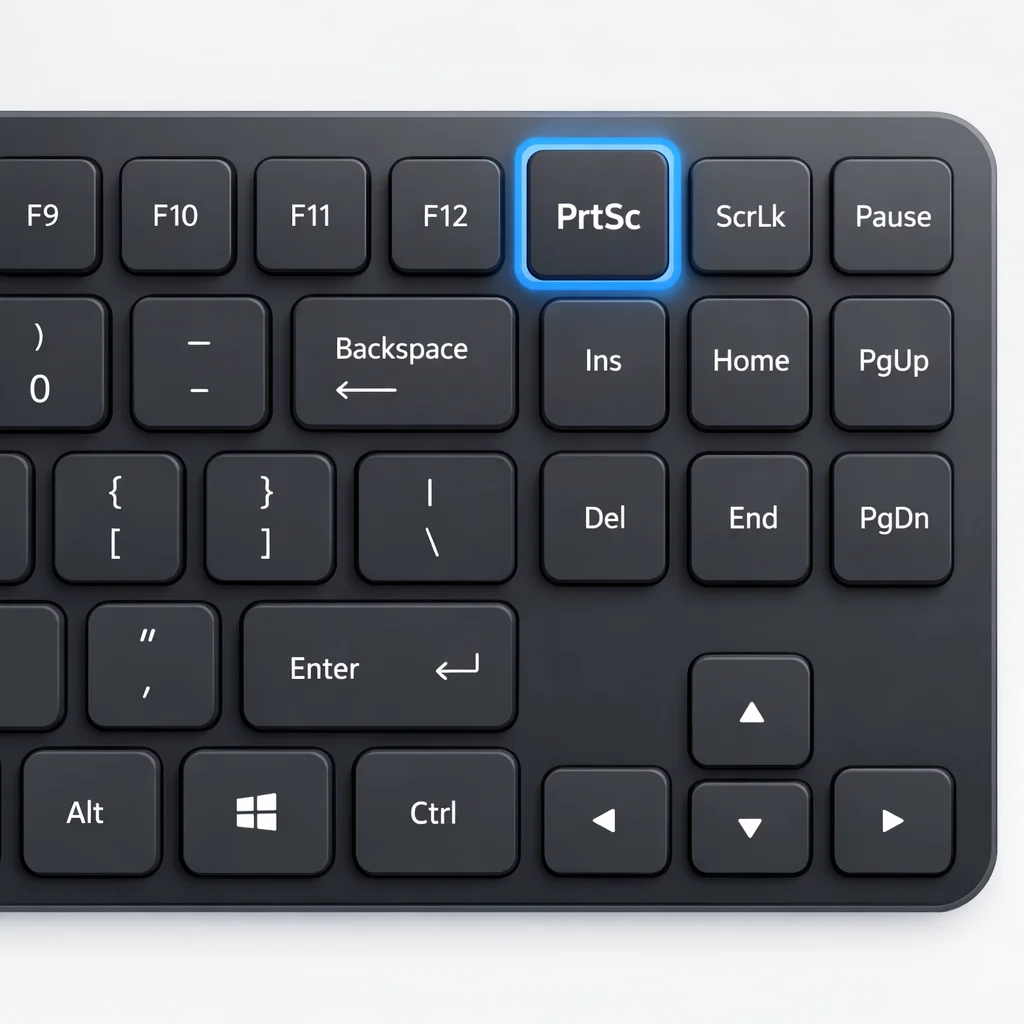
How Print Screen Works
Here are the most important shortcuts (fact-checked for Windows 10 & 11):
- PrtSc → Copies the entire screen to the clipboard
- Alt + PrtSc → Copies only the active window
- Win + PrtSc → Saves a full screenshot automatically to
Pictures > Screenshots (PNG format) - Win + Shift + S → Opens Snipping Tool interface (Windows 10/11)
These shortcuts are officially documented by Microsoft Support.
Pros of Print Screen
- Extremely fast
- No app opening required
- Ideal for quick paste into email or chat
- Automatic file save with Win + PrtSc
Cons of Print Screen
- Cannot select custom areas (without cropping later)
- No built-in editing tools
- No delay option
- Requires another app (Paint, Word, etc.) to edit
Best for: Quick, full-screen captures.
What Is the Snipping Tool?
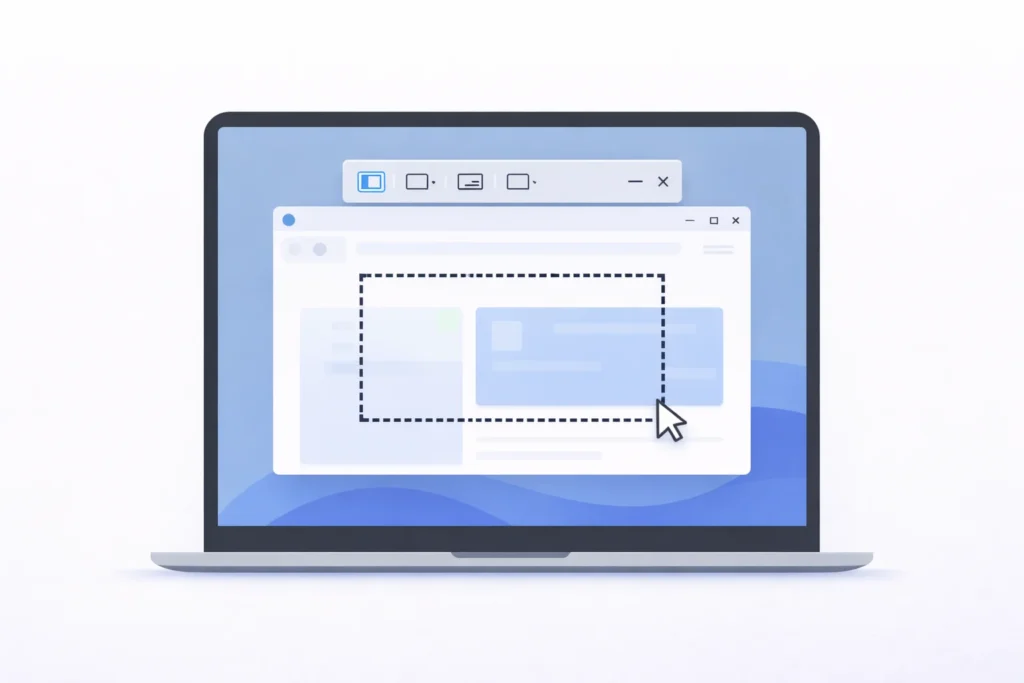
The Snipping Tool is a built-in Windows screenshot application. In Windows 11, it combines classic Snipping Tool features with Snip & Sketch functionality.
You can open it by:
- Searching “Snipping Tool” in Start
- Pressing Win + Shift + S
Snipping Tool Capture Modes
When activated, you can choose:
- Rectangular Snip
- Freeform Snip
- Window Snip
- Full-screen Snip
Extra Features
Unlike Print Screen, Snipping Tool includes:
- Built-in annotation tools (pen, highlighter)
- Crop and editing options
- Delay timer (3, 5, or 10 seconds in Windows 11)
- Easy sharing
Pros of Snipping Tool
- Precise area selection
- Built-in editor
- Supports delayed screenshots
- More professional workflow
Cons of Snipping Tool
- Slightly slower than Print Screen
- Requires manual saving
- Opens an interface before capture
Best for: Tutorials, guides, UI screenshots, and documentation.
Snipping Tool vs Print Screen: Real-World Use Cases
Now let’s compare practical scenarios.
1. Fast Screenshot for Chat or Email
If you need to paste something quickly into WhatsApp Web, Slack, or email:
Use Print Screen
It copies instantly without opening an app.
2. Capturing a Specific Part of the Screen
If you only need a small section:
Use Snipping Tool
It lets you drag and select only what you need.
3. Capturing Dropdown Menus
Menus disappear when you press Print Screen.
Use Snipping Tool with a delay timer
Set a delay, open the menu, and capture it easily.
4. Saving Screenshots Automatically
If you want screenshots saved automatically as PNG files:
Use Win + PrtSc
This saves files directly to the Screenshots folder.
Which Is Better: Snipping Tool or Print Screen?
There is no universal winner.
Here’s a simple rule:
- Choose Print Screen for speed.
- Choose Snipping Tool for flexibility and editing.
In modern Windows 11, pressing Win + Shift + S gives you the best of both worlds: fast access plus advanced selection tools.
Troubleshooting Tips
Print Screen Not Working?
Try these fixes:
- Check if the Fn key is required (on laptops)
- Disable OneDrive screenshot override
- Update keyboard drivers
- Restart Windows Explorer
Snipping Tool Not Opening?
Try:
- Restart the app
- Run Windows Update
- Reset Snipping Tool in Settings > Apps
- Run sfc /scannow in Command Prompt
Best Practices for Screenshot Quality
To ensure high-quality results:
- Use PNG for UI and text clarity
- Use JPG for a smaller file size
- Use descriptive file names (example: snipping-tool-vs-print-screen.png)
- Add alt text for accessibility and SEO
If you run a blog or tutorial website, optimized screenshots improve readability and user engagement.
Final Thought
When comparing Snipping Tool vs Print Screen, it comes down to your workflow.
If you need something quick and simple, use Print Screen.
However, if you want precision, editing, and professional results, Snipping Tool is the better choice.
For most modern users, Win + Shift + S is the most powerful and flexible screenshot method in Windows today.
Frequently Asked Questions
Print Screen captures the entire screen instantly, while Snipping Tool allows you to select specific areas and edit screenshots before saving.
Press Alt + PrtSc to capture the active window only.
Press Win + PrtSc to save a full-screen screenshot automatically to the Pictures > Screenshots folder.
Snipping Tool is better because it includes built-in annotation and cropping tools.