
Snipping Tool on Mac: How to Screenshot Like Windows
Many people switching from Windows to macOS search for “How to use Snipping Tool on Mac” and assume the tool is missing. The truth is simple: Mac does not have an app called Snipping Tool, but macOS includes built-in screenshot tools that do the same job, and often do it better.
Does Mac Have a Snipping Tool?
No. macOS does not include a tool named “Snipping Tool” like Windows.
However, macOS provides three built-in ways to capture screenshots that fully replace Snipping Tool:
- Keyboard shortcuts (fastest)
- Screenshot Toolbar (advanced capture & recording)
- Preview app (capture + edit)
Together, these tools let you capture:
- Full screen
- Selected area
- Specific window
- Timed screenshots
- Screen recordings
- Annotated images
What Is the Mac Equivalent of Snipping Tool?
The Mac equivalent of Snipping Tool is macOS Screenshot, which works through keyboard shortcuts and the Screenshot Toolbar.
1. Keyboard Shortcuts (Fastest Way to Snip on Mac)
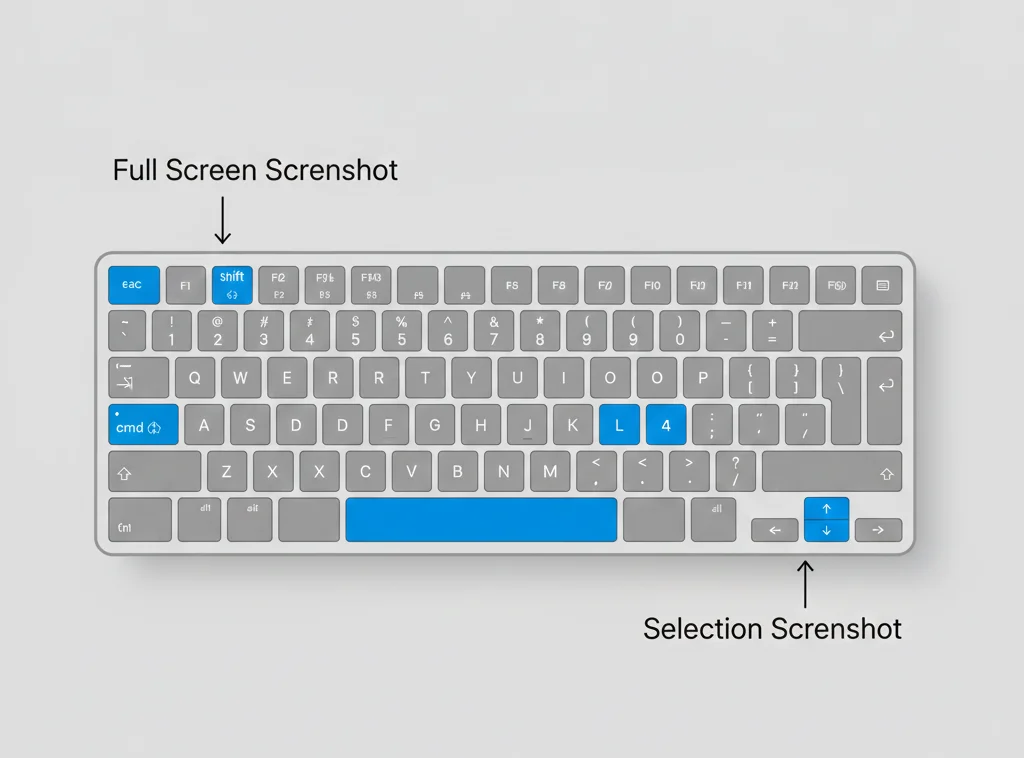
These shortcuts are the most direct replacement for Snipping Tool.
| Action | Mac Shortcut |
|---|---|
| Capture entire screen | ⌘ + Shift + 3 |
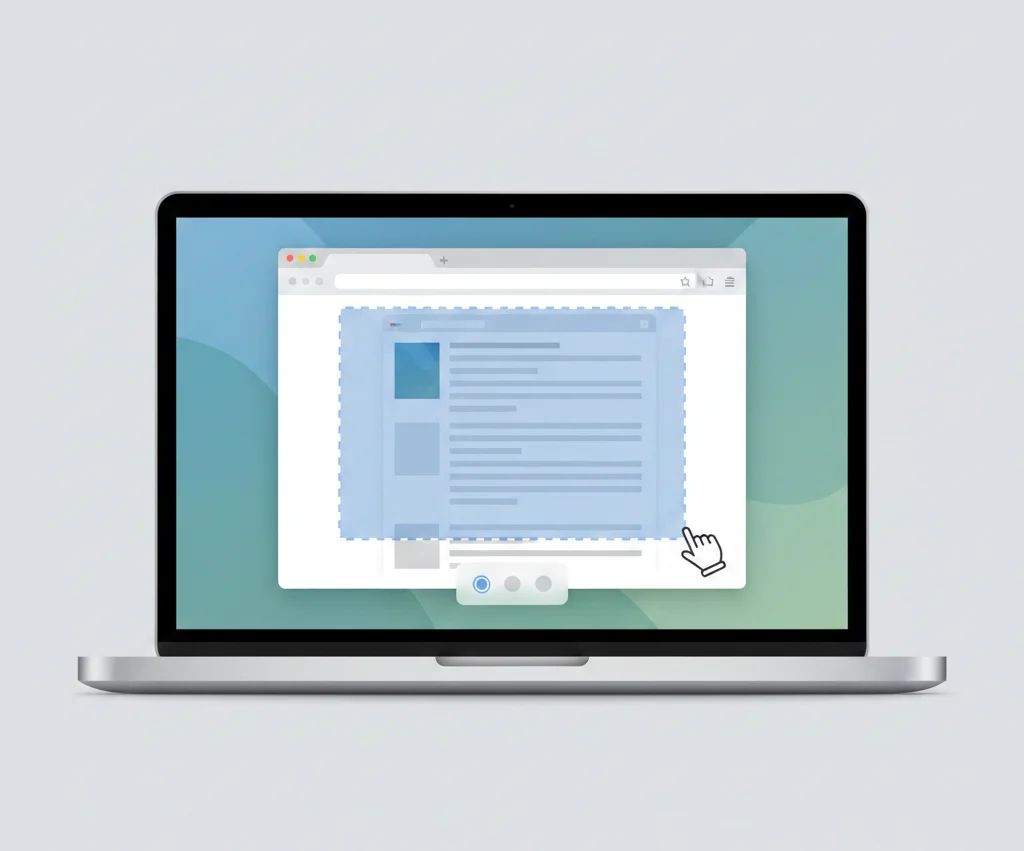
| Capture selected area | ⌘ + Shift + 4 |
| Capture specific window | ⌘ + Shift + 4 → Space |
| Copy screenshot to clipboard | Hold Control while capturing |
Tip: Holding Control copies the screenshot instead of saving it, similar to copying a snip in Windows.
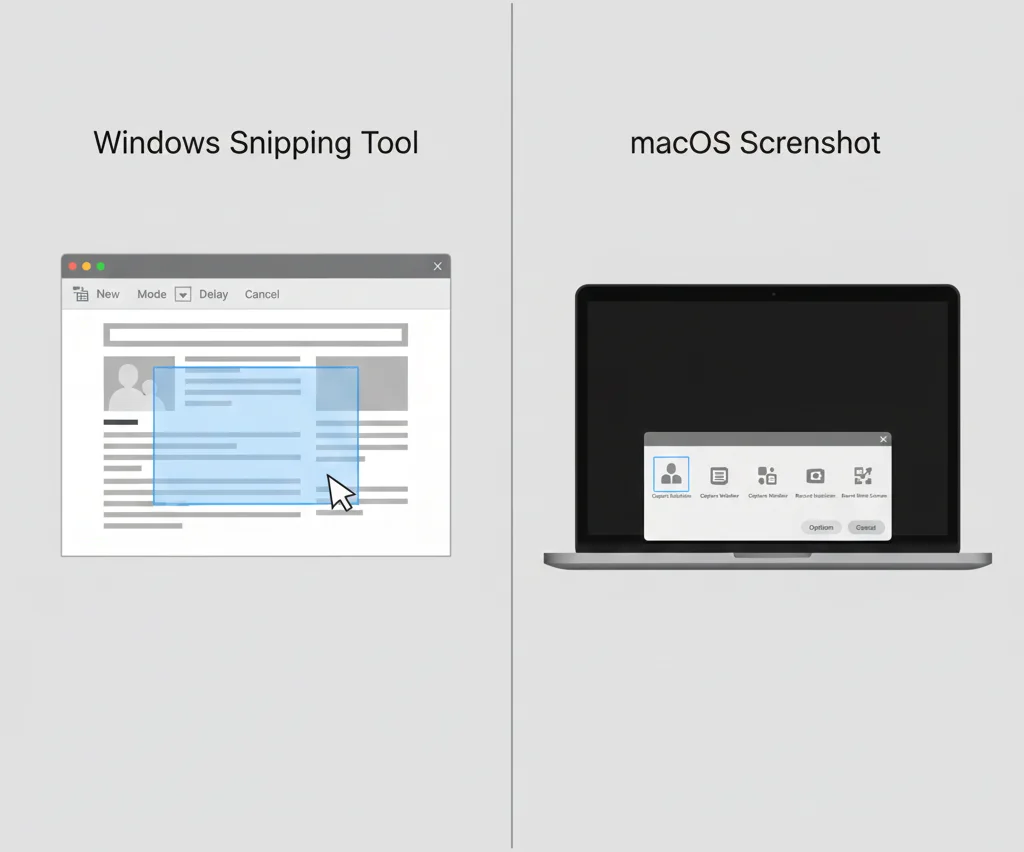
2. Screenshot Toolbar (Mac’s Built-In Snipping Tool)
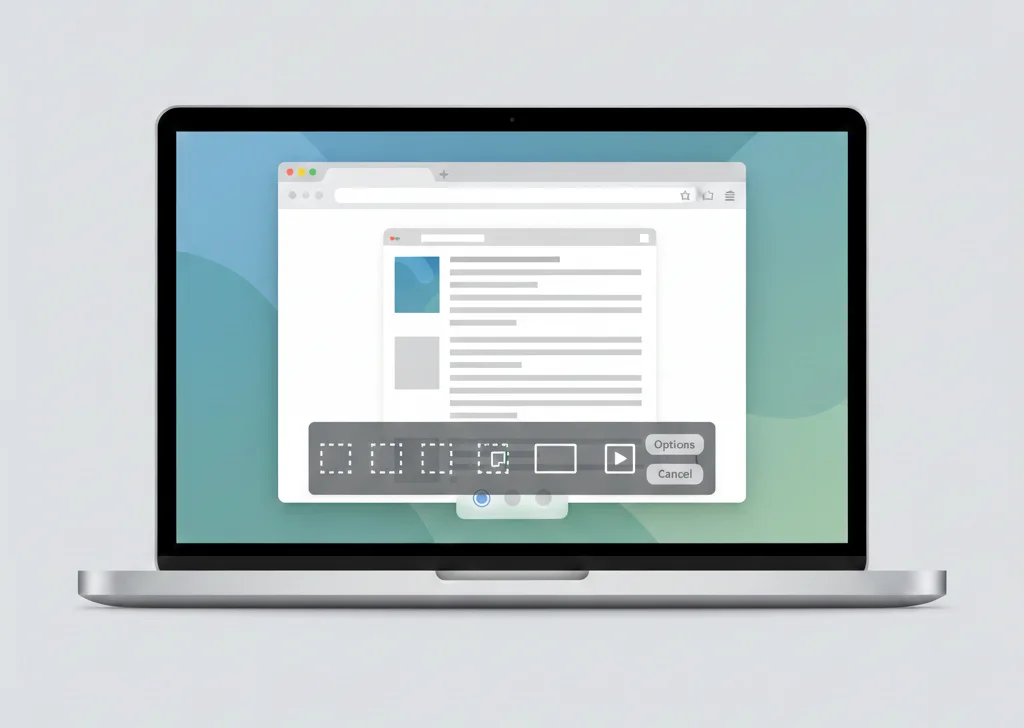
Press:
Command (⌘) + Shift + 5
This opens the Screenshot Toolbar, which is the closest experience to the Windows Snipping Tool interface.
You can:
- Capture full screen
- Capture selected window
- Capture the selected portion
- Record full screen
- Record selected portion
- Set a timer
- Choose where screenshots are saved
For most users, this becomes the main snipping tool on Mac.
3. Using the Preview App to Snip Screenshots
Preview is another built-in Mac app that allows capturing and editing screenshots.
Steps:
- Open Preview
- Click File → Take Screenshot
- Choose:
- From Selection
- From Window
- From Entire Screen
- Edit and save immediately
Preview is best when you need cropping, annotations, or signatures after capturing.
How to Use Snipping Tool on Mac (Step-by-Step)
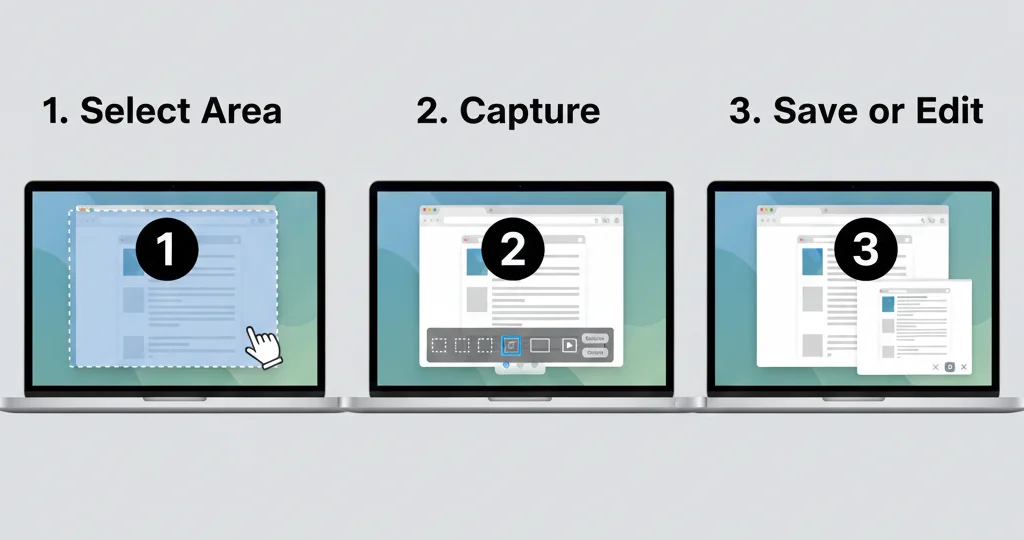
This section directly answers the search intent.
Step 1: Open Screenshot Mode
Press Command (⌘) + Shift + 5.
Step 2: Choose Capture Type
Select:
- Entire screen
- Selected window
- Selected portion
Step 3: Capture the Screen
Click Capture or drag to select the area.
Step 4: Edit or Save
- Click the floating thumbnail to edit
- Or let it auto-save to your chosen location
That’s it. This process fully replaces the Windows Snipping Tool workflow.
Mac Snipping Tool Shortcuts vs Windows Snipping Tool
| Feature | Windows Snipping Tool | Mac Screenshot |
|---|---|---|
| Launch shortcut | Windows + Shift + S | Command + Shift + 5 |
| Area capture | Yes | Yes |
| Window capture | Yes | Yes |
| Full screen | Yes | Yes |
| Copy to clipboard | Yes | Yes (Control key) |
| Screen recording | Limited | Built-in |
Mac shortcuts may feel different at first, but most users find them faster after a few days.
Where Do Snips Save on Mac?
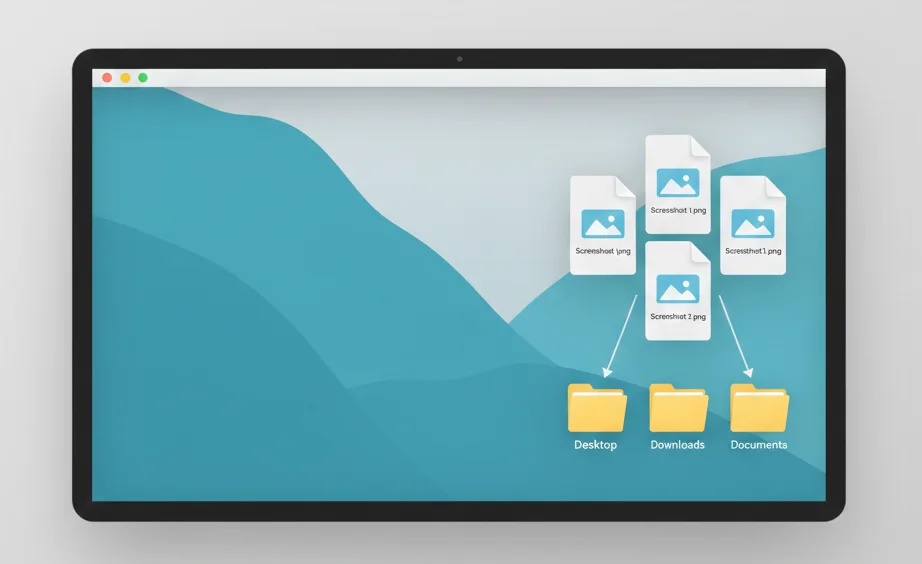
By default, screenshots save to the Desktop.
To change this:
- Press Command + Shift + 5
- Click Options
- Choose a new save location (Documents, Clipboard, custom folder)
This setting applies to all future screenshots.
Best Snipping Tool Alternatives for Mac
If you want more advanced features like scrolling screenshots or cloud sharing, third-party tools exist. However, most users never need them because macOS already covers everyday needs.
For basic and professional use, the built-in tools are enough.
Common Problems Windows Users Face on Mac
“Nothing happens when I press the shortcut.”
→ Make sure keyboard shortcuts are enabled in System Settings.
“Where did my screenshot go?”
→ Check Desktop or your custom save location in Screenshot Options.
“Why didn’t it copy to the clipboard?”
→ Hold the Control key while capturing.
Final Thoughts
Although macOS doesn’t include an app called Snipping Tool, it offers a faster, more flexible screenshot system once you learn it. Keyboard shortcuts and the Screenshot Toolbar together fully replace, and often outperform, the Windows Snipping Tool.
After a short learning curve, most users never look back.
Frequently Asked Questions
Press Command + Shift + 4, then drag to select the area.
macOS Screenshot tools accessed via shortcuts and the Screenshot Toolbar.
Yes. macOS includes free built-in screenshot tools, no download needed.
Yes. Use the floating thumbnail or Preview app to crop and annotate.
Hold Control while taking the screenshot.