Best Snipping Tool Option for Mac Users
Many Mac users move from Windows and expect to find the same Snipping Tool they used for years. Then they search the Mac and think it’s missing. The tool is not missing; it simply works differently on macOS. The good news is that the Mac screenshot system is faster, smoother, and offers more control once you learn it.
Let’s walk through everything, step by step.
Does Mac Have a Snipping Tool?
There isn’t an app named Snipping Tool on a Mac.
But the Mac gives you three built-in methods that do the same job:
- Keyboard shortcuts for quick screenshots
- Screenshot toolbar for advanced capture and screen recording
- Preview app for capturing and editing images
Most users don’t discover these tools because Apple doesn’t advertise them much. But once you learn them, you’ll see that they cover every need: area capture, full screen, timed capture, recording, and editing.
1. Keyboard Shortcuts (Fastest Snipping Method on Mac)
This is the closest experience to the Windows Snipping Tool, but even quicker.
You don’t need to open anything, just press a key and snip.
Main shortcuts
- Shift + Command + 3
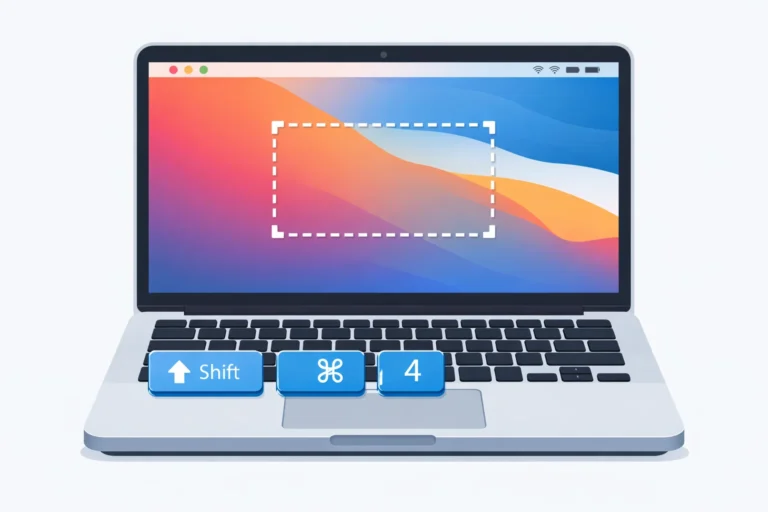
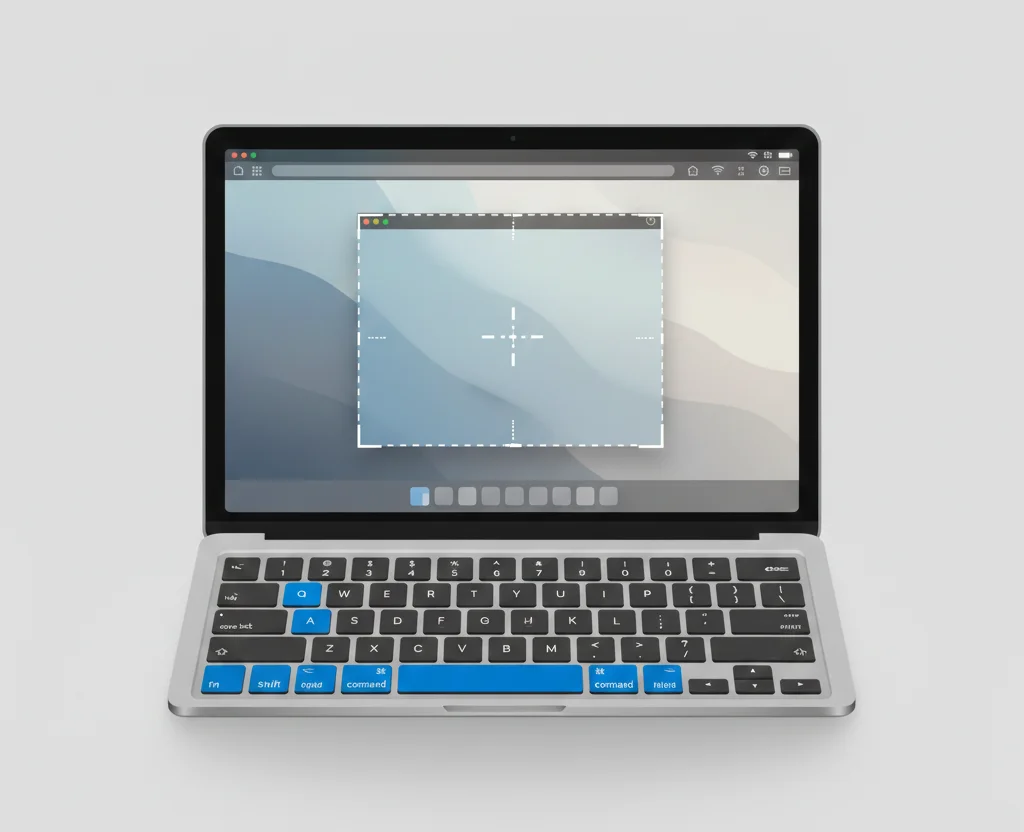
Instantly captures the whole screen. - Shift + Command + 4
Turns your cursor into a crosshair. You drag and capture the part you want. - Shift + Command + 4 then Space
Captures a single window. A camera icon appears; click the window to snip it. - Shift + Command + 6
Captures the Touch Bar (only for older MacBook Pro models).
Why is it best for most users
- It’s fast
- It doesn’t need any apps
- It works on all macOS versions
- You can copy the snip instead of saving it
To copy instead of saving, press Control + (your shortcut).
Example: Control + Shift + Command + 4.
This drops the screenshot directly into your clipboard.
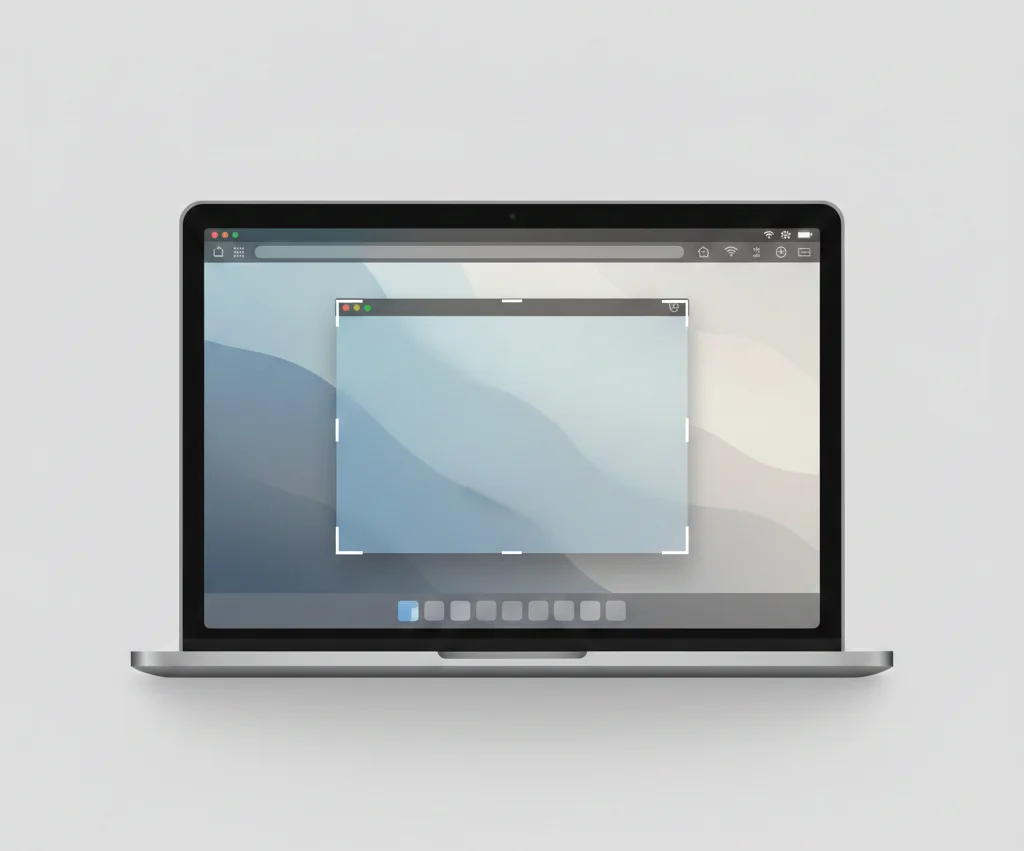
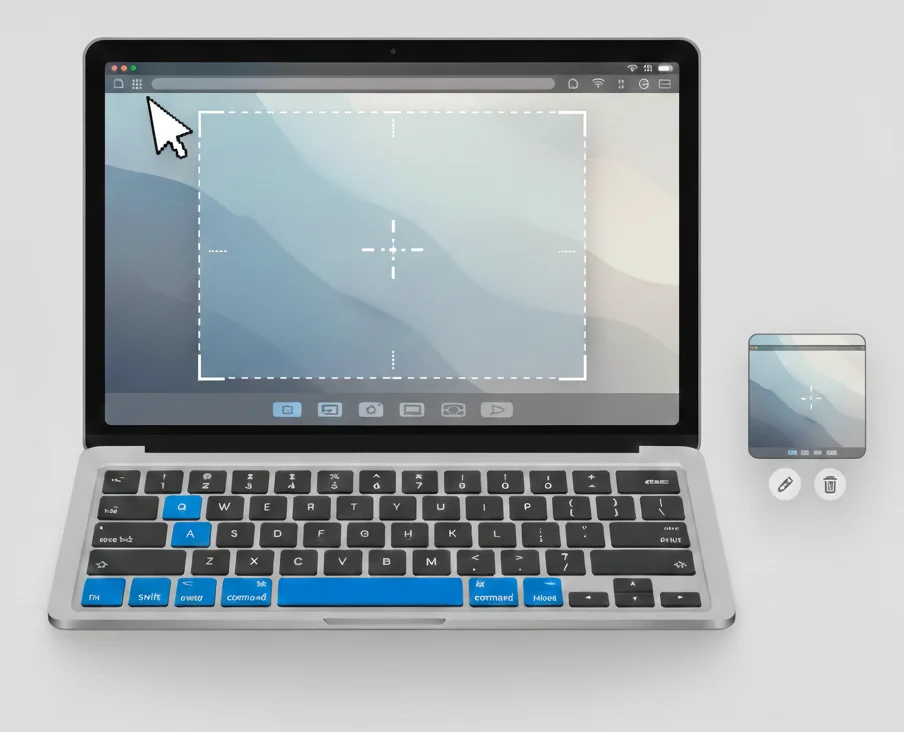
2. Screenshot Toolbar (Shift + Command + 5)
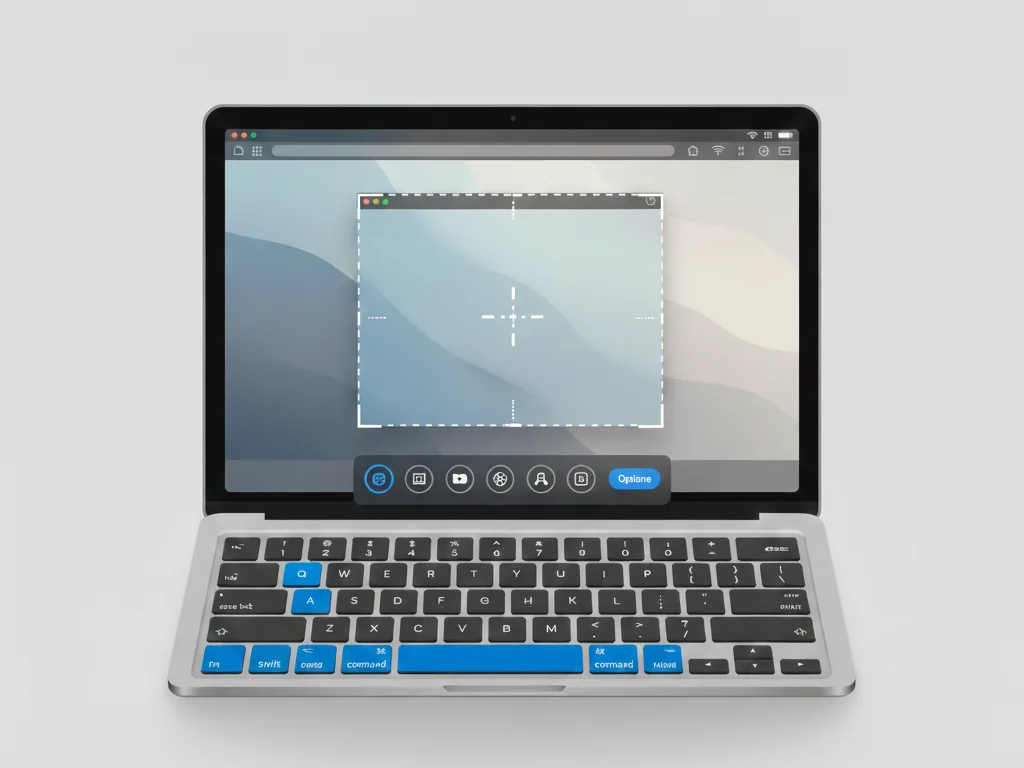
This is the most complete built-in tool on any Mac.
When you press Shift + Command + 5, a small toolbar appears at the bottom of your screen.
Here’s what it allows you to do:
Capture Options
- Entire screen
- Selected window
- Custom area
- Timed capture (5s or 10s)
- Choose a save location
- Show or hide the floating thumbnail
Screen Recording
Yes, the Mac lets you record your screen without installing anything.
You can:
- record the whole display
- record a selected portion
- record with voice through your microphone
- Save recordings in .mov format
This toolbar is perfect for teachers, students, YouTube beginners, and office work.
3. Taking Snips Through Preview
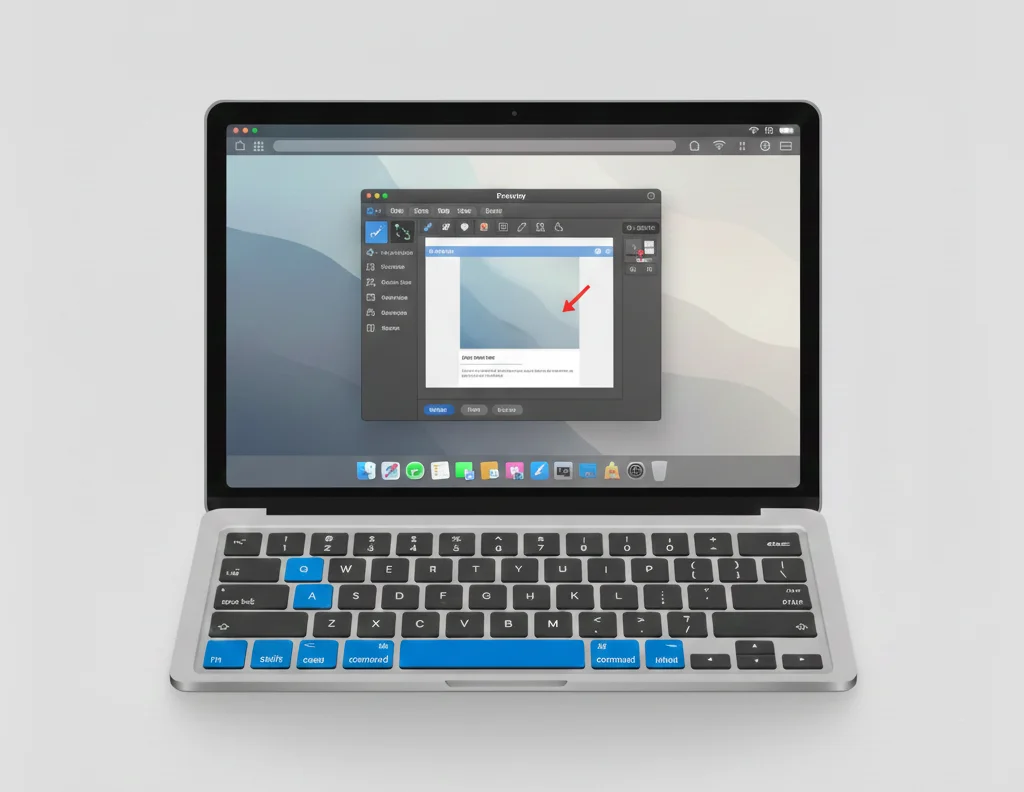
Preview is more than an image viewer.
You can capture screenshots directly from it:
Steps
- Open Preview
- Click File
- Select Take Screenshot
- Choose from:
- From Entire Screen
- From Window
- From Selection
The best part of Preview?
You get built-in editing:
- Add arrows
- Add shapes
- Add text
- Highlight important areas
- Add your signature
So if your goal is “capture + quick edit,” Preview is ideal.
4. Best Third-Party Snipping Tools for Mac
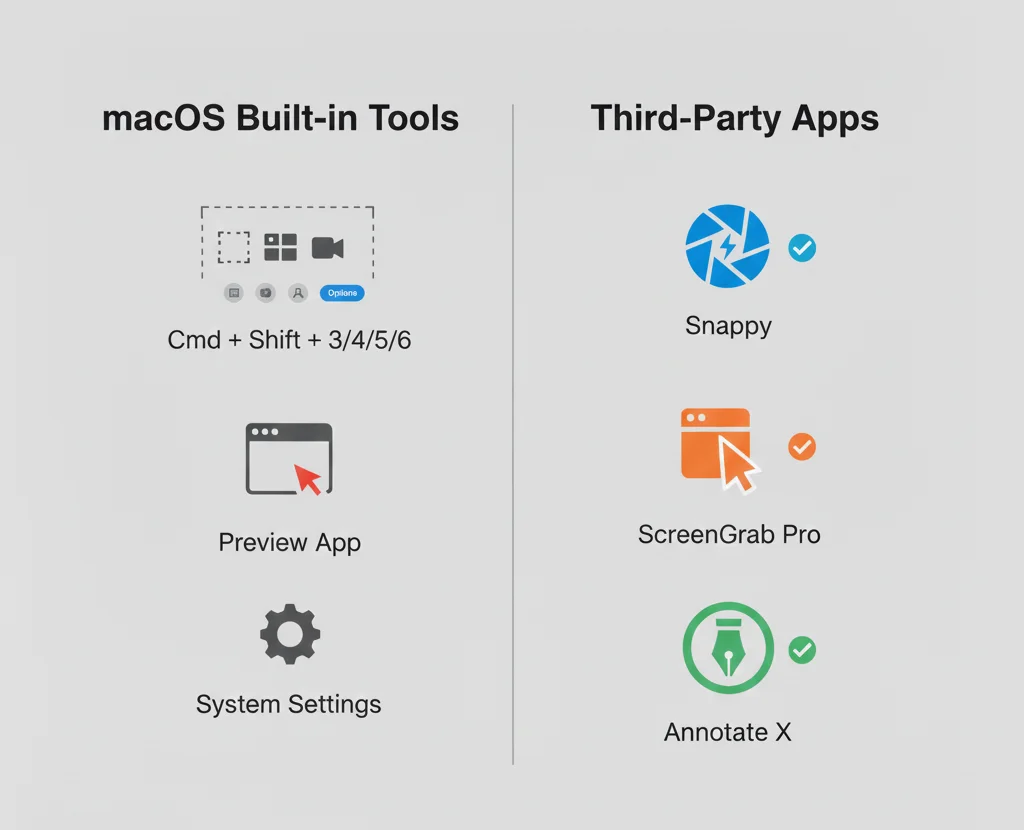
Some users need features that the built-in tools don’t offer, like scrolling screenshots, cloud sharing, or deep editing. Here are the most helpful tools for that.
A. Lightshot
Great for simple work.
Why do How to Take a Snip on Mac (Detailed Steps)
- Quick markup
- Easy sharing link
- Very light
- Free
Students and office users love it because it takes no effort to learn.
B. Snagit
This is for users who need more than simple snips.
What it offers
- Strong editor
- Step-by-step markup tools
- Screen recording with mic
- Templates for guides and tutorials
Snagit is paid, but it saves a lot of time for content creators.
C. CleanShot X
Built especially for Mac users who want a clean workflow.
Features
- Cloud storage
- Scrolling screenshots
- Clean background mode
- On-screen controls
- Amazing editing tools
This is perfect if you take many screenshots every day.
D. Monosnap
A good mix of simple and advanced.
Why it works
- Free plan
- Screenshot + recording
- Easy file upload
- Works well for remote teams
A safe pick for beginners.
5. What Should You Pick? (Simple Guide)
Here’s a clear breakdown so anyone can choose the right option:
Use built-in shortcuts if you want:
- speed
- no installation
- simple image capture
Use the Screenshot Toolbar if you want:
- screen recording
- timer
- more control
Use Preview if you want:
- quick edits
- markup
- good control without apps
Use Lightshot if you want:
- quick editing
- free tool
Use Snagit if you want:
- deep editing
- tutorial-level tools
Use CleanShot X if you want:
- cloud sharing
- scrolling screenshots
6. How to Take a Snip on Mac (Detailed Steps)
Here are three simple methods explained clearly.
Method 1: Using Shortcuts
- Press Shift + Command + 4
- Drag the crosshair over the area
- Release to capture
- A floating thumbnail appears
- Click it to edit or wait to auto-save
Method 2: Using Screenshot Toolbar
- Press Shift + Command + 5
- Choose the capture mode
- Pick your save location
- Capture the shot
- Edit or share from the thumbnail
Method 3: Using Preview
- Open Preview
- Go to the File menu
- Select Take Screenshot
- Pick the mode
- Edit inside Preview if needed
7. How to Edit a Screenshot on Mac
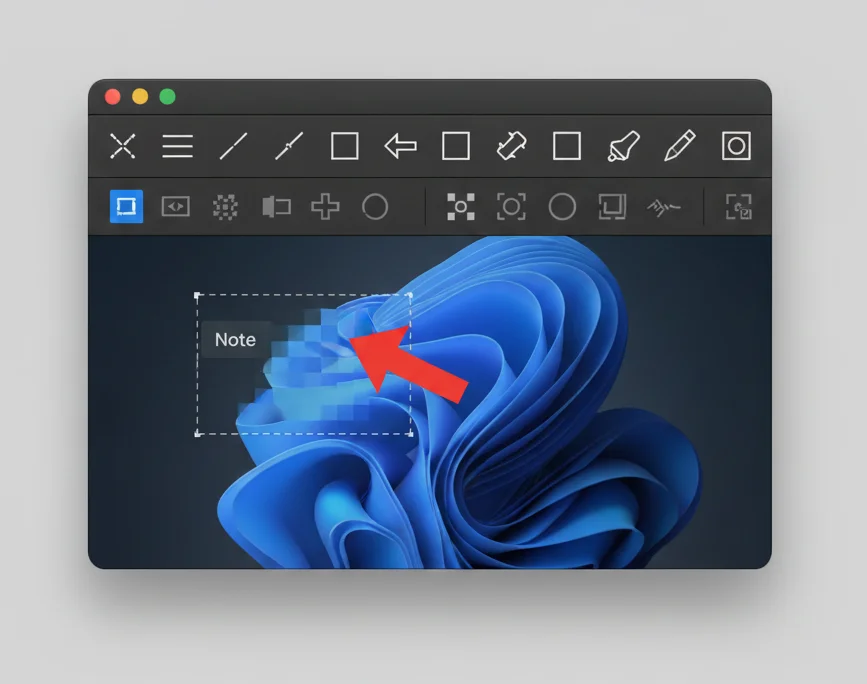
Mac gives you a clean editor without extra apps.
Editing Tools Inside Preview
- Add shapes
- Add text
- Draw freehand
- Add arrows
- Crop
- Blur sensitive information
Editing Through Photos App
- Adjust brightness
- Crop
- Rotate
- Add filters
Editing Through Third-Party Tools
- Lightshot: quick markup
- CleanShot X: advanced editing
- Snagit: tutorial-style tools
8. Where Are Screenshots Saved on Mac?
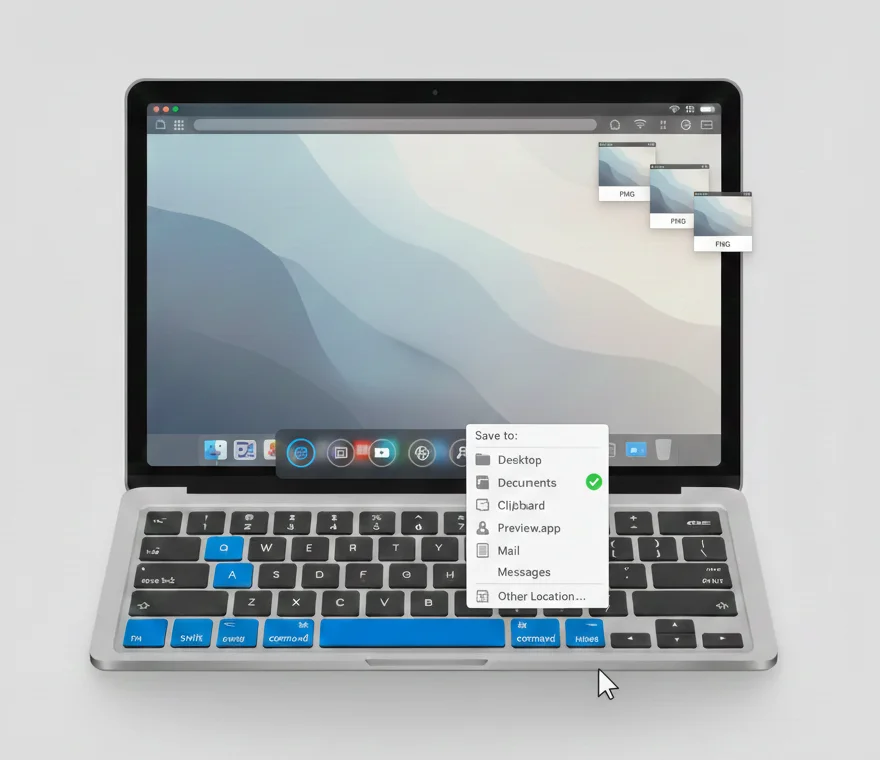
By default, they go to your desktop.
But you can change it:
- Press Shift + Command + 5
- Open Options
- Choose your save location
- Pick Documents, Downloads, or any folder you want
This helps keep your desktop clean.
Conclusion
Mac doesn’t have a tool named Snipping Tool, but it gives you stronger screenshot features through shortcuts, the Screenshot toolbar, and Preview. If you want extra editing or cloud features, apps like CleanShot X, Lightshot, or Snagit can help.
Choose what fits your daily work, and you’ll never feel like anything is missing.
Frequently Asked Questions
Yes. Mac has more shortcuts, better toolbar tools, and screen recording built in.
Yes. You can change the format using a Terminal command or use Preview to convert files.
Yes. Press Control + Shift + Command + 4 to copy directly to the clipboard.
Yes. Use Preview or any third-party app.